Buying Securities

The Allocation tool allows you to model purchases and prepare your client’s account for trading. Learn all about how to buy securities in an account, add securities to a client’s account, and export a trade file to execute the trades. 

Introduction to Buying Securities

Purchasing securities using the Allocation tool comes in two forms: buying a new security in an account and buying more of a security that’s already in an account. 

Buying a New Security in an Account

Purchasing a new security in an account is done at the account level. To add a new security to the account, you can hover over the Account Header and click on the “Buy” quick action button.
Image

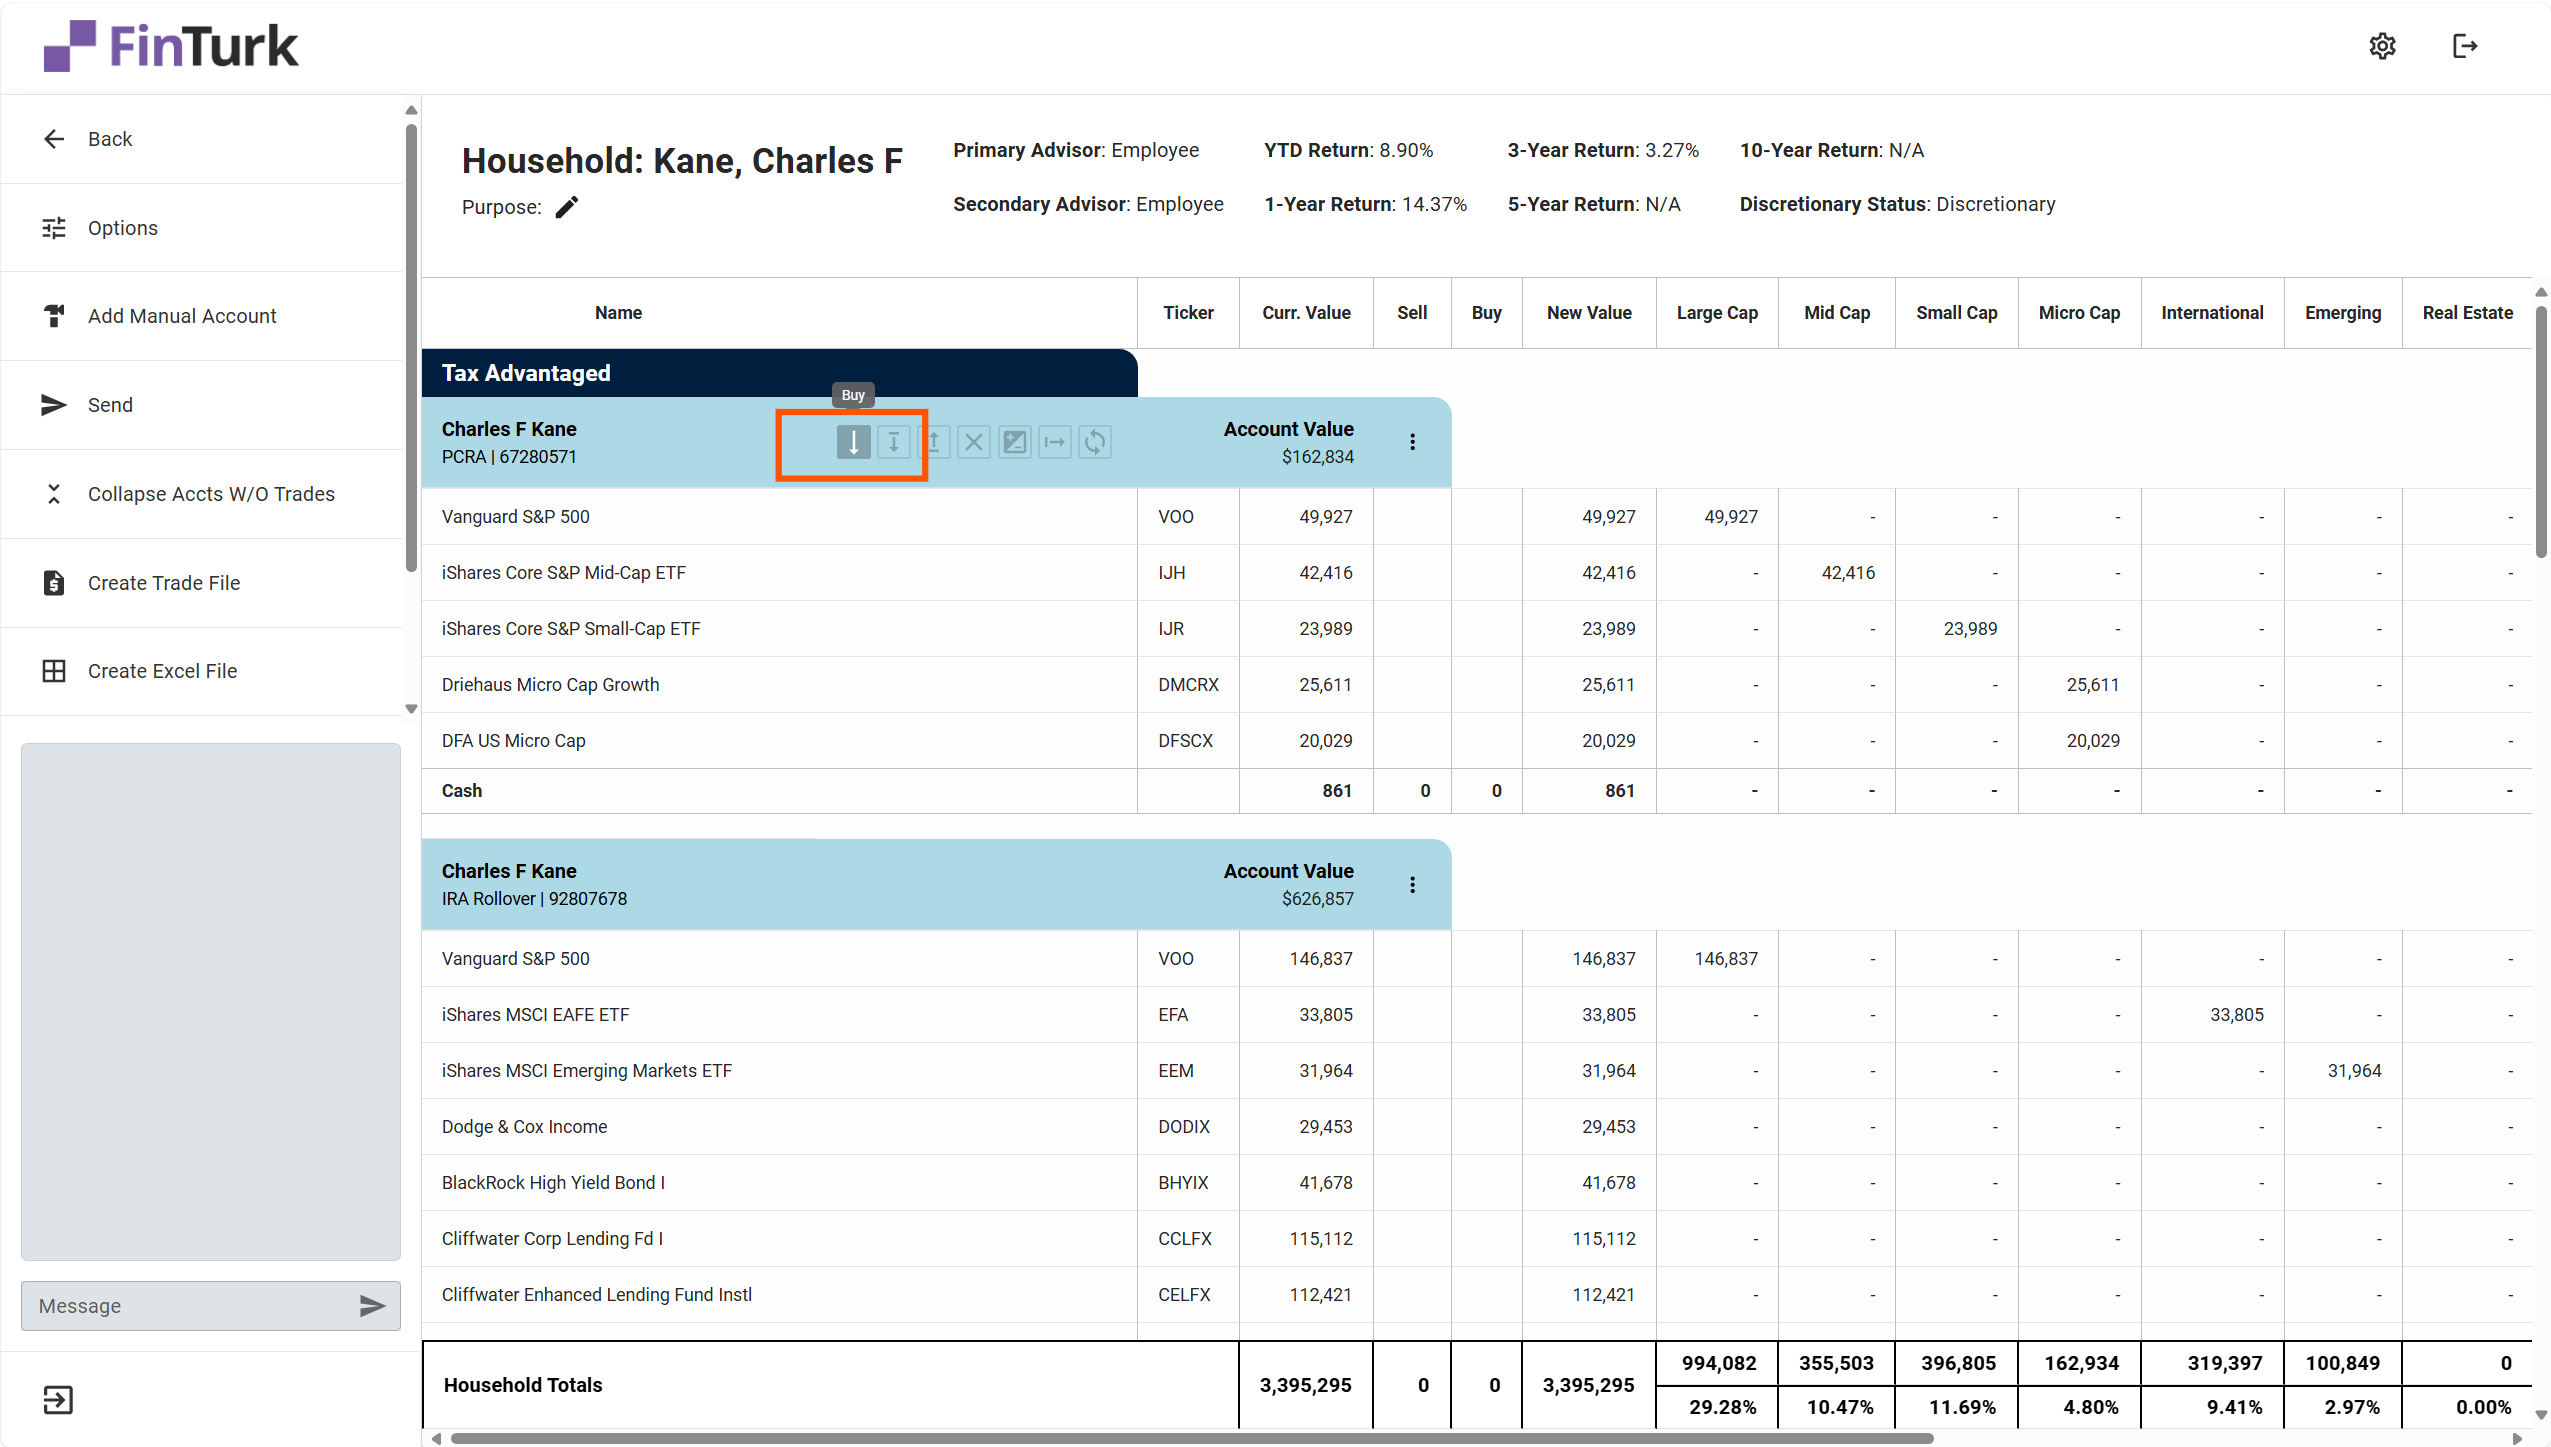
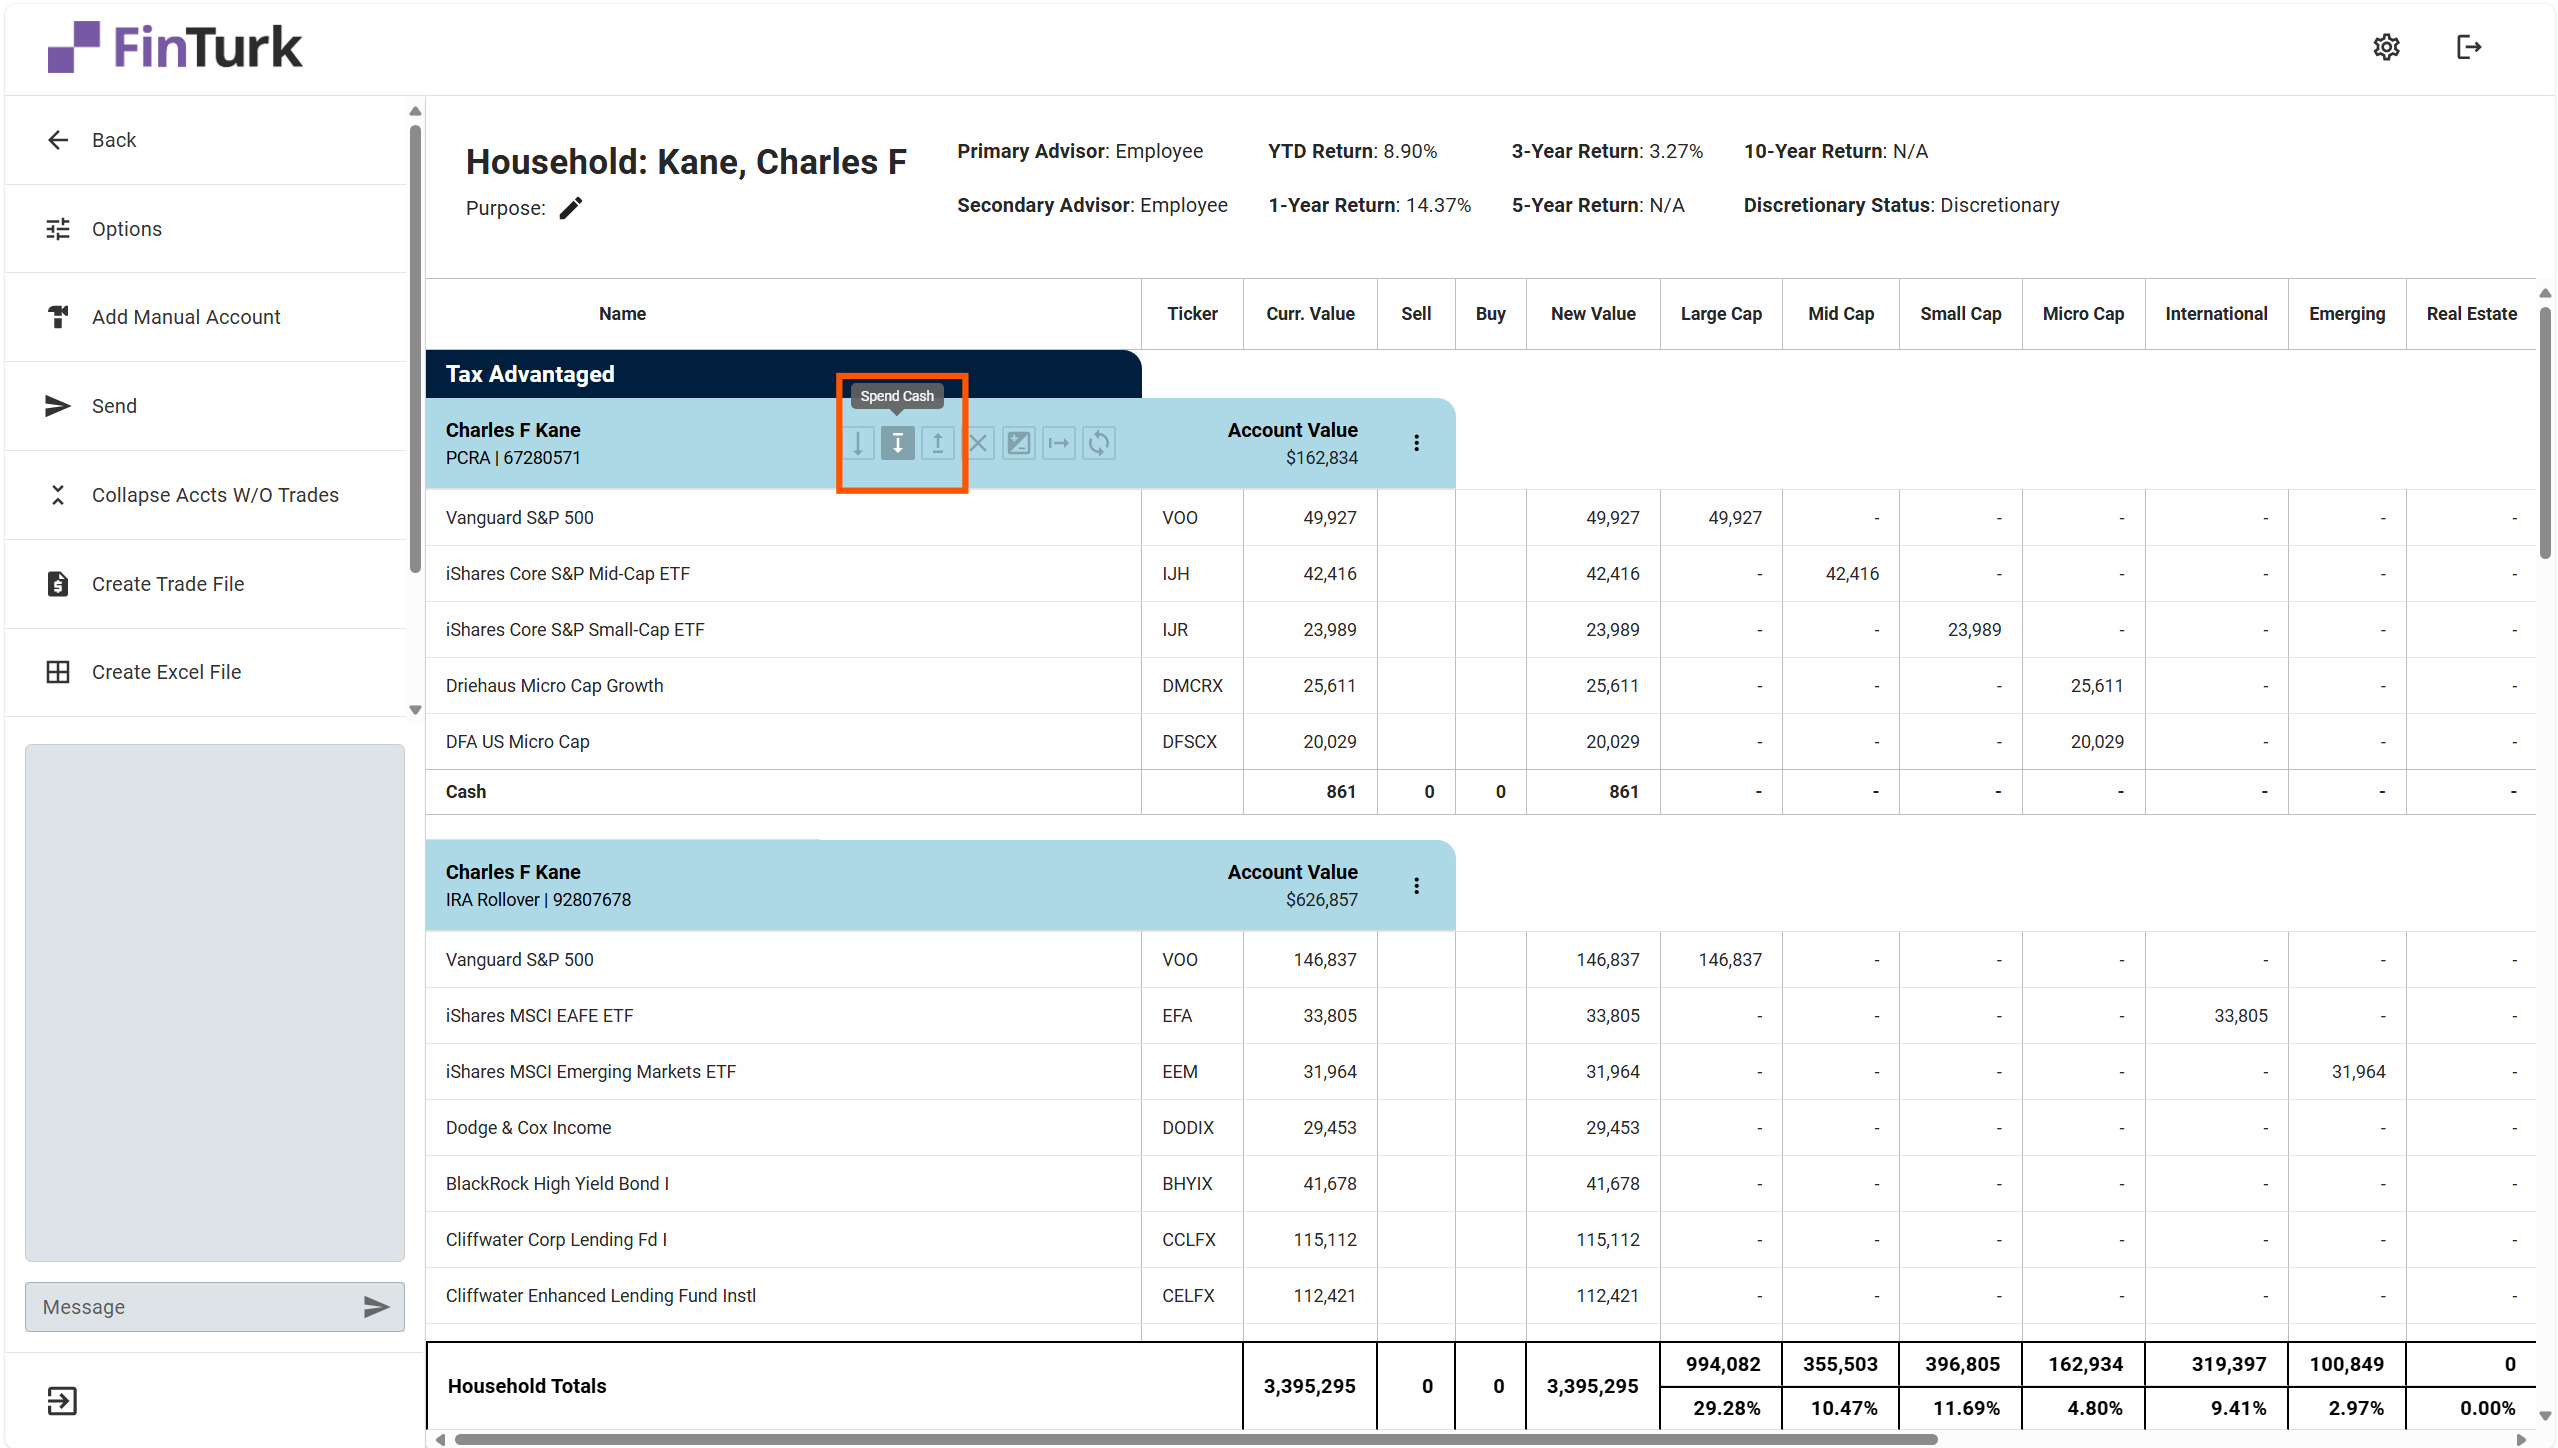
You can also access this by clicking on the “More” button on the right side of the Account Header and selecting the “Buy” option from the dropdown. 

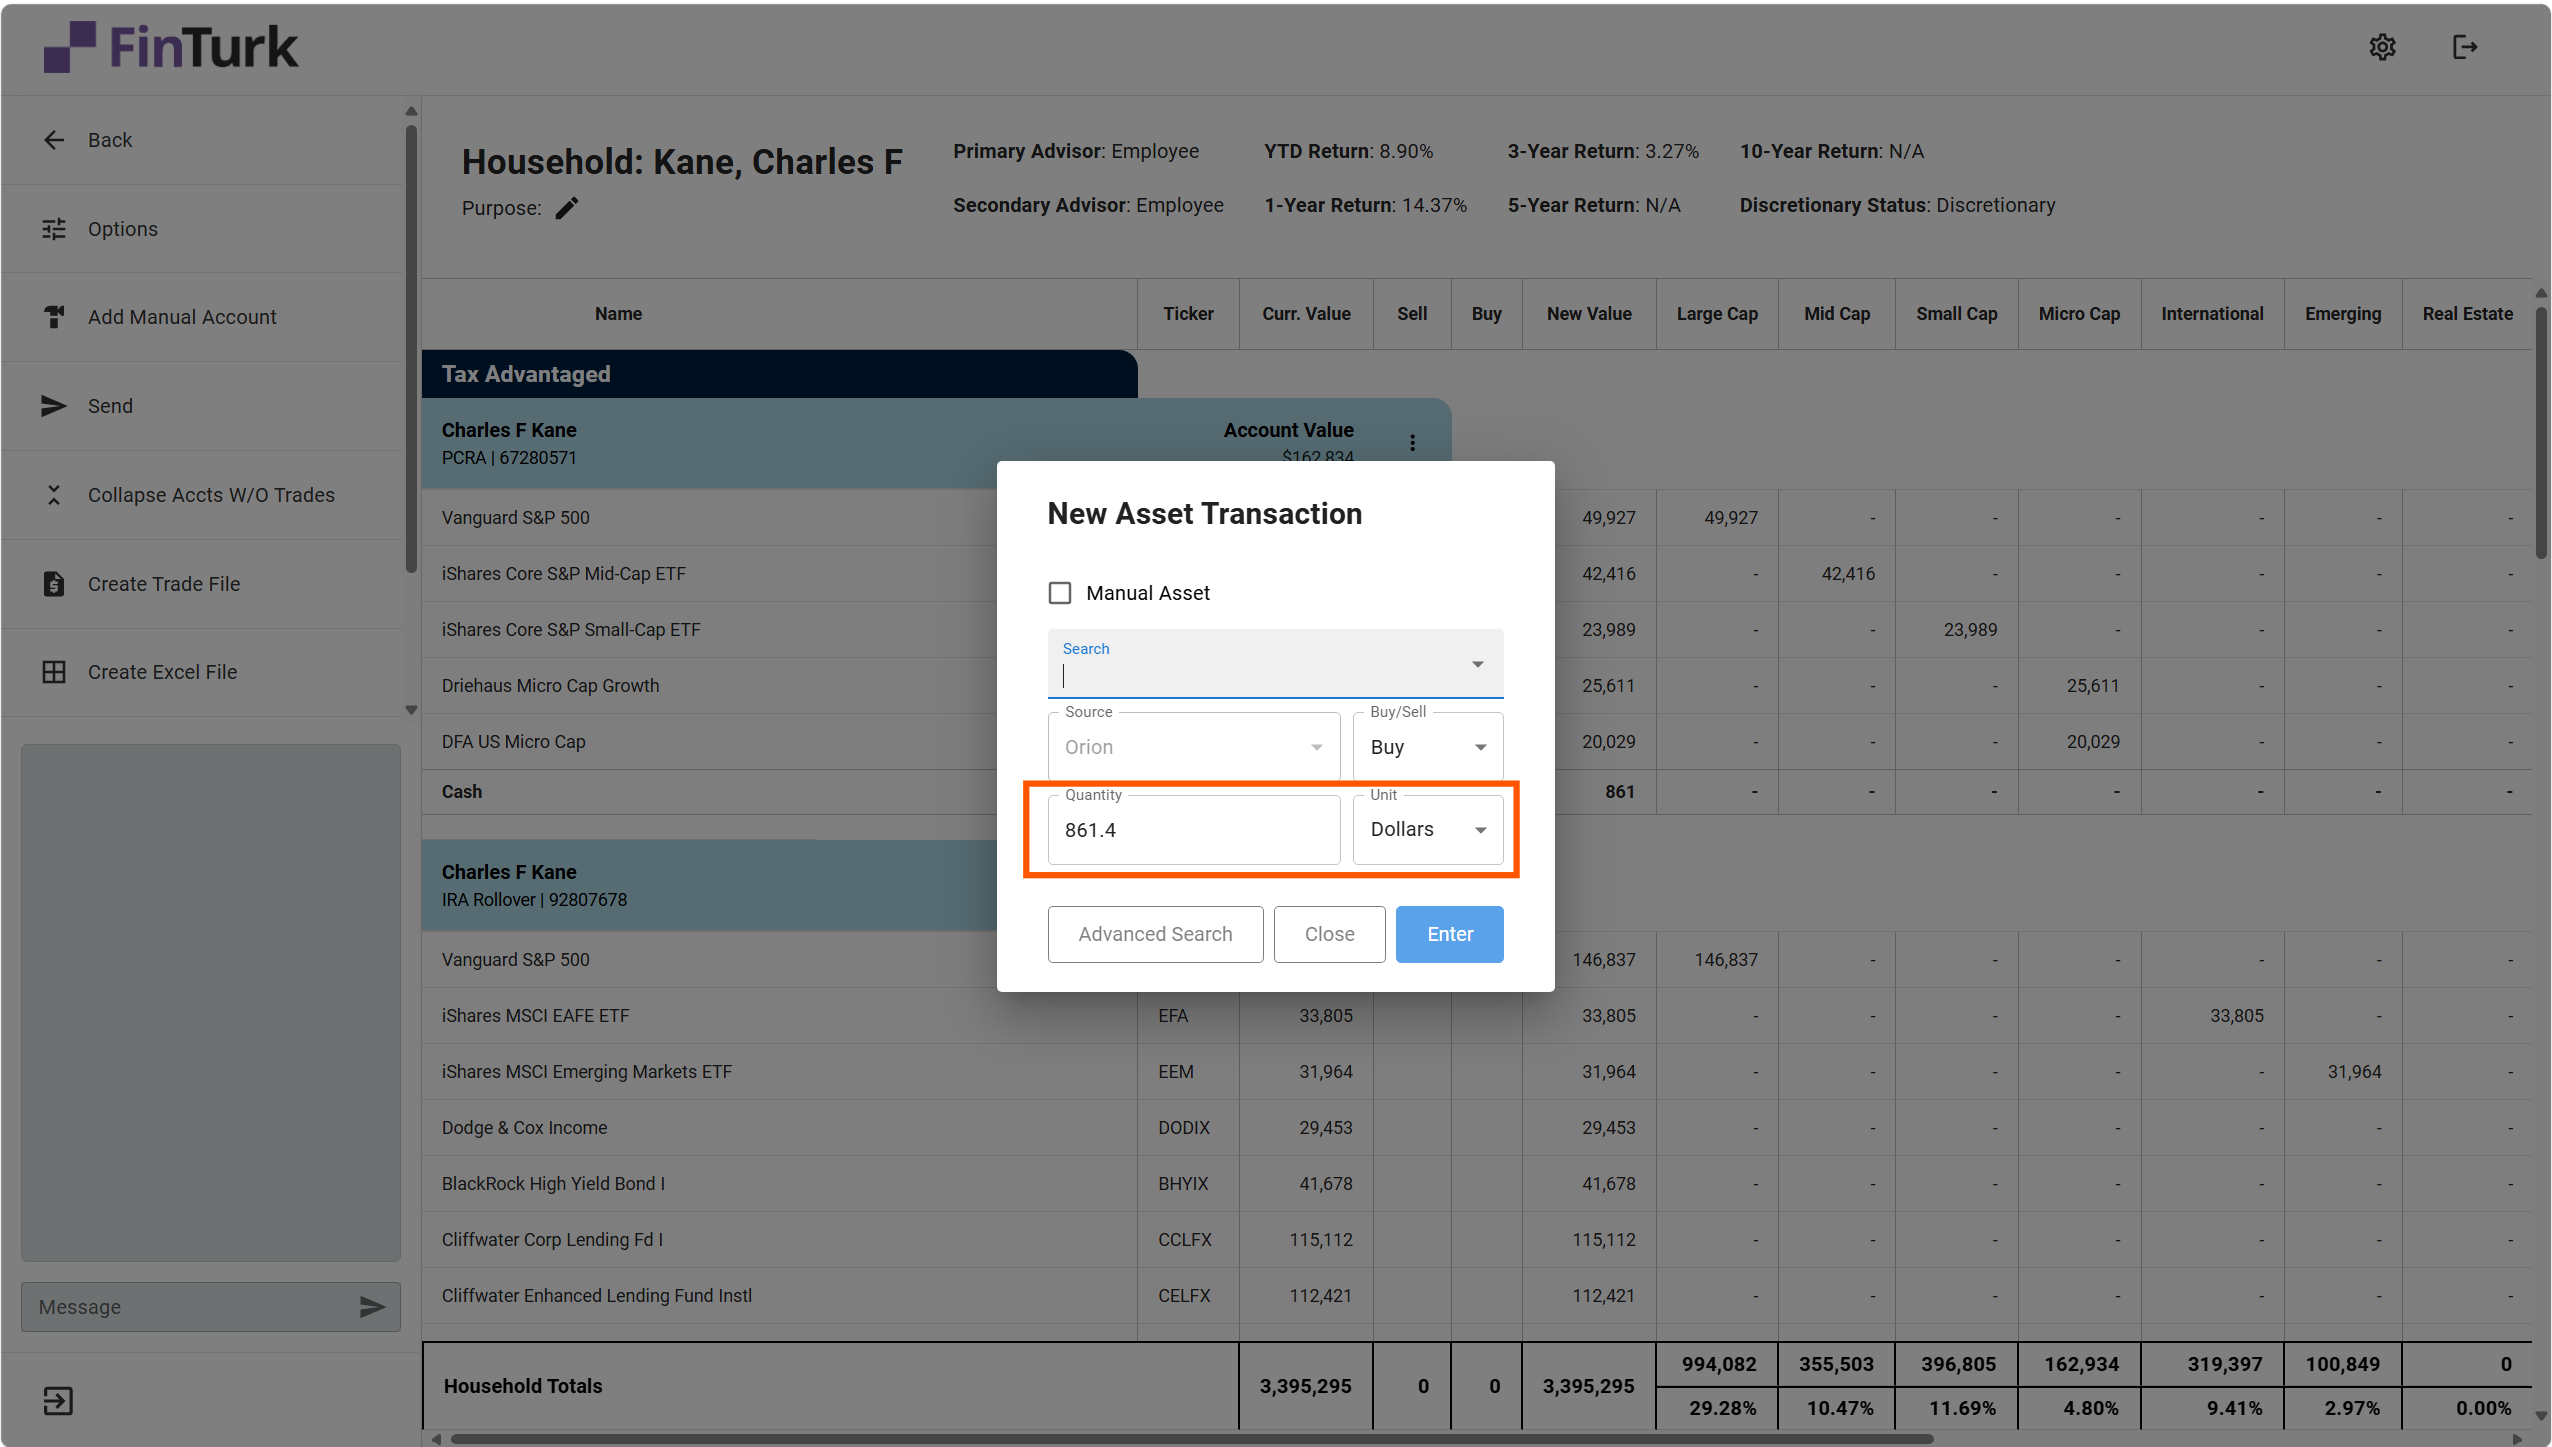
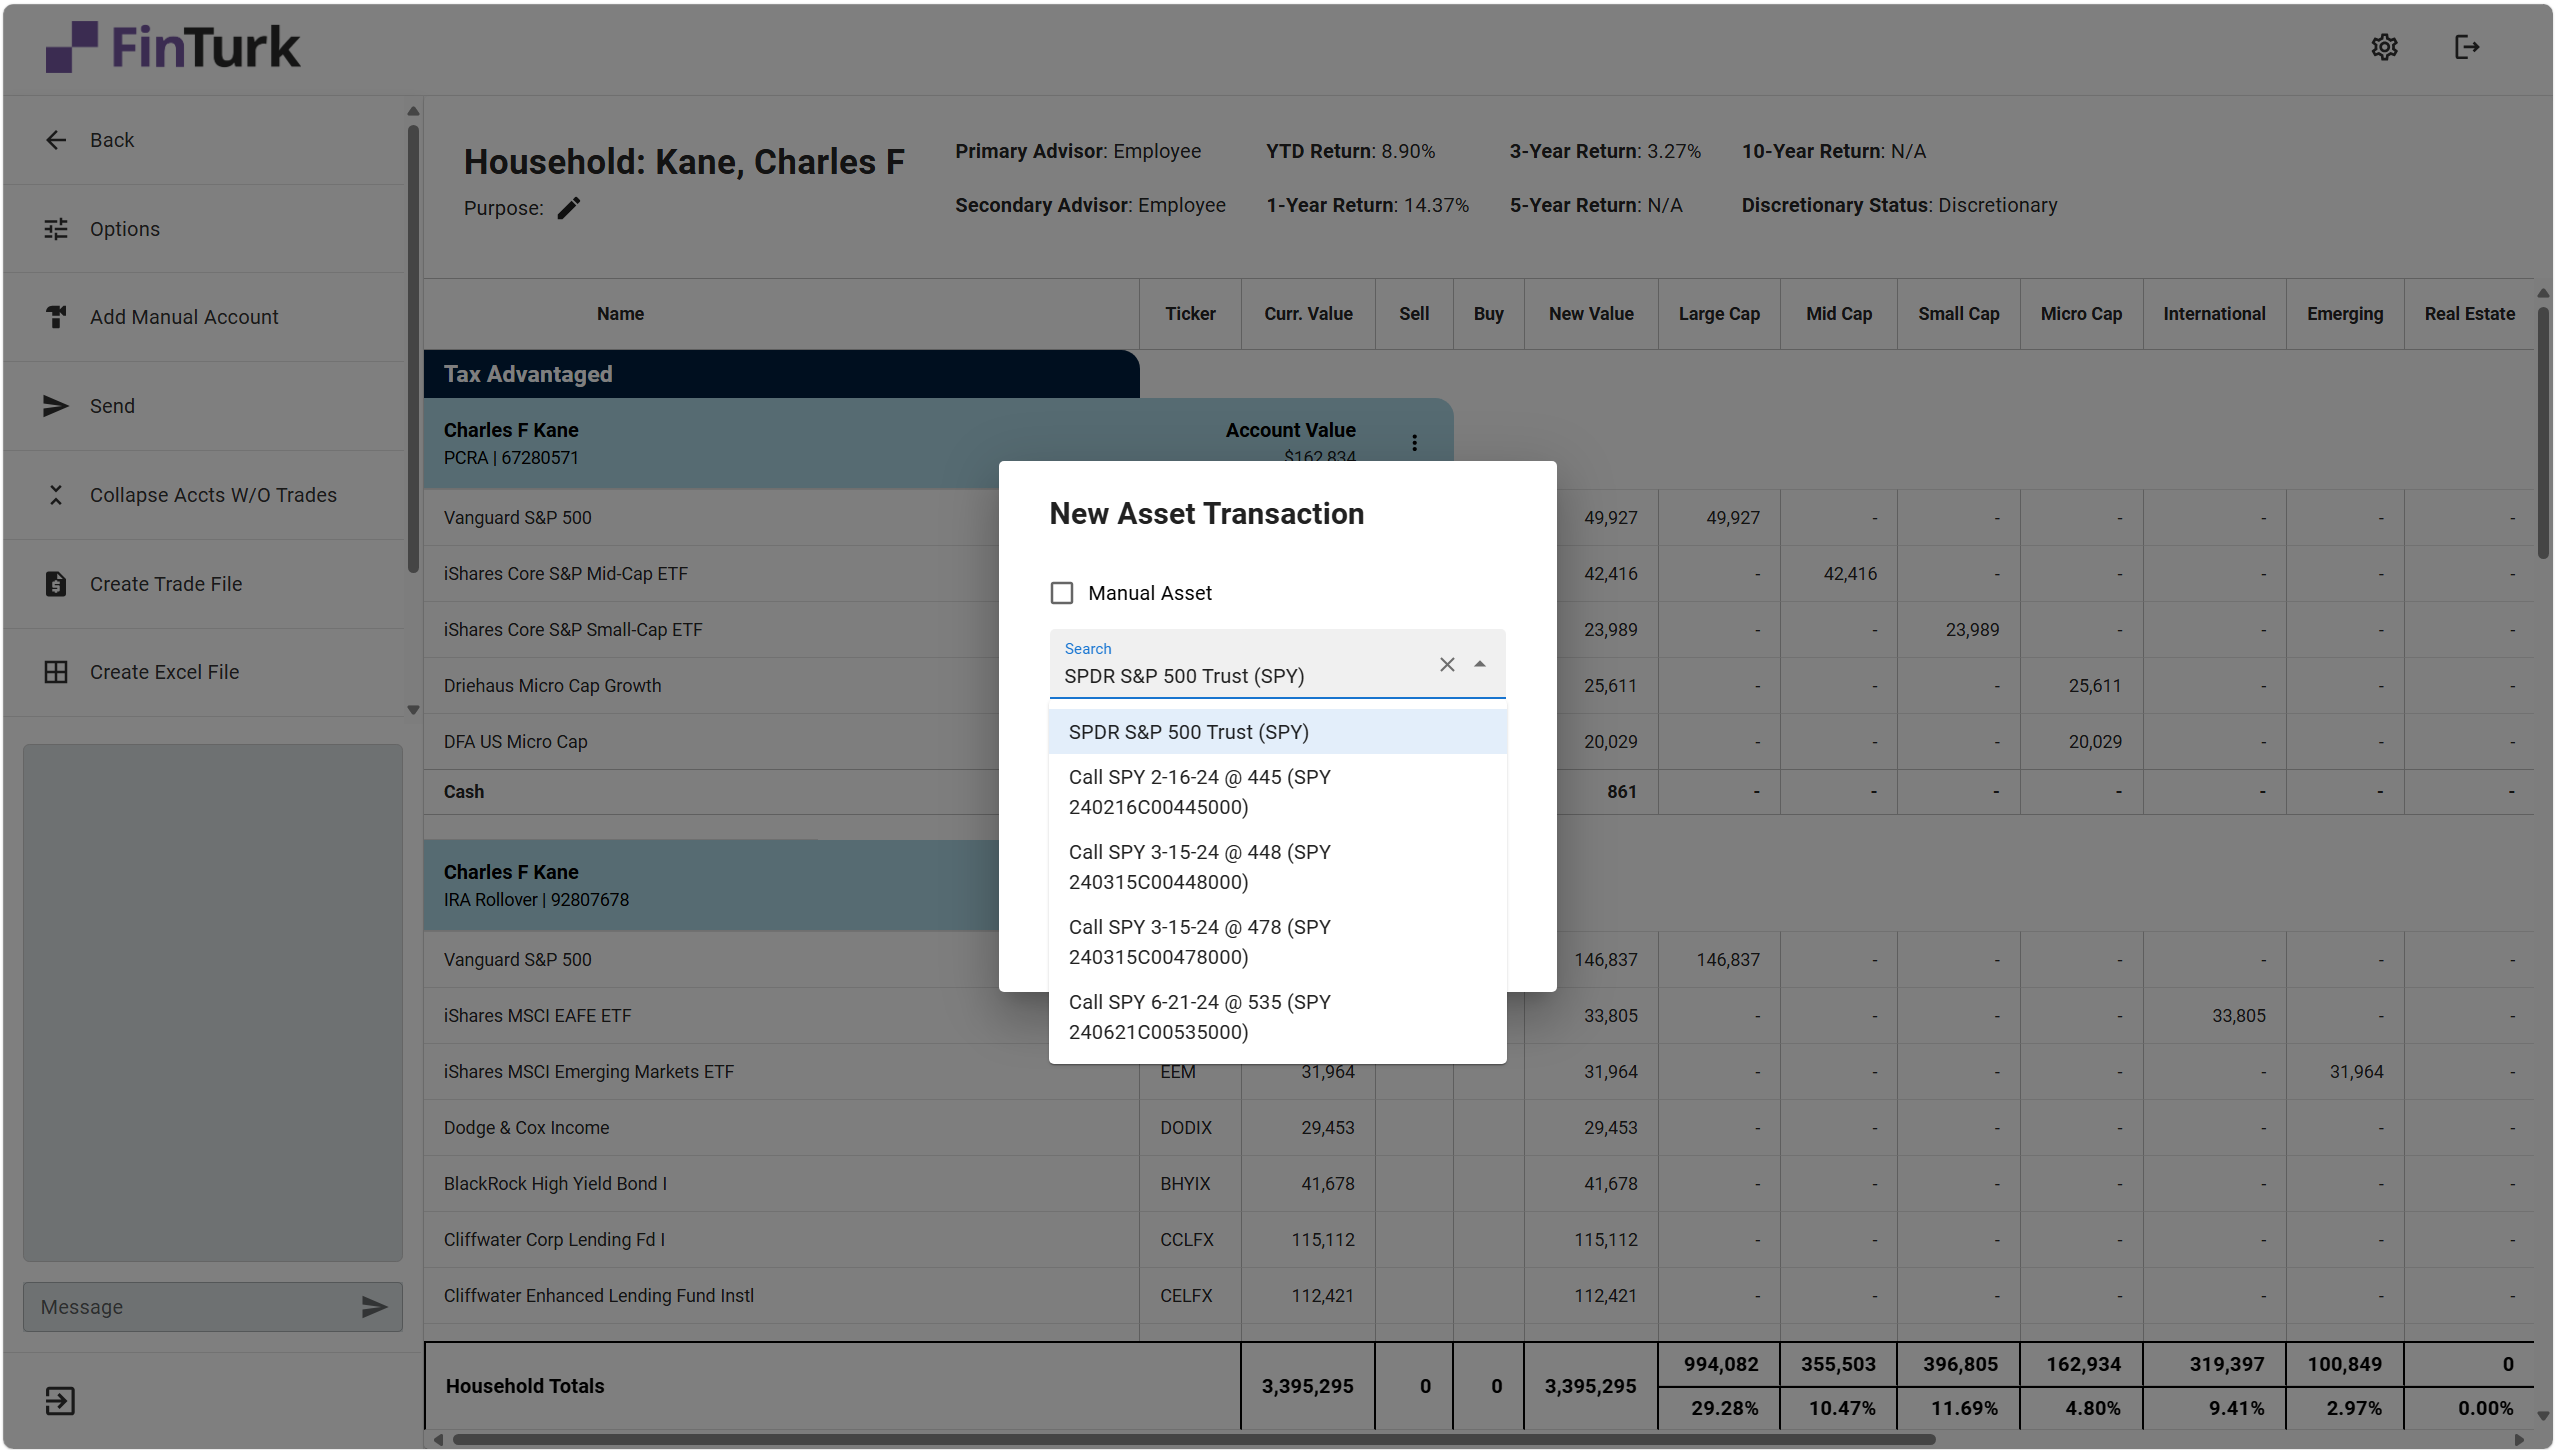
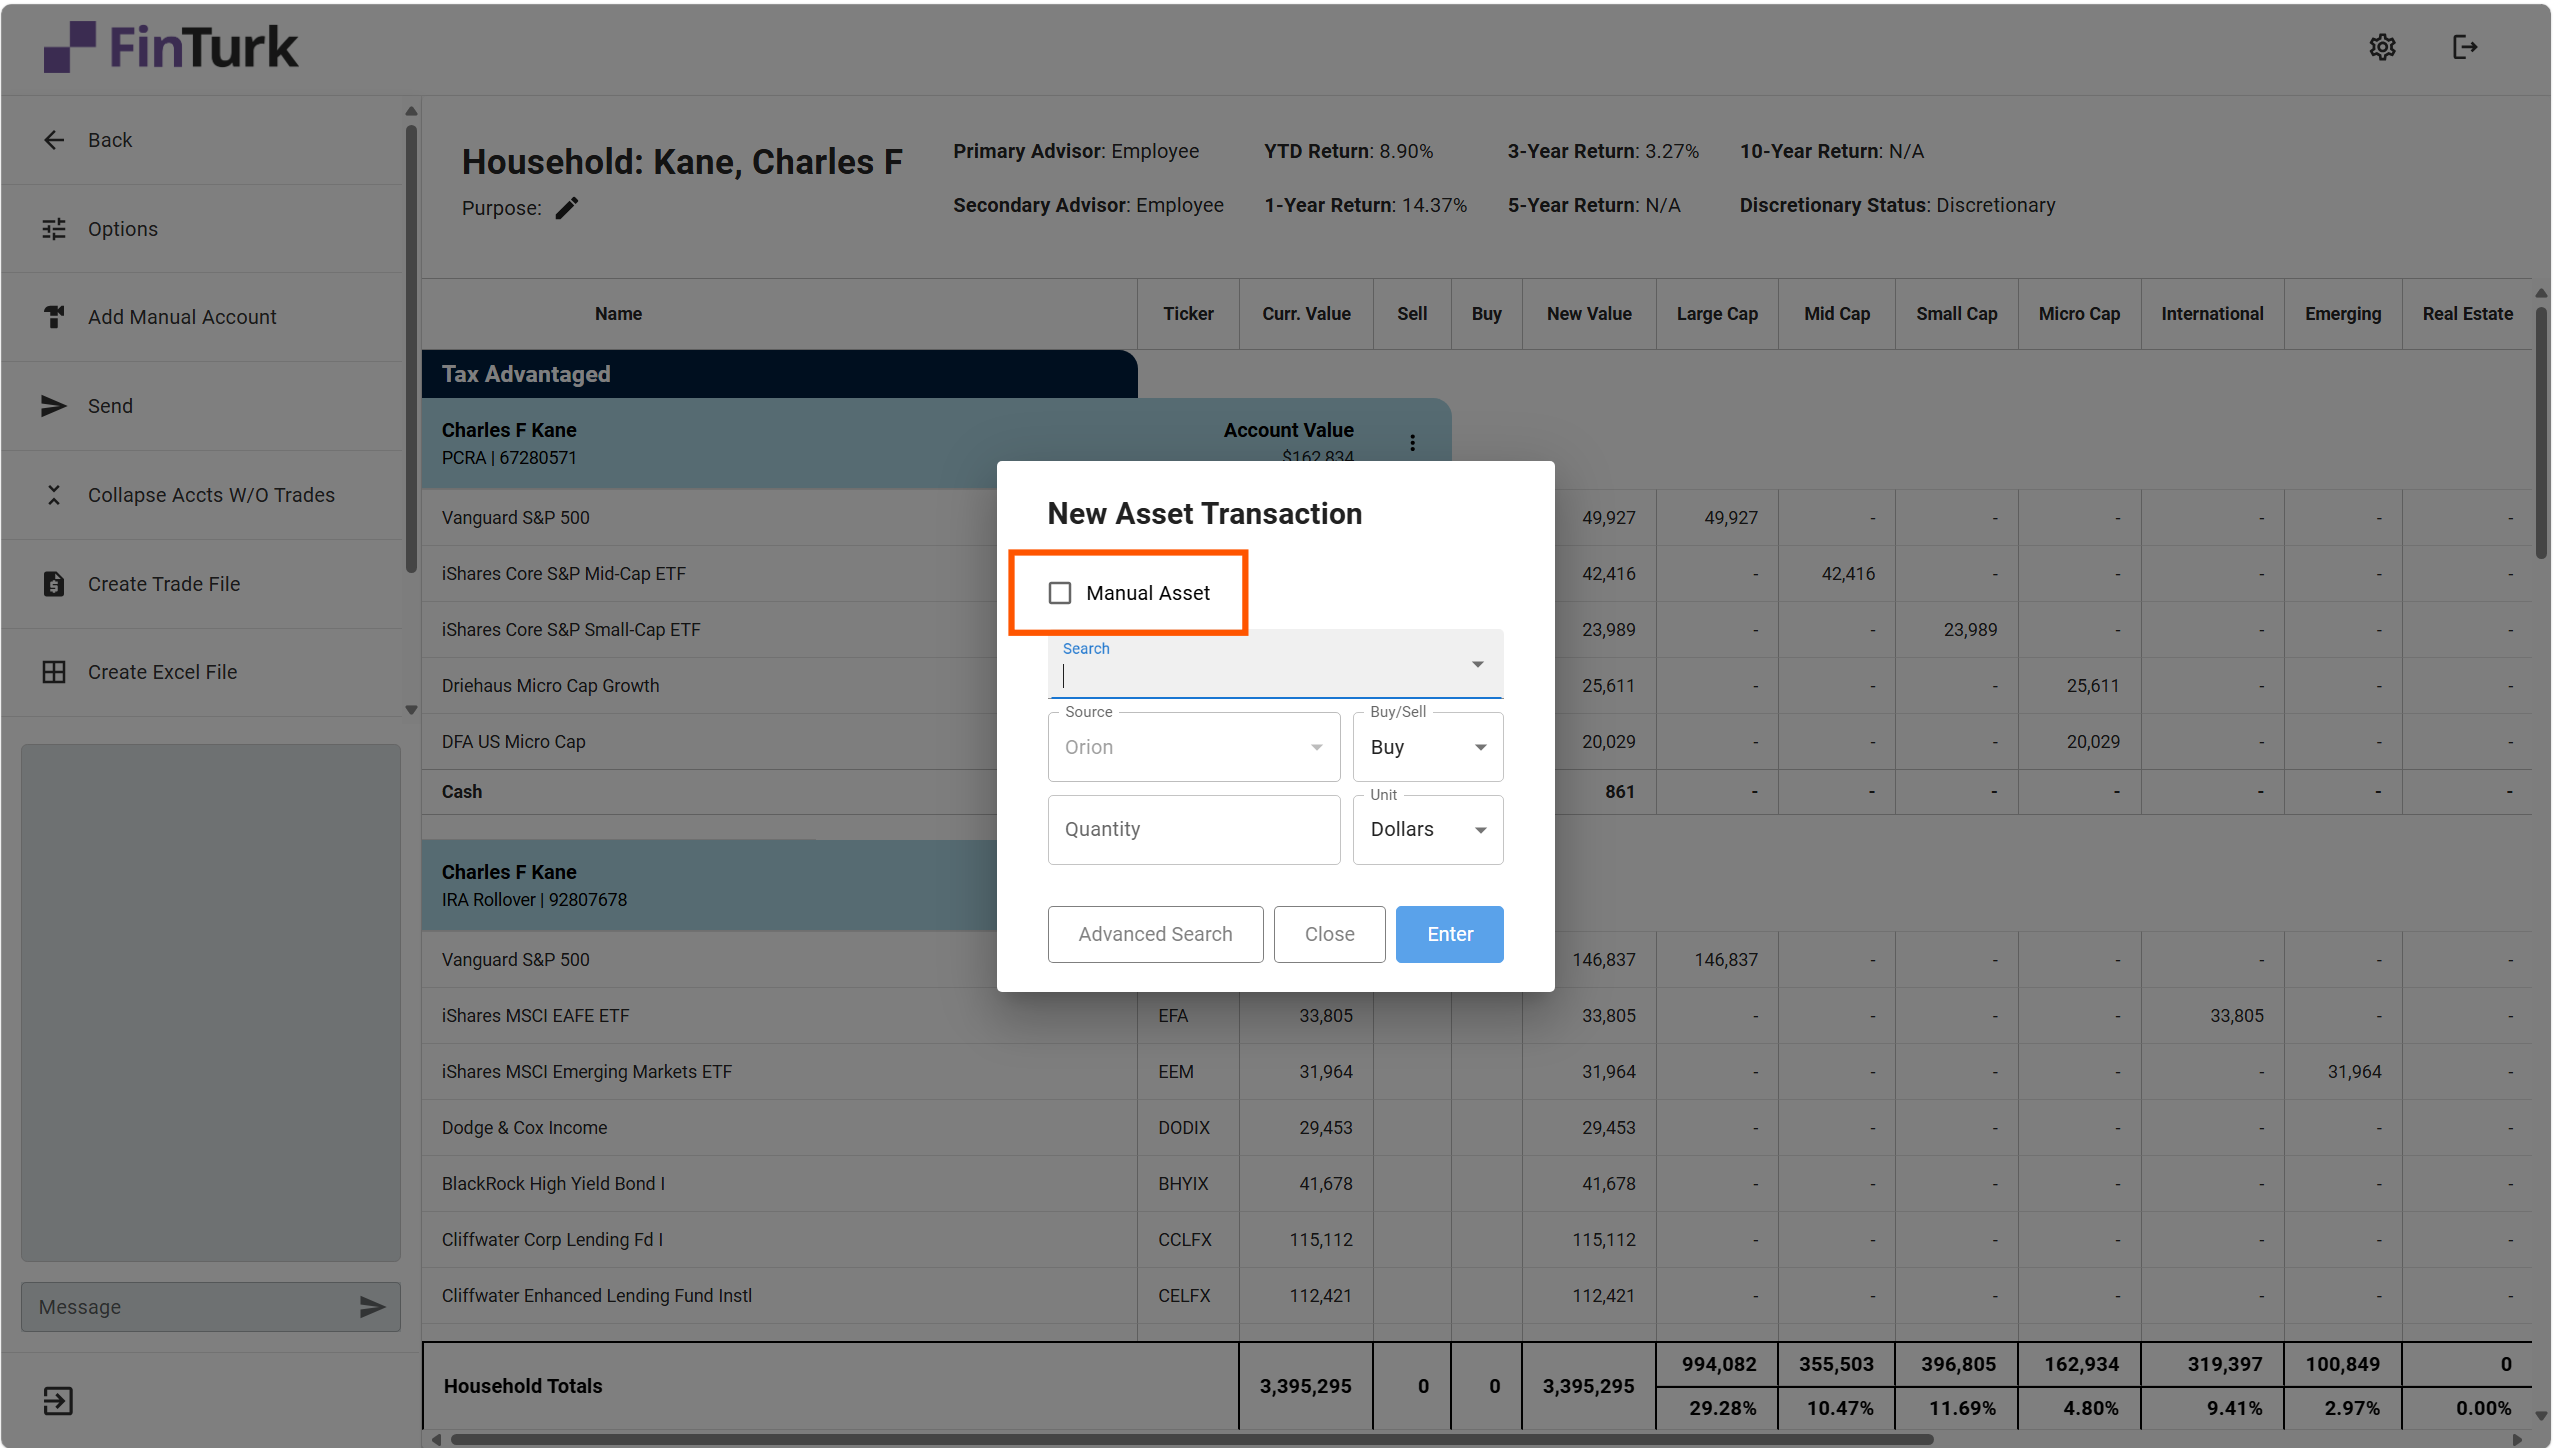
This opens the “New Asset Transaction” dialogue, which allows you to search securities and define the quantity you’d like to purchase. You can also use this dialogue to Add a Manual Asset

Image
To add the security purchase to the allocation, in the search bar at the top of the dialogue you can type in the ticker symbol or name of the company you’d like to add. The search will pull up the security you’re looking for, and you can simply select the security from the search results. Once you’ve selected the security, the current price of the security will appear. 
Image
From there, you can specify how much of the security you would like to purchase in either dollars or shares.
Image

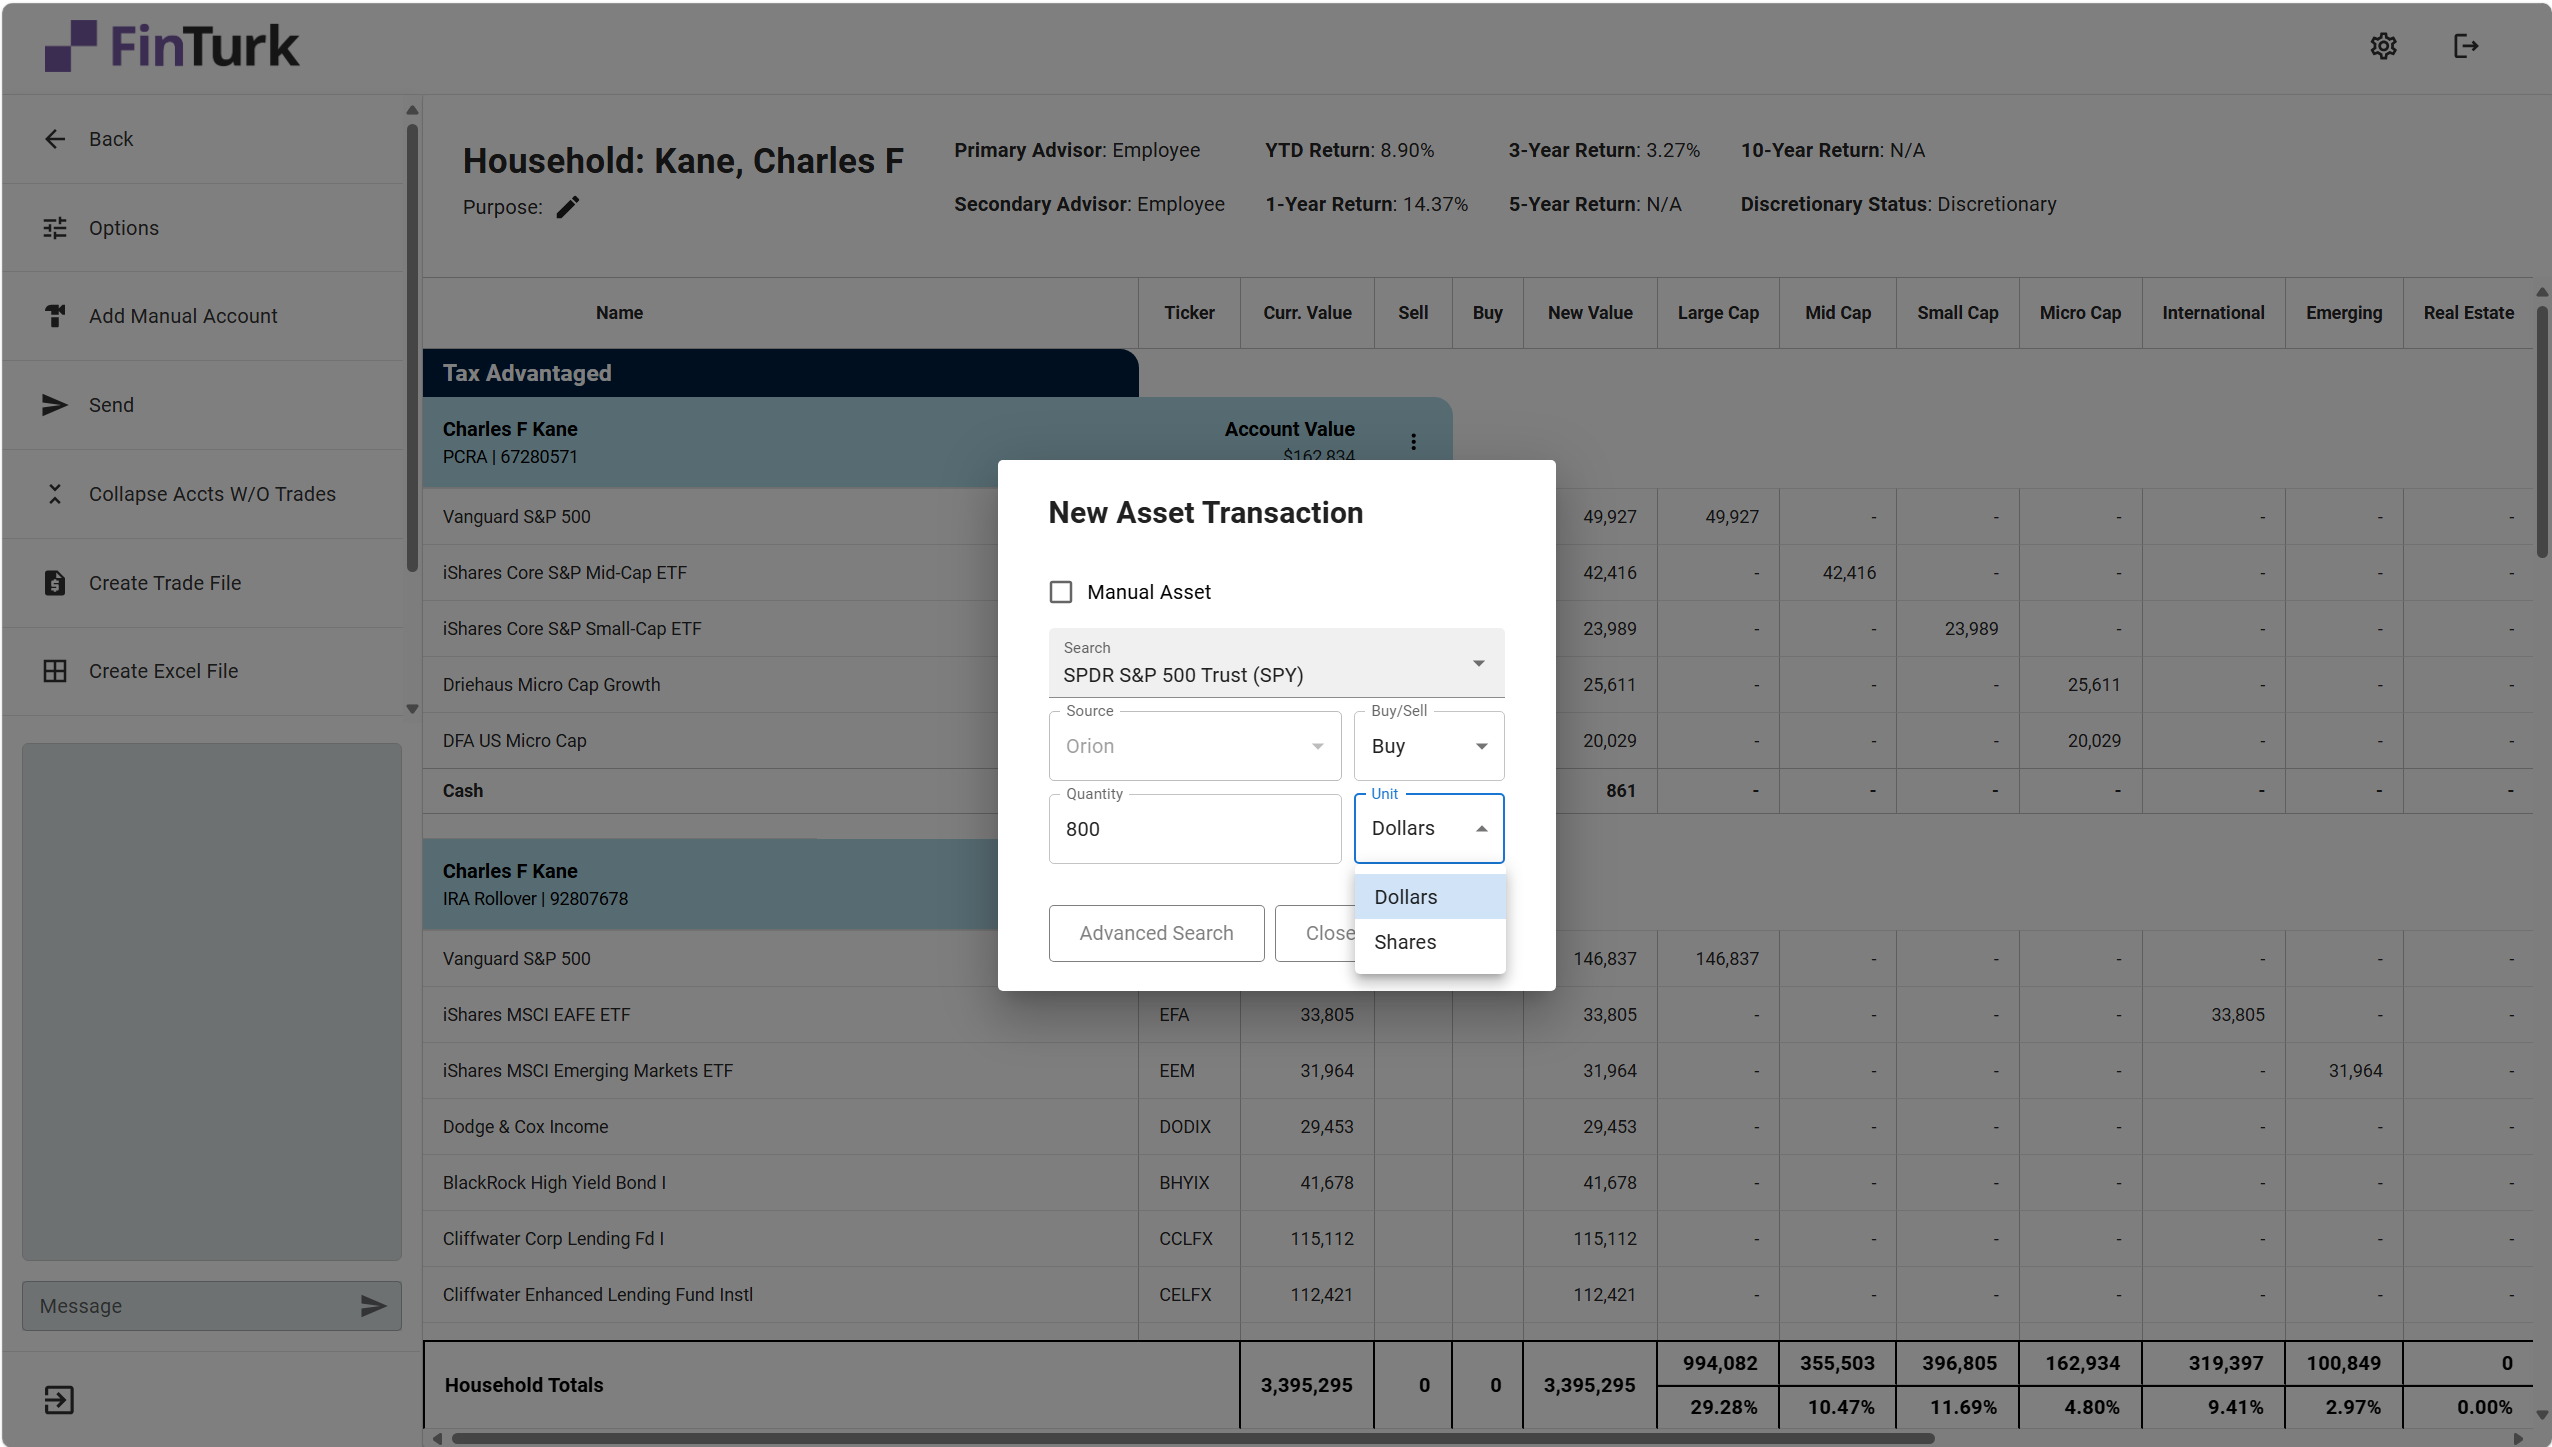
Type in the amount of either shares or dollars you would like to purchase, and click the “Enter” button. 

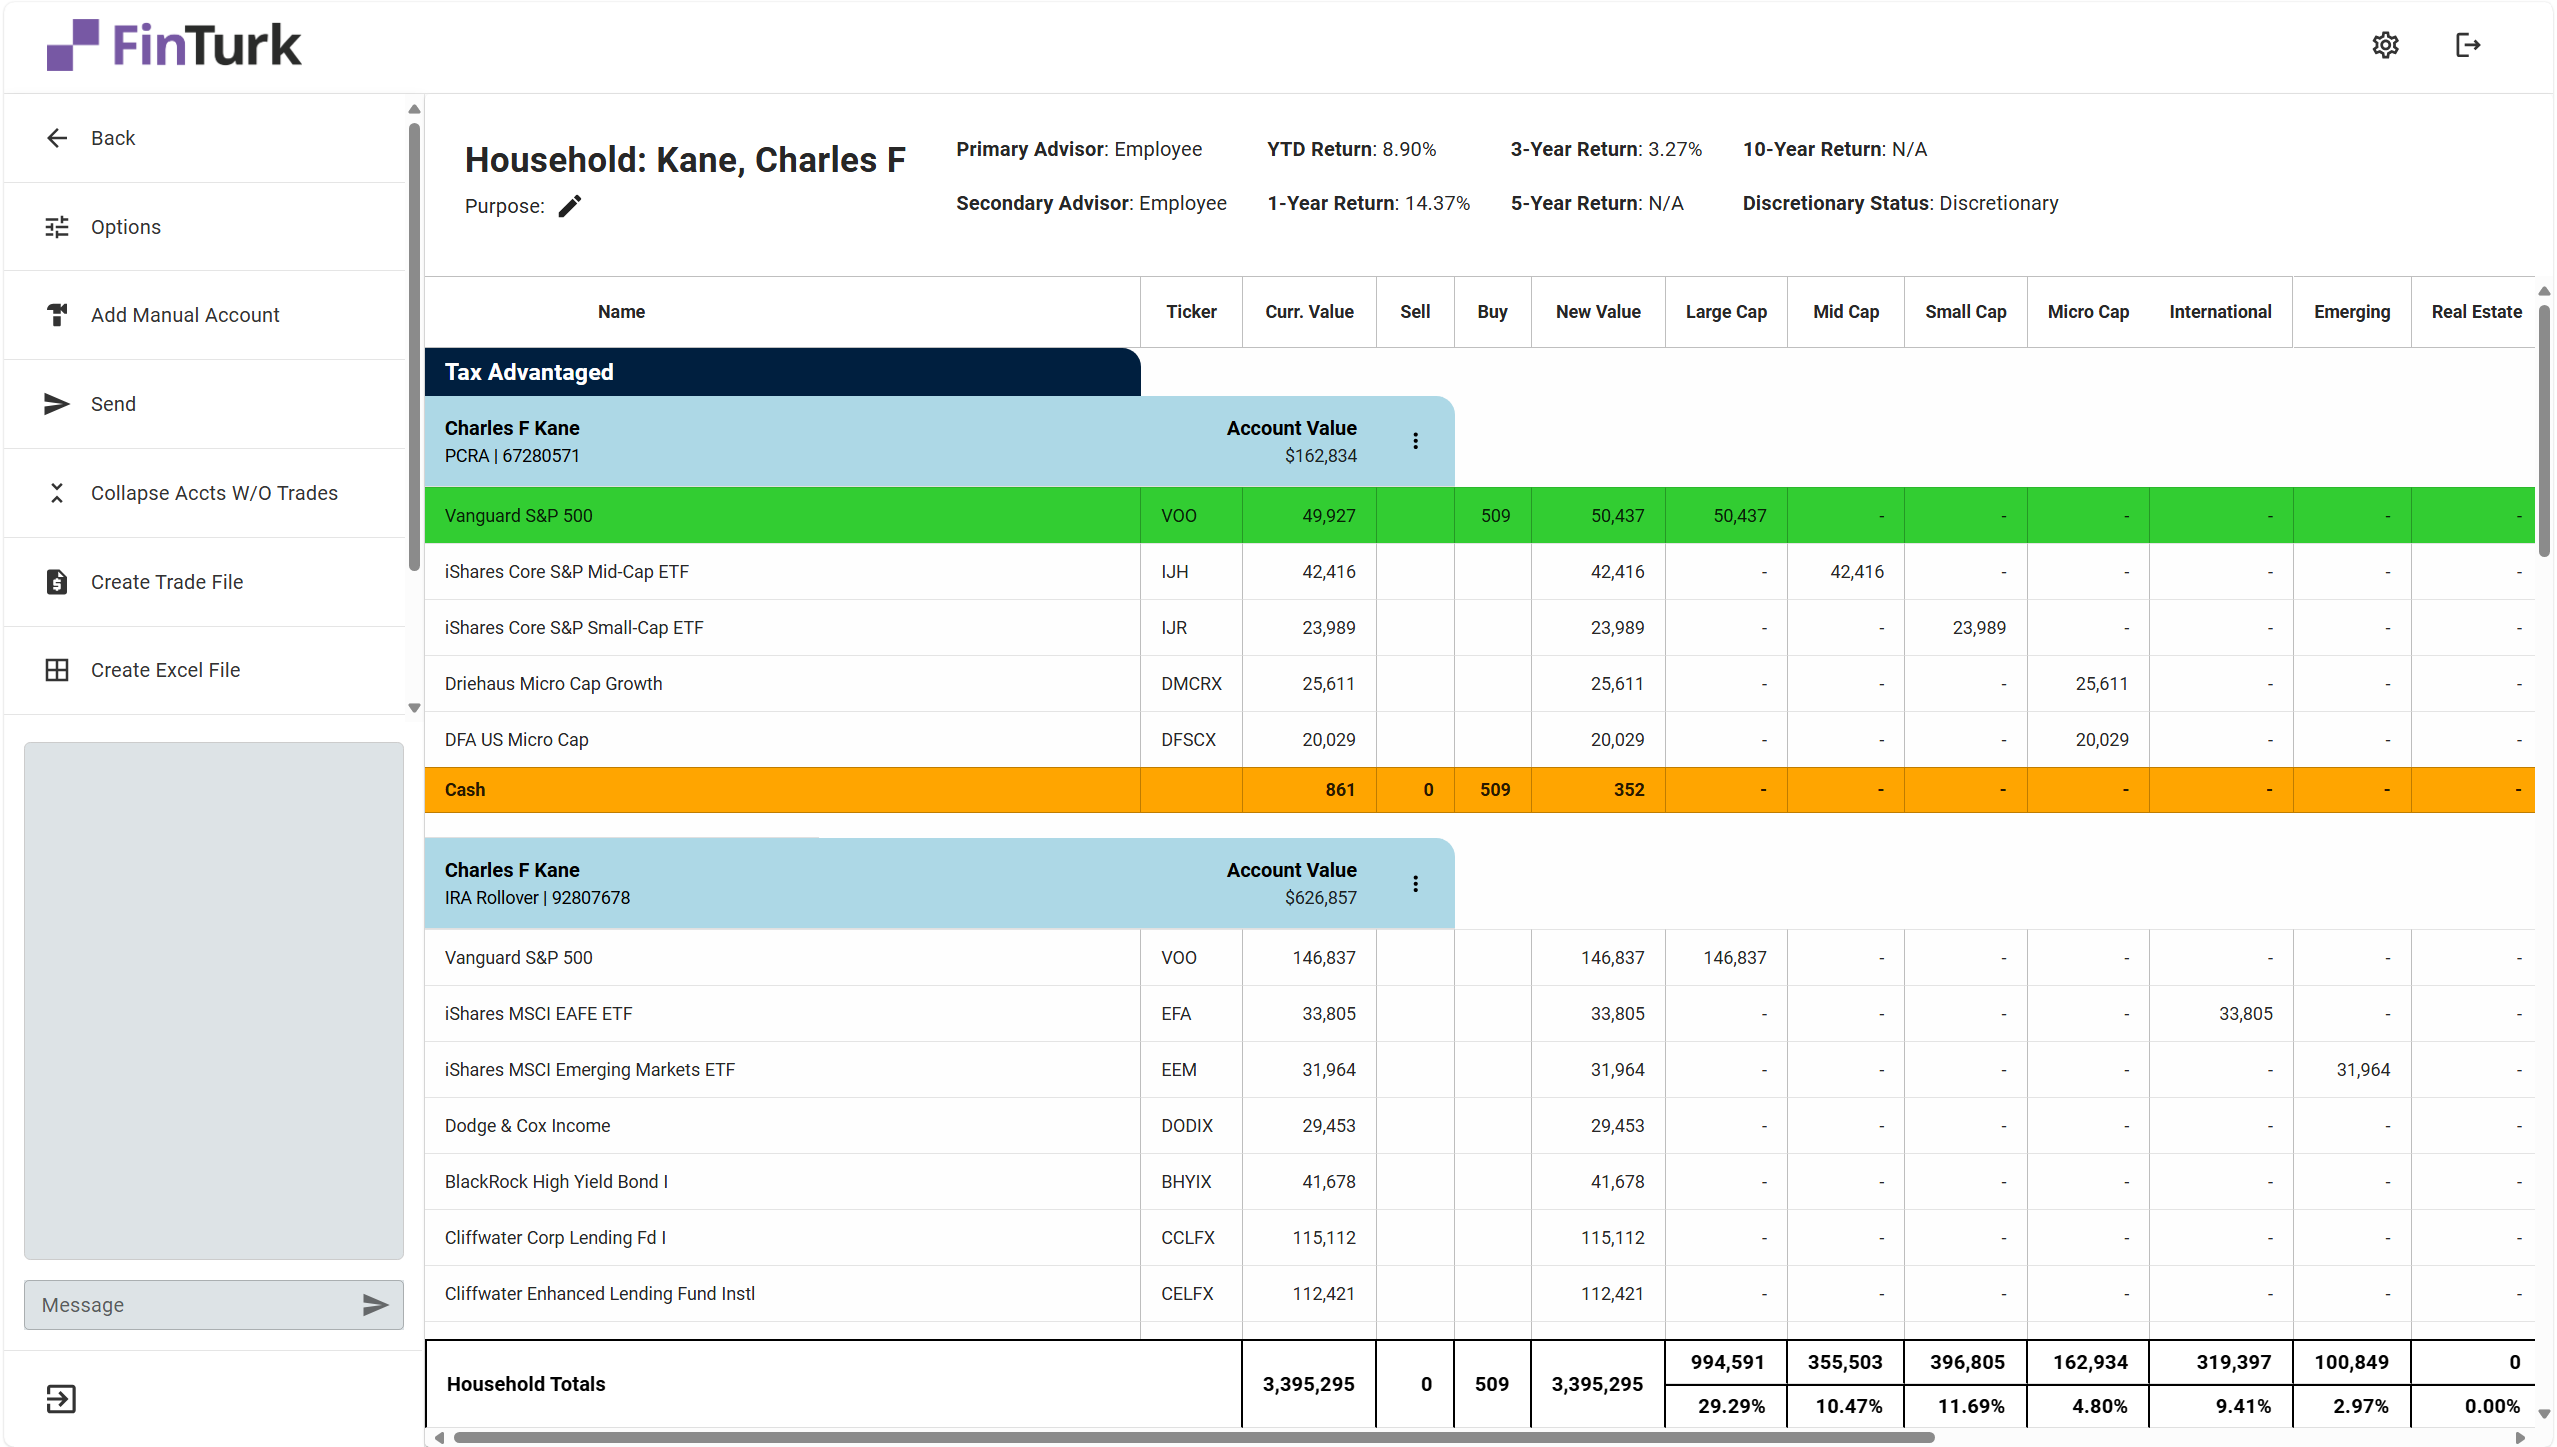
You’ll see the new security you’ve purchased for your client appear in the account highlighted in green.

Image

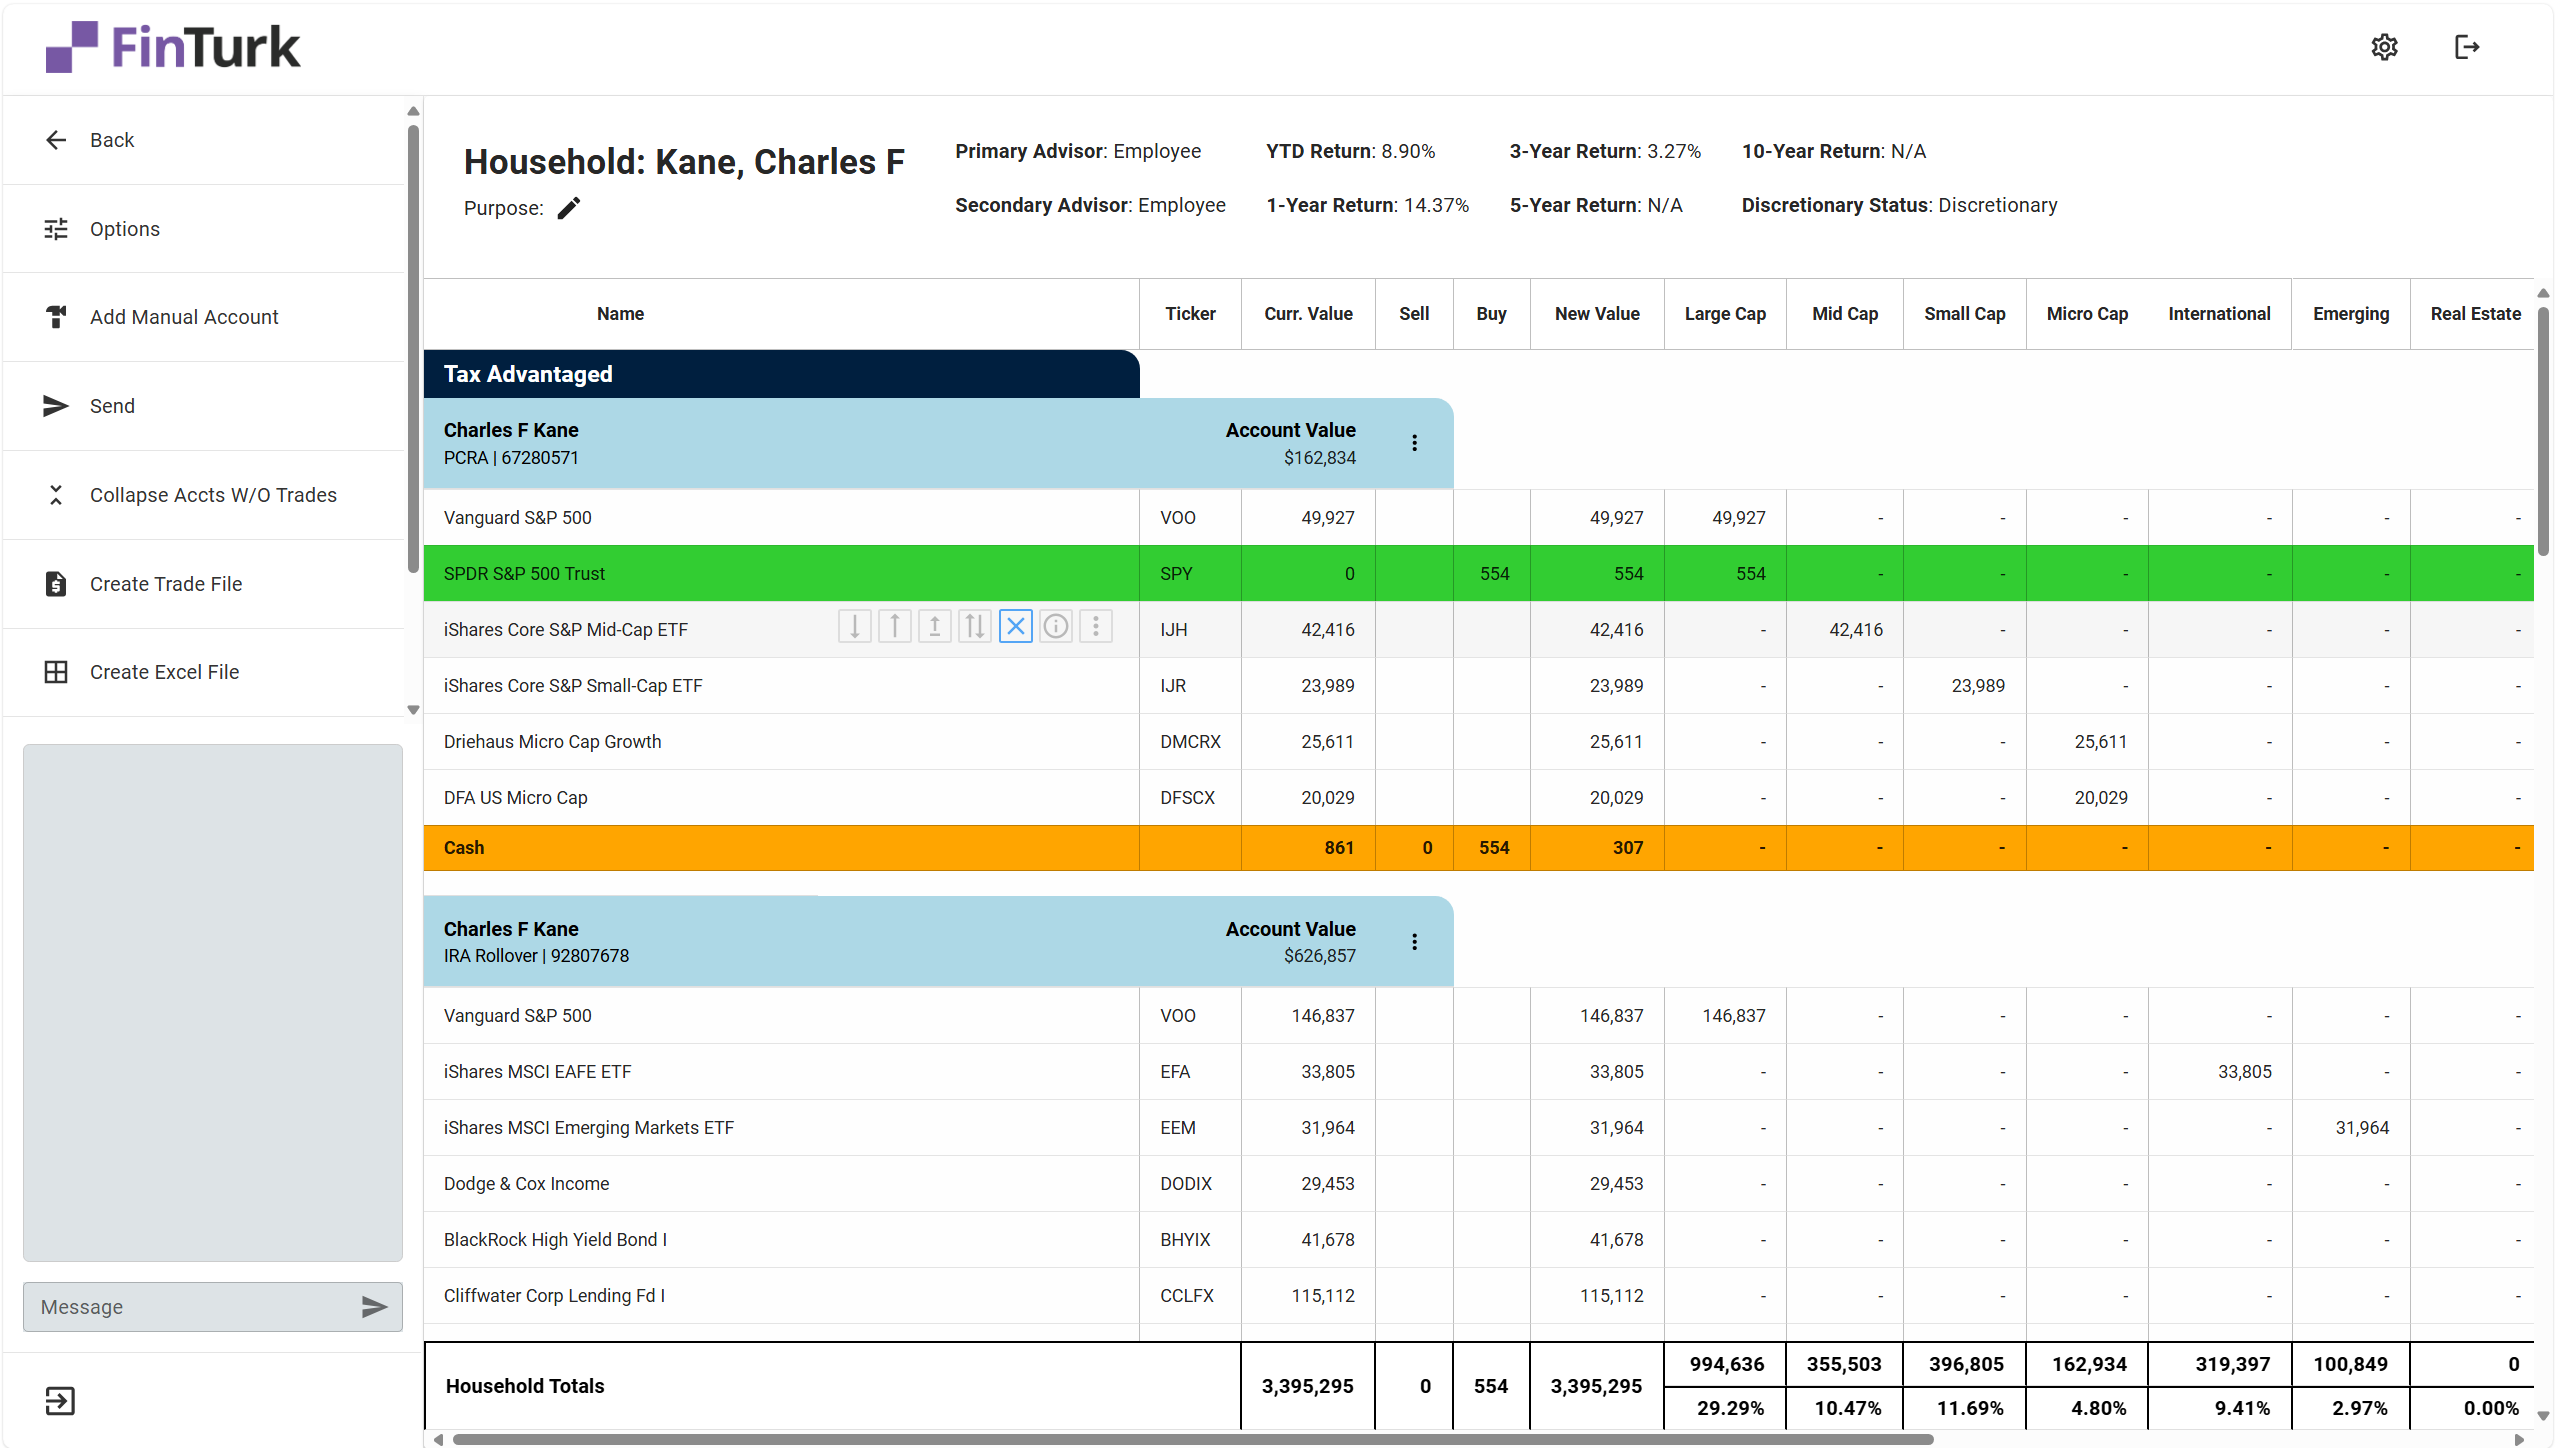
The purchase value of the security will show up under the “Buy” column to show that you are purchasing this security. You can also see the amount you’re purchasing show up under the “New Value” column and under the right Asset Class column that corresponds to the security. 

The Cash row at the bottom will also update to account for the purchase of the security. Since we’re only adding a security, the cash balance has decreased, which you can see because the row has turned orange. The “New Value” of the Cash row has also updated to reflect the purchase of a security in an account. 

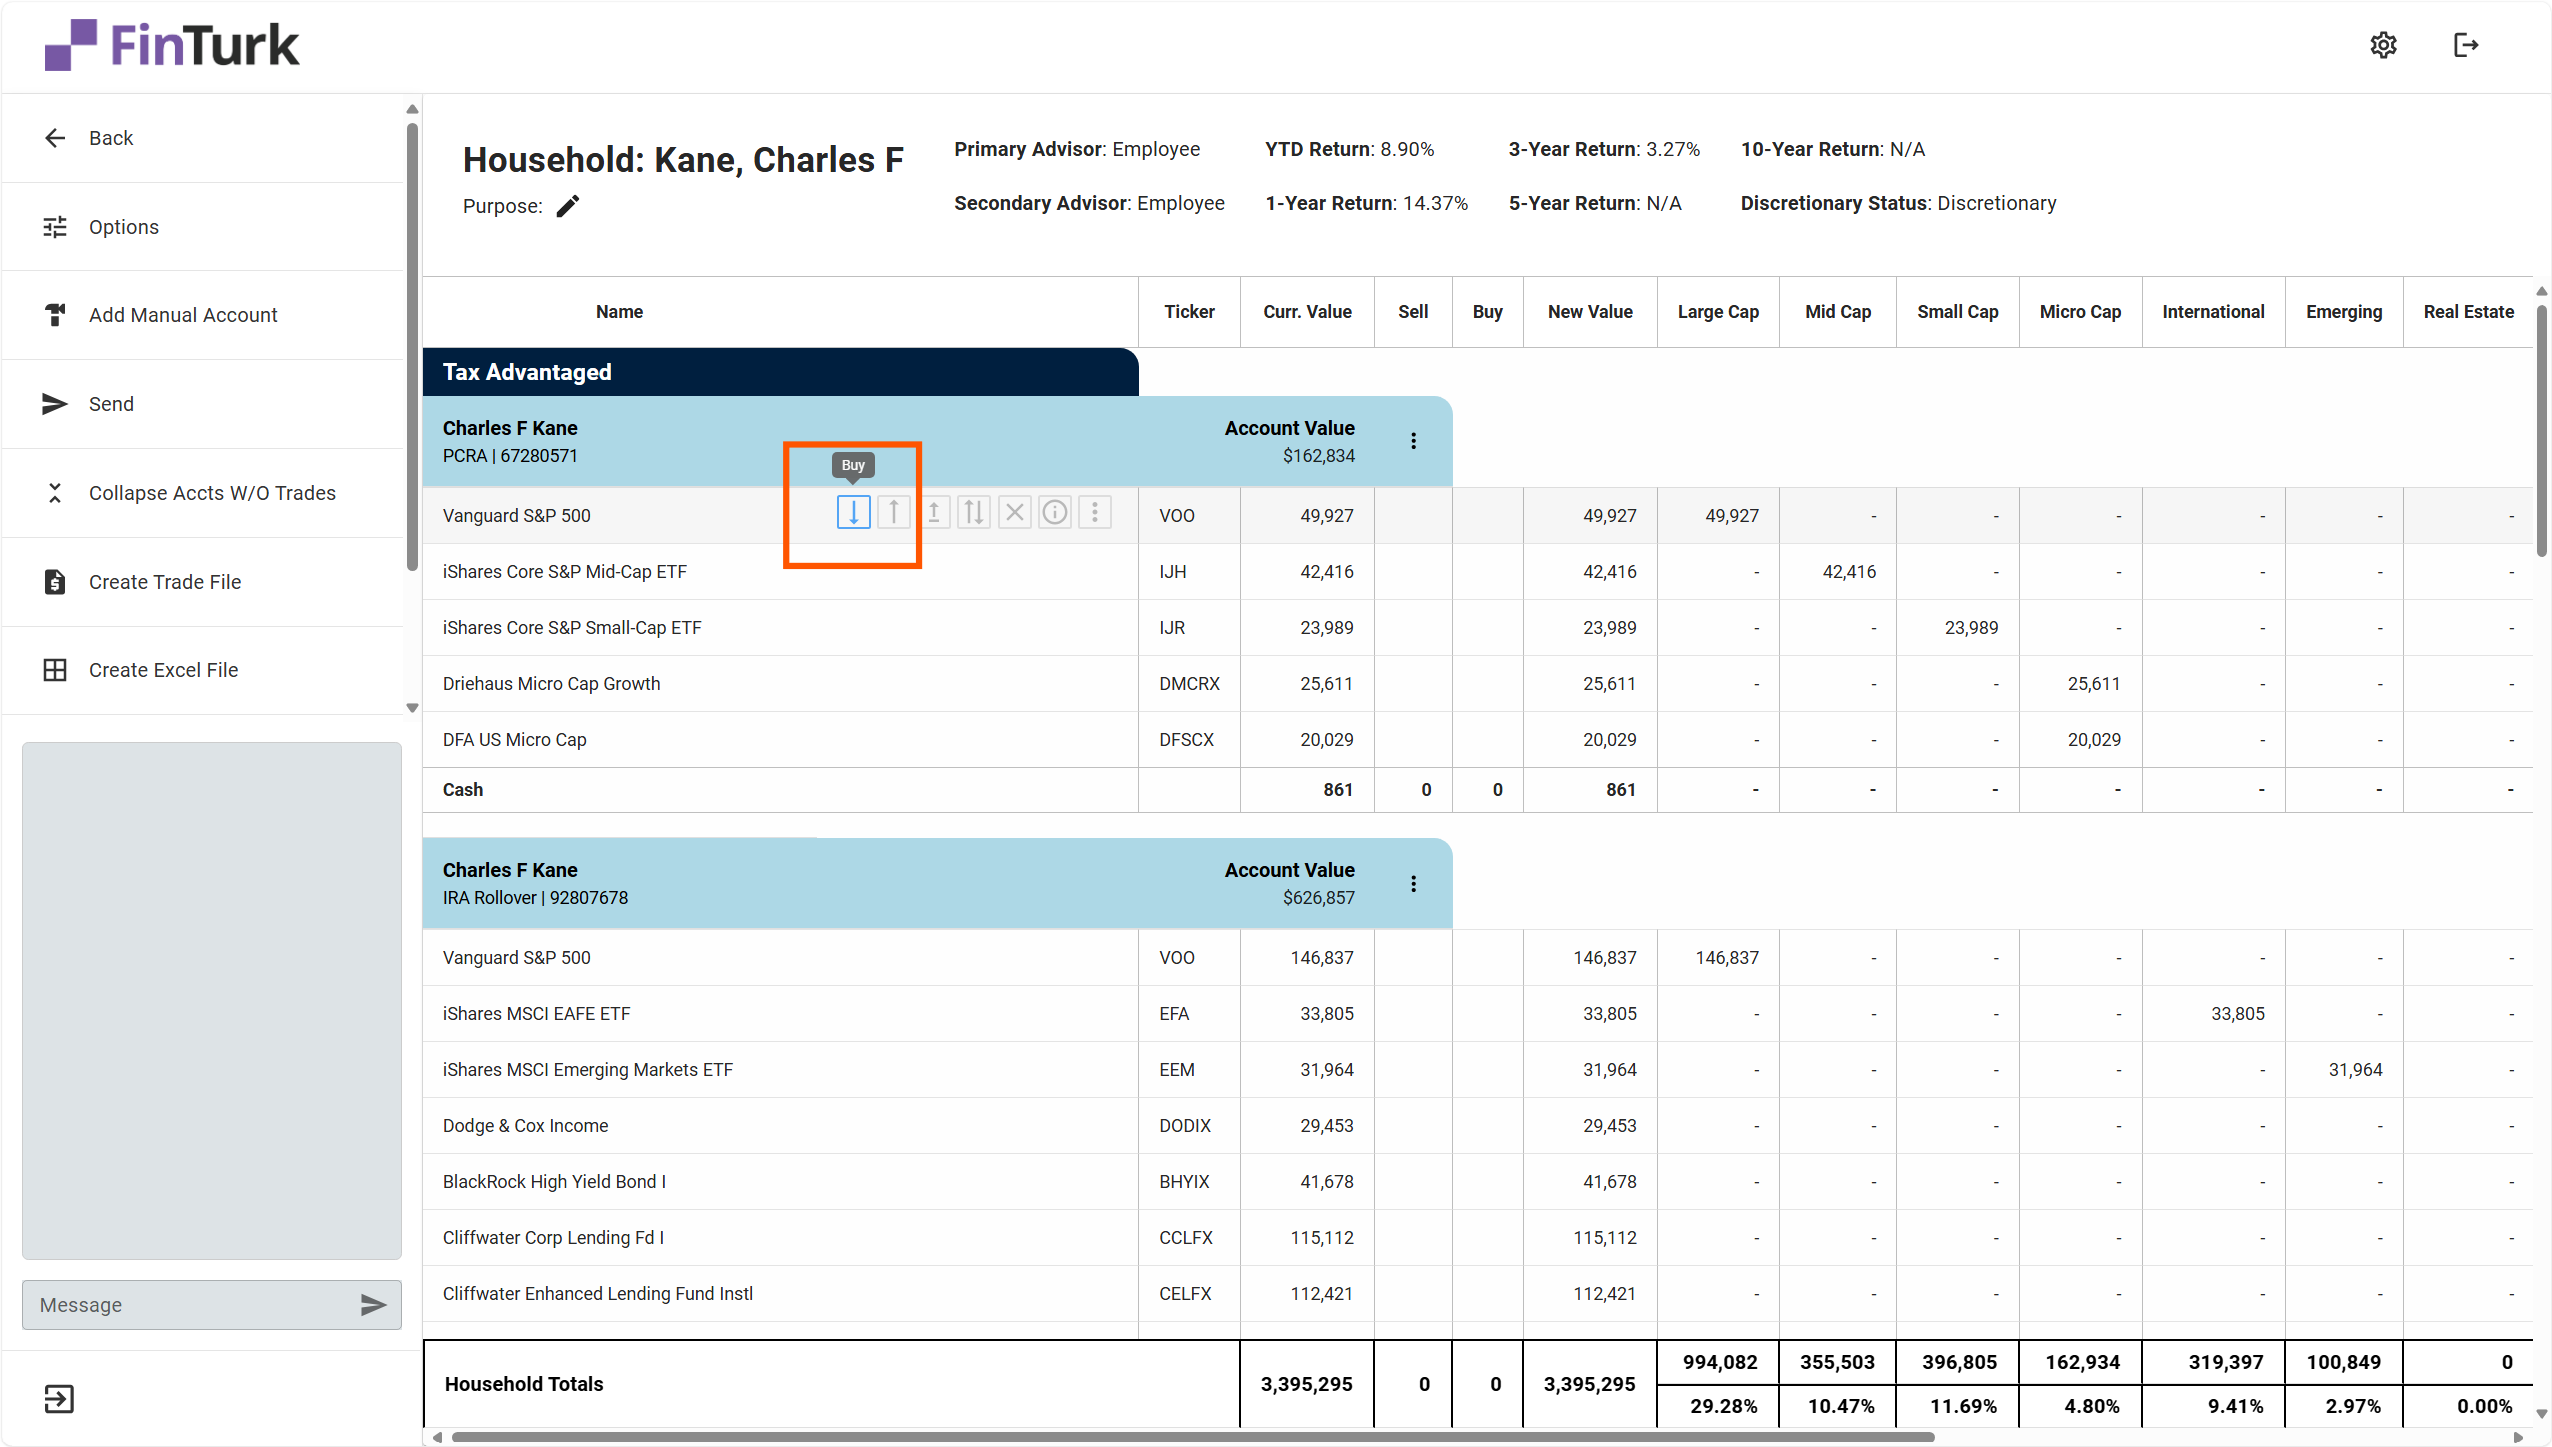
Great! We’ve successfully added a new security to the account. Now, let’s take a look at how to buy more of an existing security. 

Buying More of an Existing Security

Purchasing more of a security the client already owns is done at the Asset level. To buy more of an asset, you can hover over the asset and click the “Buy” quick action button.
Image
From there, a window will pop up showing the name of the security you’re purchasing, the ticker, and the most recently updated price. You can enter the amount you’d like to purchase in either dollars or shares, and click the “Enter” button.
Image
Like before, the security will show up in green, indicating that you are marking this security to be purchased. You’ll see the dollar value of the amount you’re purchasing show up in the “Buy” column, and the “New Value” column, “Cash” row, and the corresponding Asset Class column will also be updated to reflect the new value of the security in the account. 

Buying Manual Assets

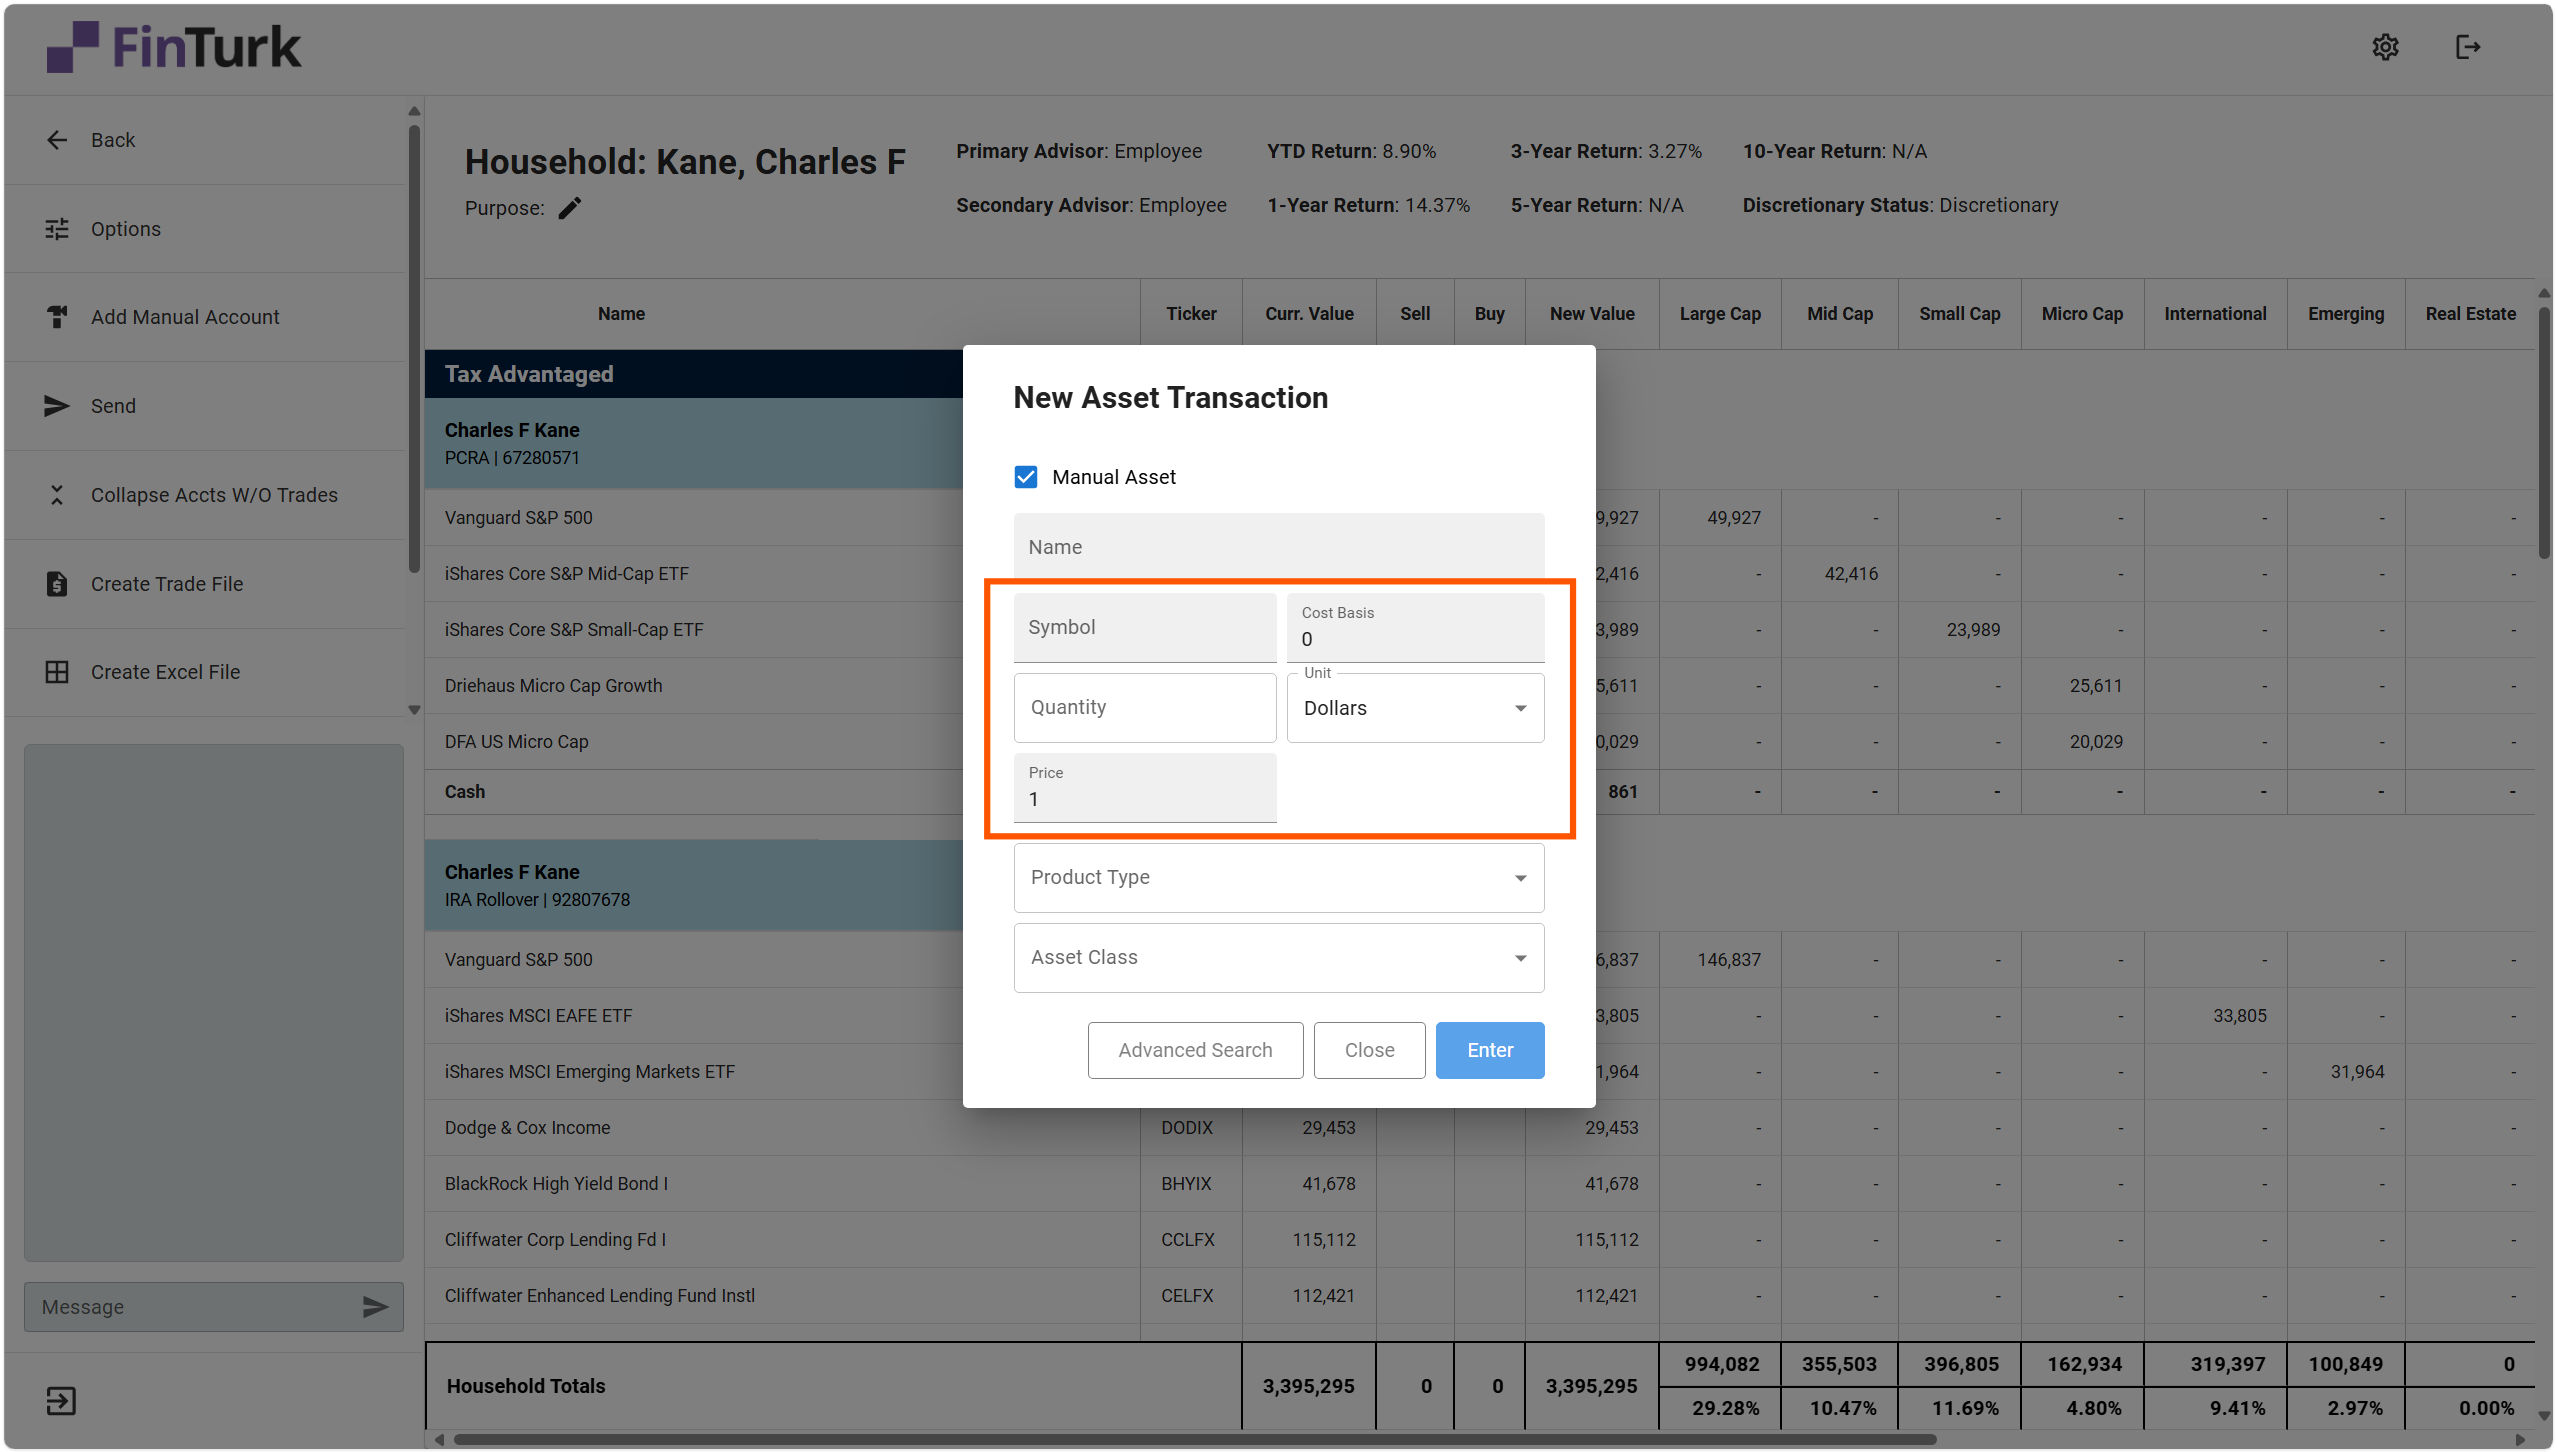
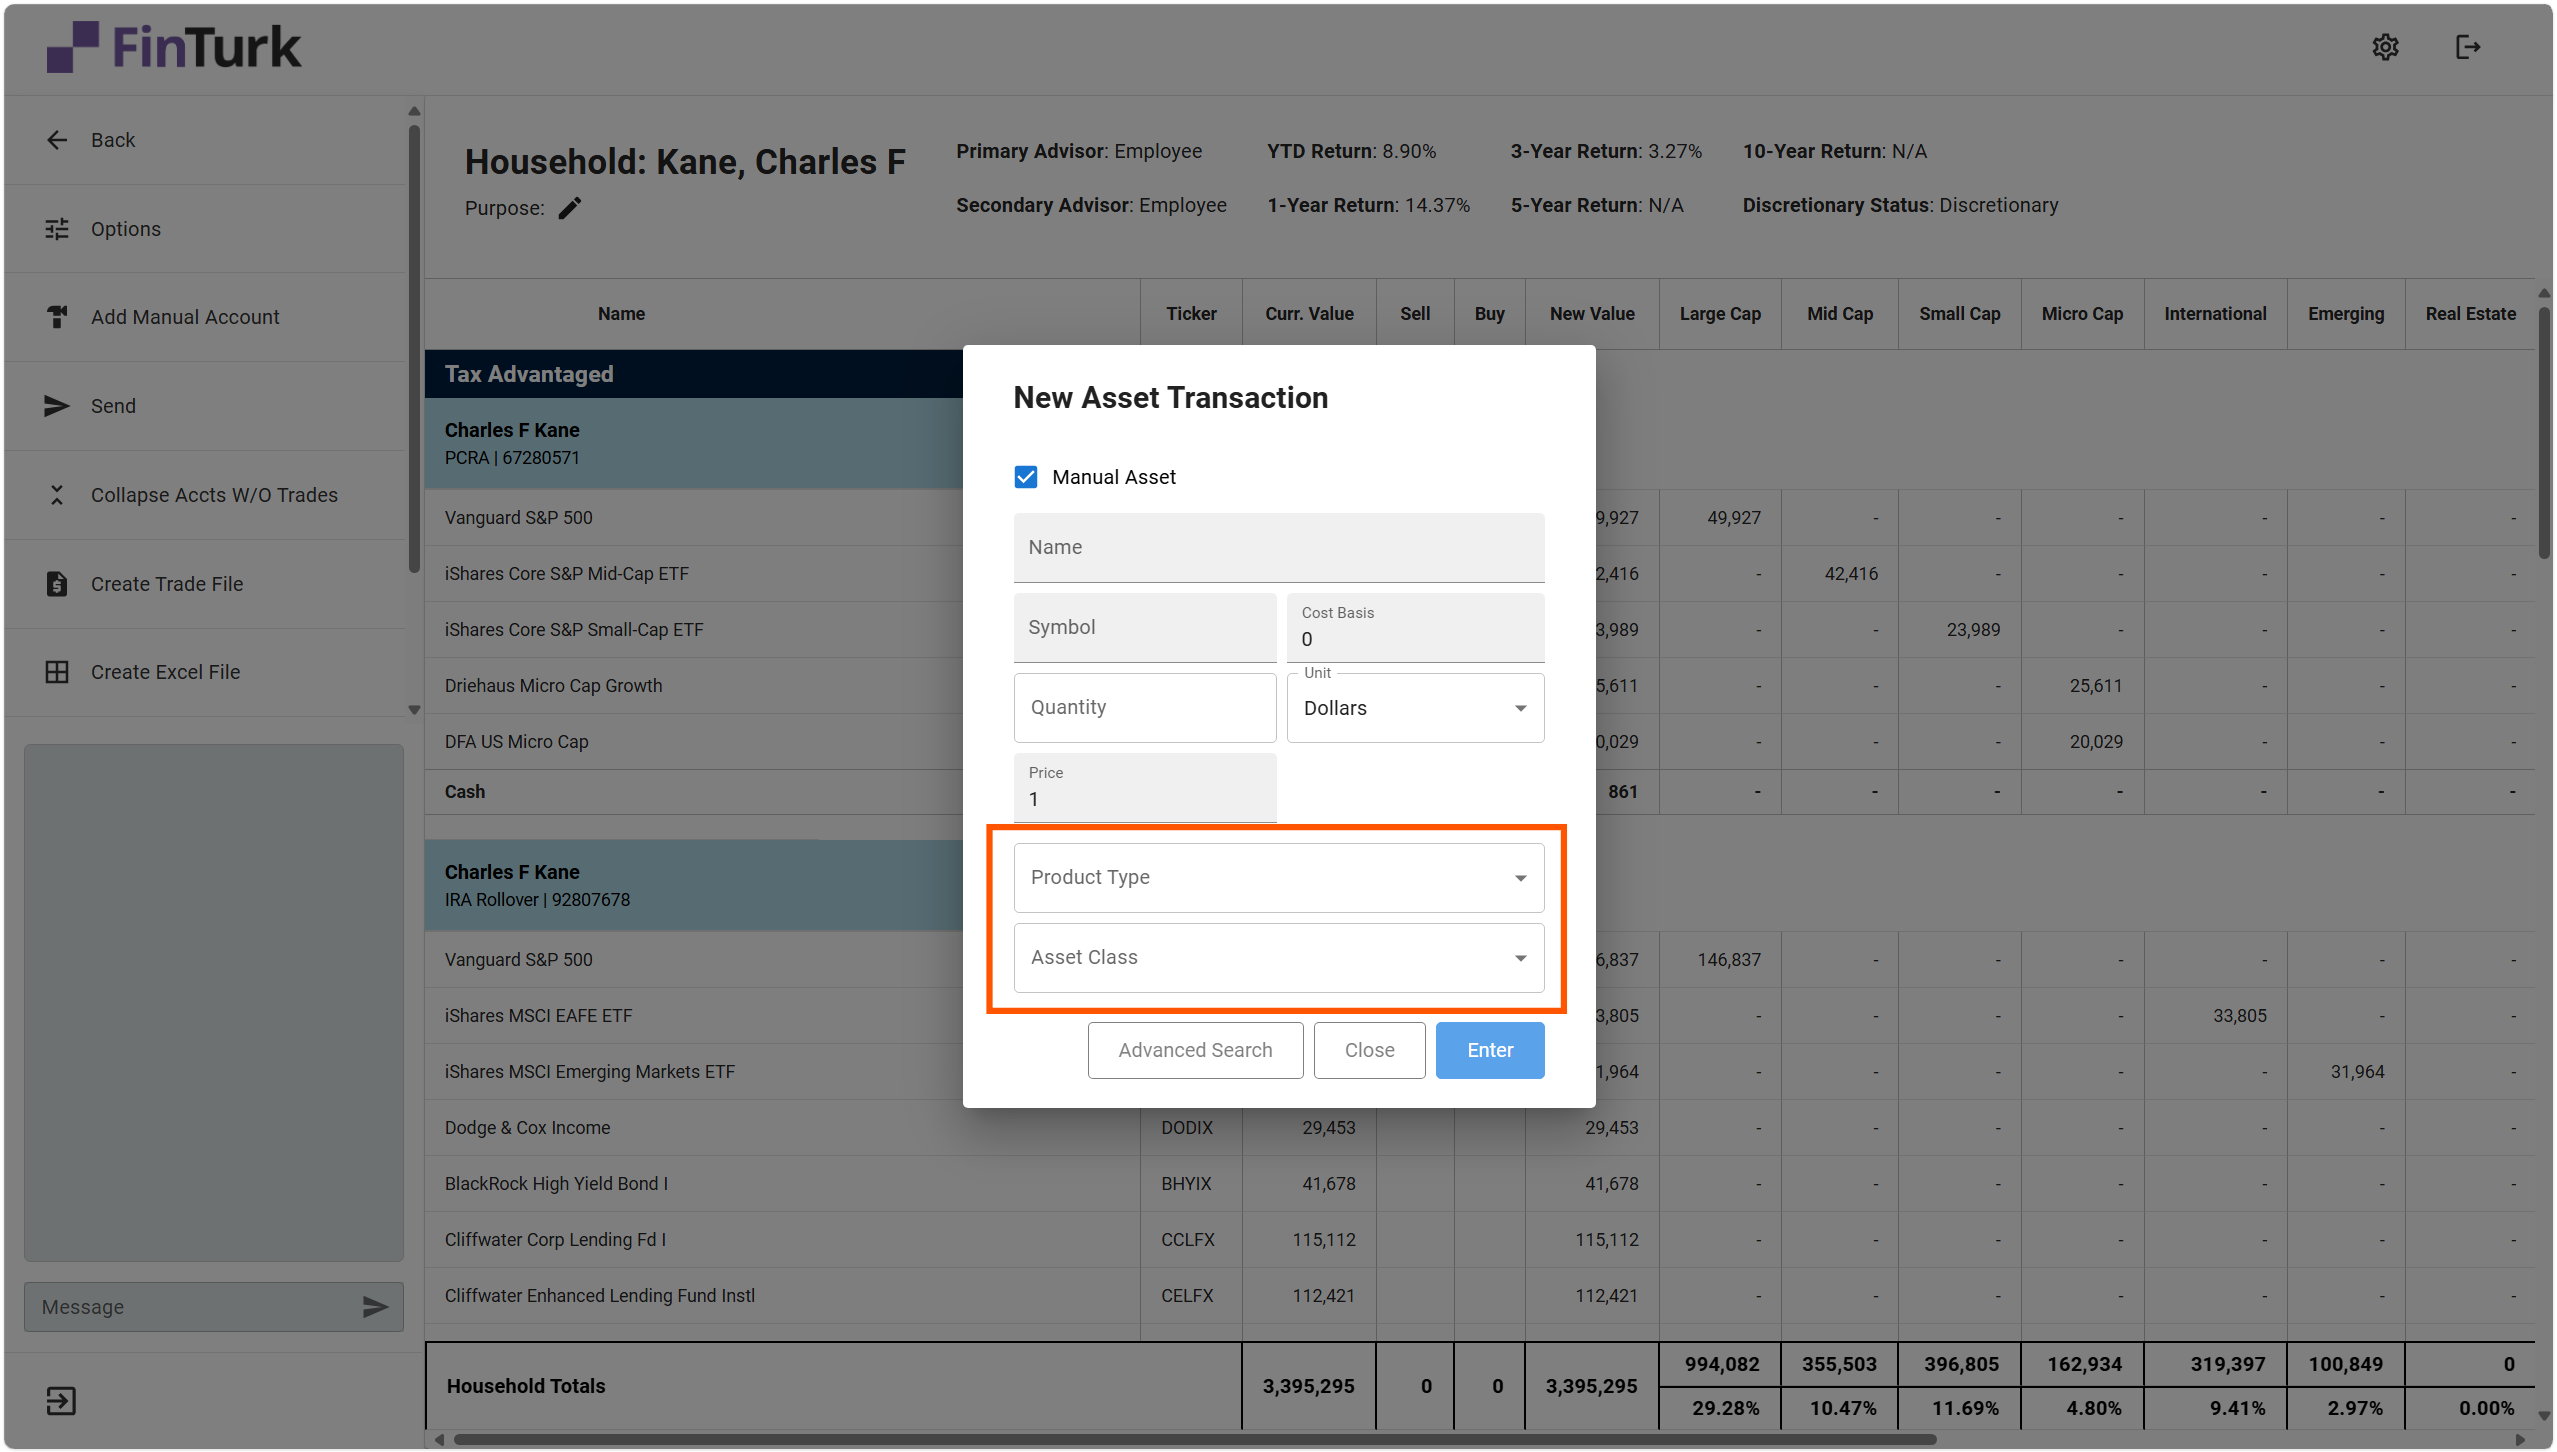
There may be a time when you would like to model the purchase of a security that is not listed in the data source. Whether this is a private placement, unlisted security, or other asset your client would like to see in their portfolio, you can simulate the purchase of this asset by buying a manual asset

A manual asset is an asset that you add to a client portfolio that is not connected to a data source. For manual assets, you will have to monitor and review the asset to make sure its current value is up-to-date and it is properly assigned to the right Asset Class column. 

To buy a manual asset, you can take the same steps as Buying a New Security in an Account, but this time, you can check the box labeled “Manual Asset.” 

Image
When you check this box, new fillable options will appear on the New Asset Transaction dialogue: Name, Symbol, Cost Basis, and Price. You can fill out these options according to the asset’s specific information and cost basis. 
Image
Two new dropdown options will also appear: Product Type and Asset Class. You can select a Product Type and an Asset Class from these dropdowns to define what kind of asset it is and which Asset Class it belongs to. 
Image
After you’ve filled out all the information, you can click the “Enter” button and you’ll see the Manual Asset purchase modeled in your client’s account.
Image

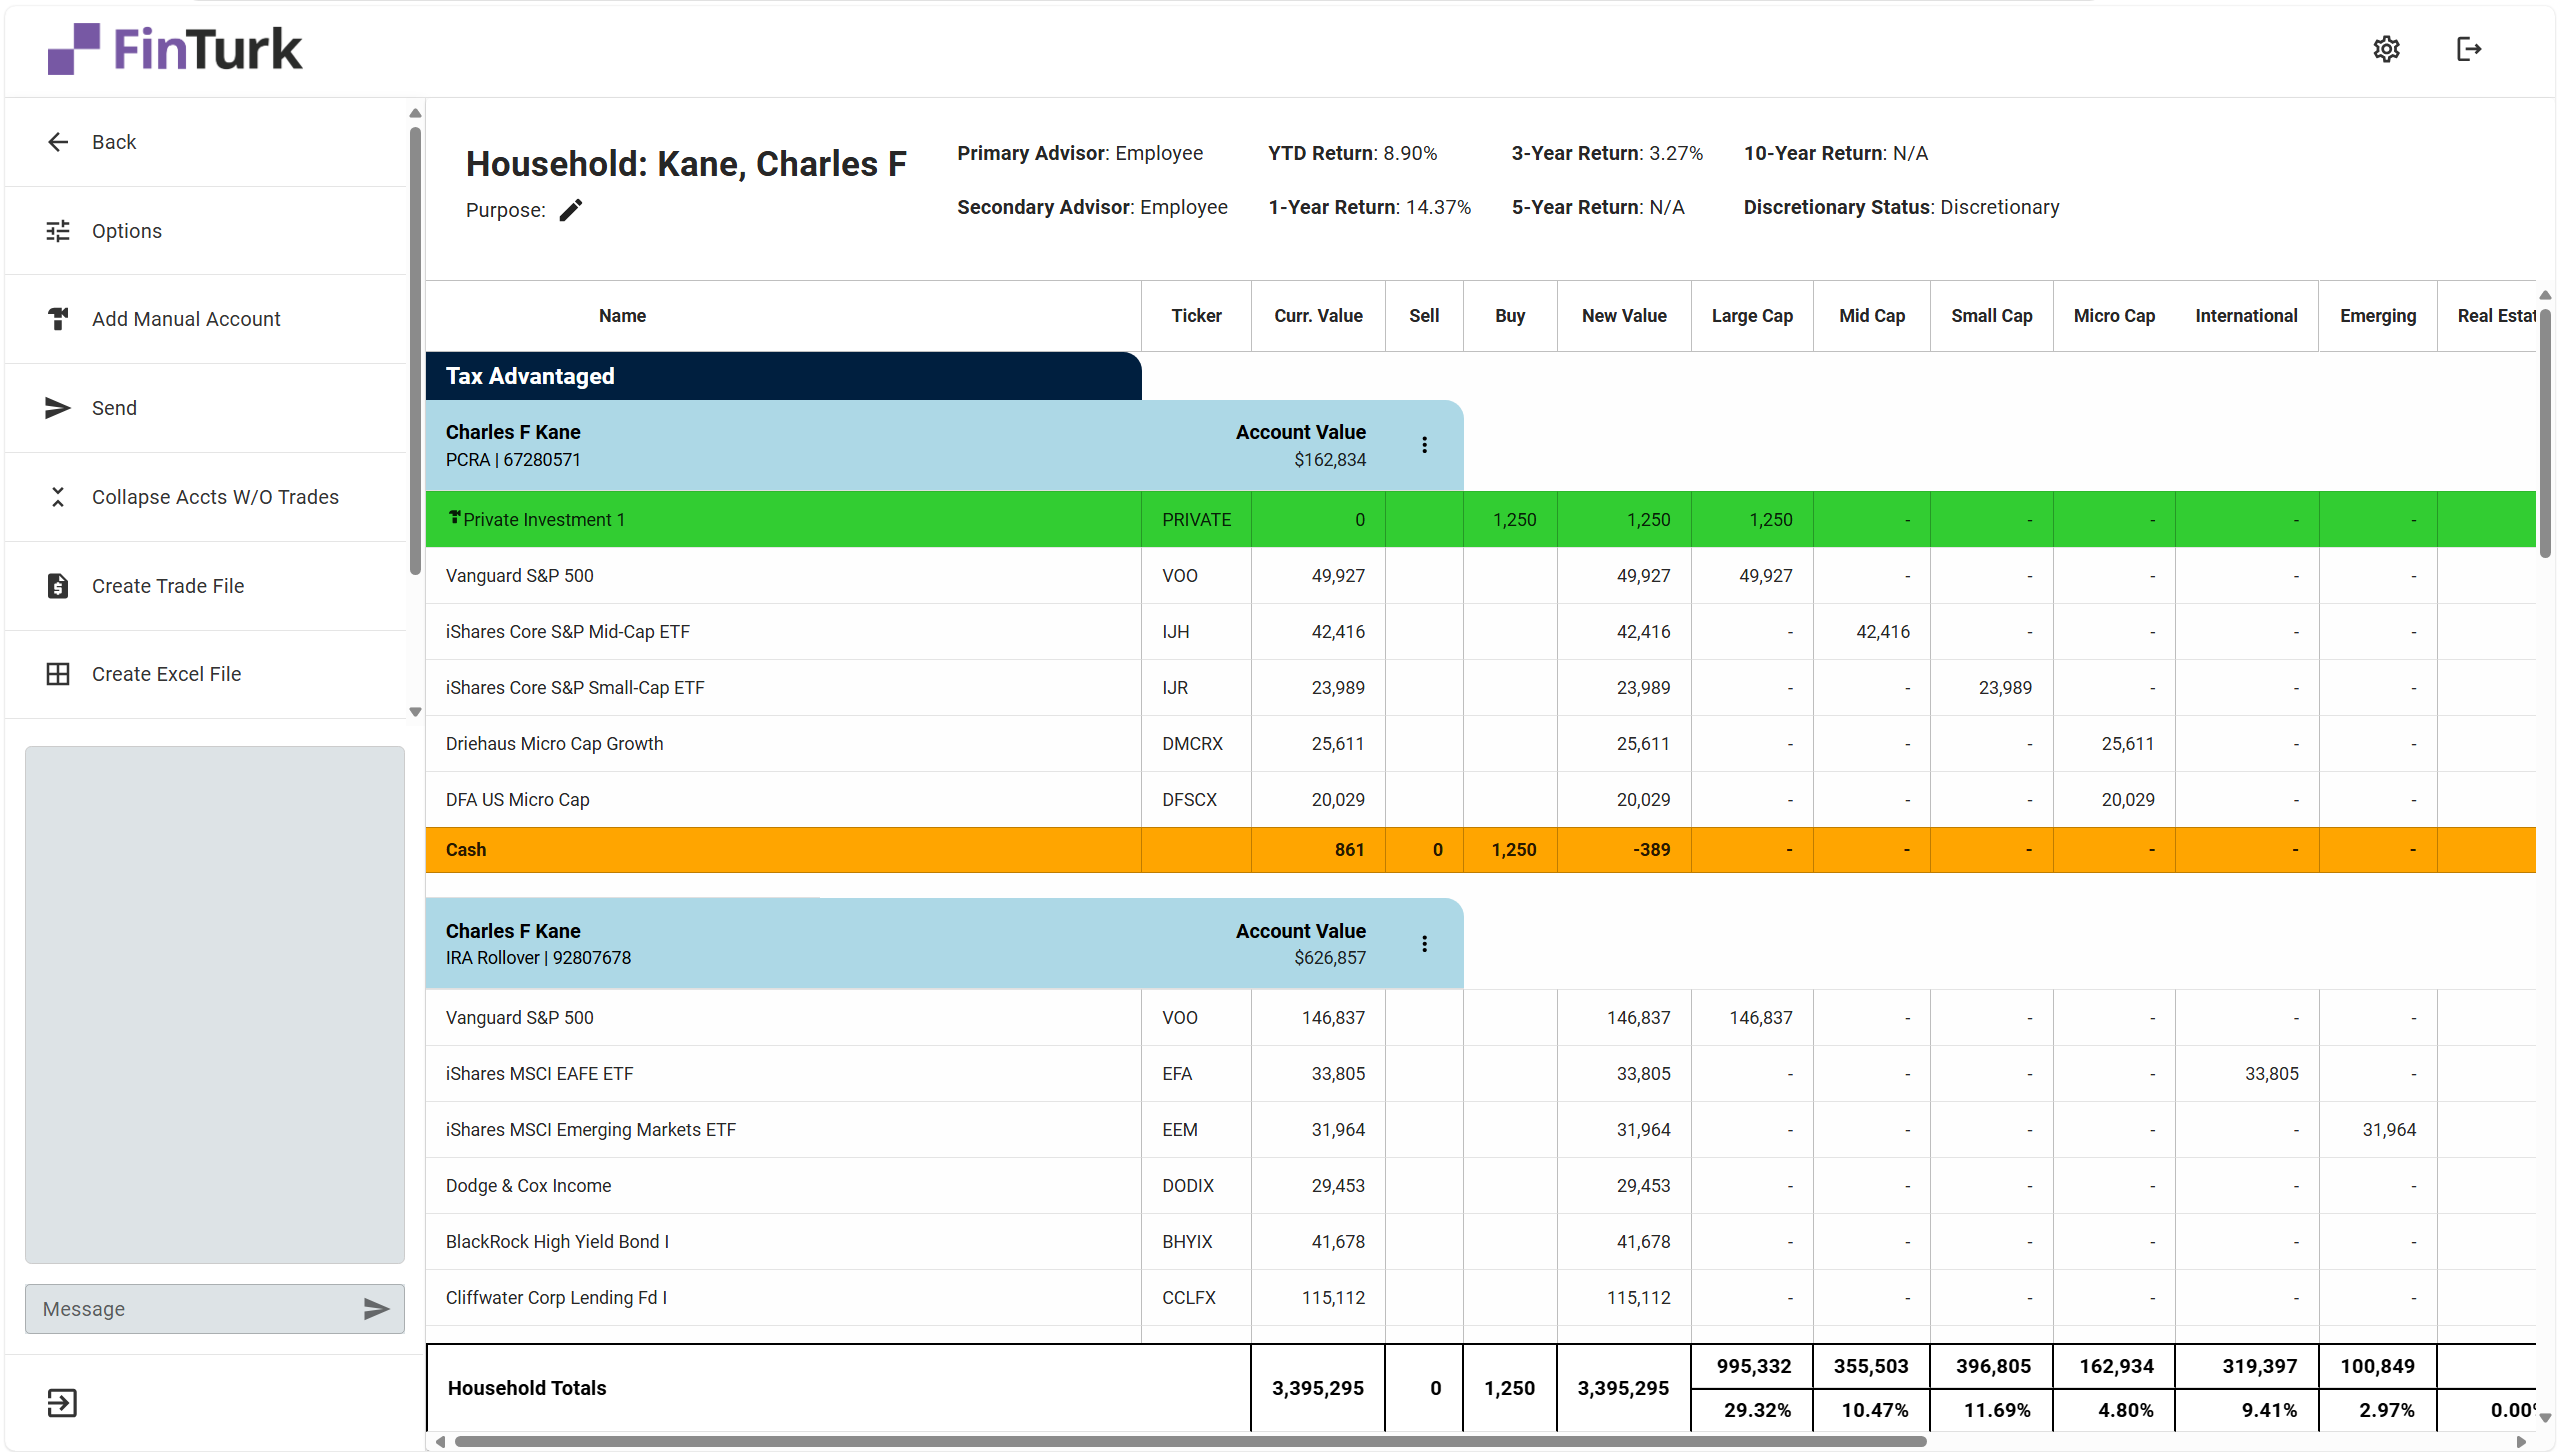
You can tell this is a Manual Asset because of the icon indicator next to the asset’s name. 

Awesome! These are all the primary ways you can model an asset purchase in a client’s account. From here, you are all set to send the Allocation to another advisor on your team for review or to export the trade file and place the trades at your client’s custodian. 

Additional Ways to Purchase Securities

Awesome! We've run the allocation, and we're back at the Allocation Dashboard. Here, we can see that the allocation showed up under the "In Progress" status on the dashboard.

Using the Spend Cash Button

The Spend Cash feature is an advanced option that allows advisors to quickly model a transaction where all the cash in the account is used to purchase a single security. To start, you can click on the “Spend Cash” quick action button on the Account level. 
Image
This will open up the New Asset Transaction dialogue, but instead of the “Quantity” field being blank, you can see it’s prepopulated with all the current cash in the account.
Image
From there, you can purchase a security by searching for the security in the Search bar or you can Buy a Manual Asset, just like you would using the same steps as above.