Allocation Overview
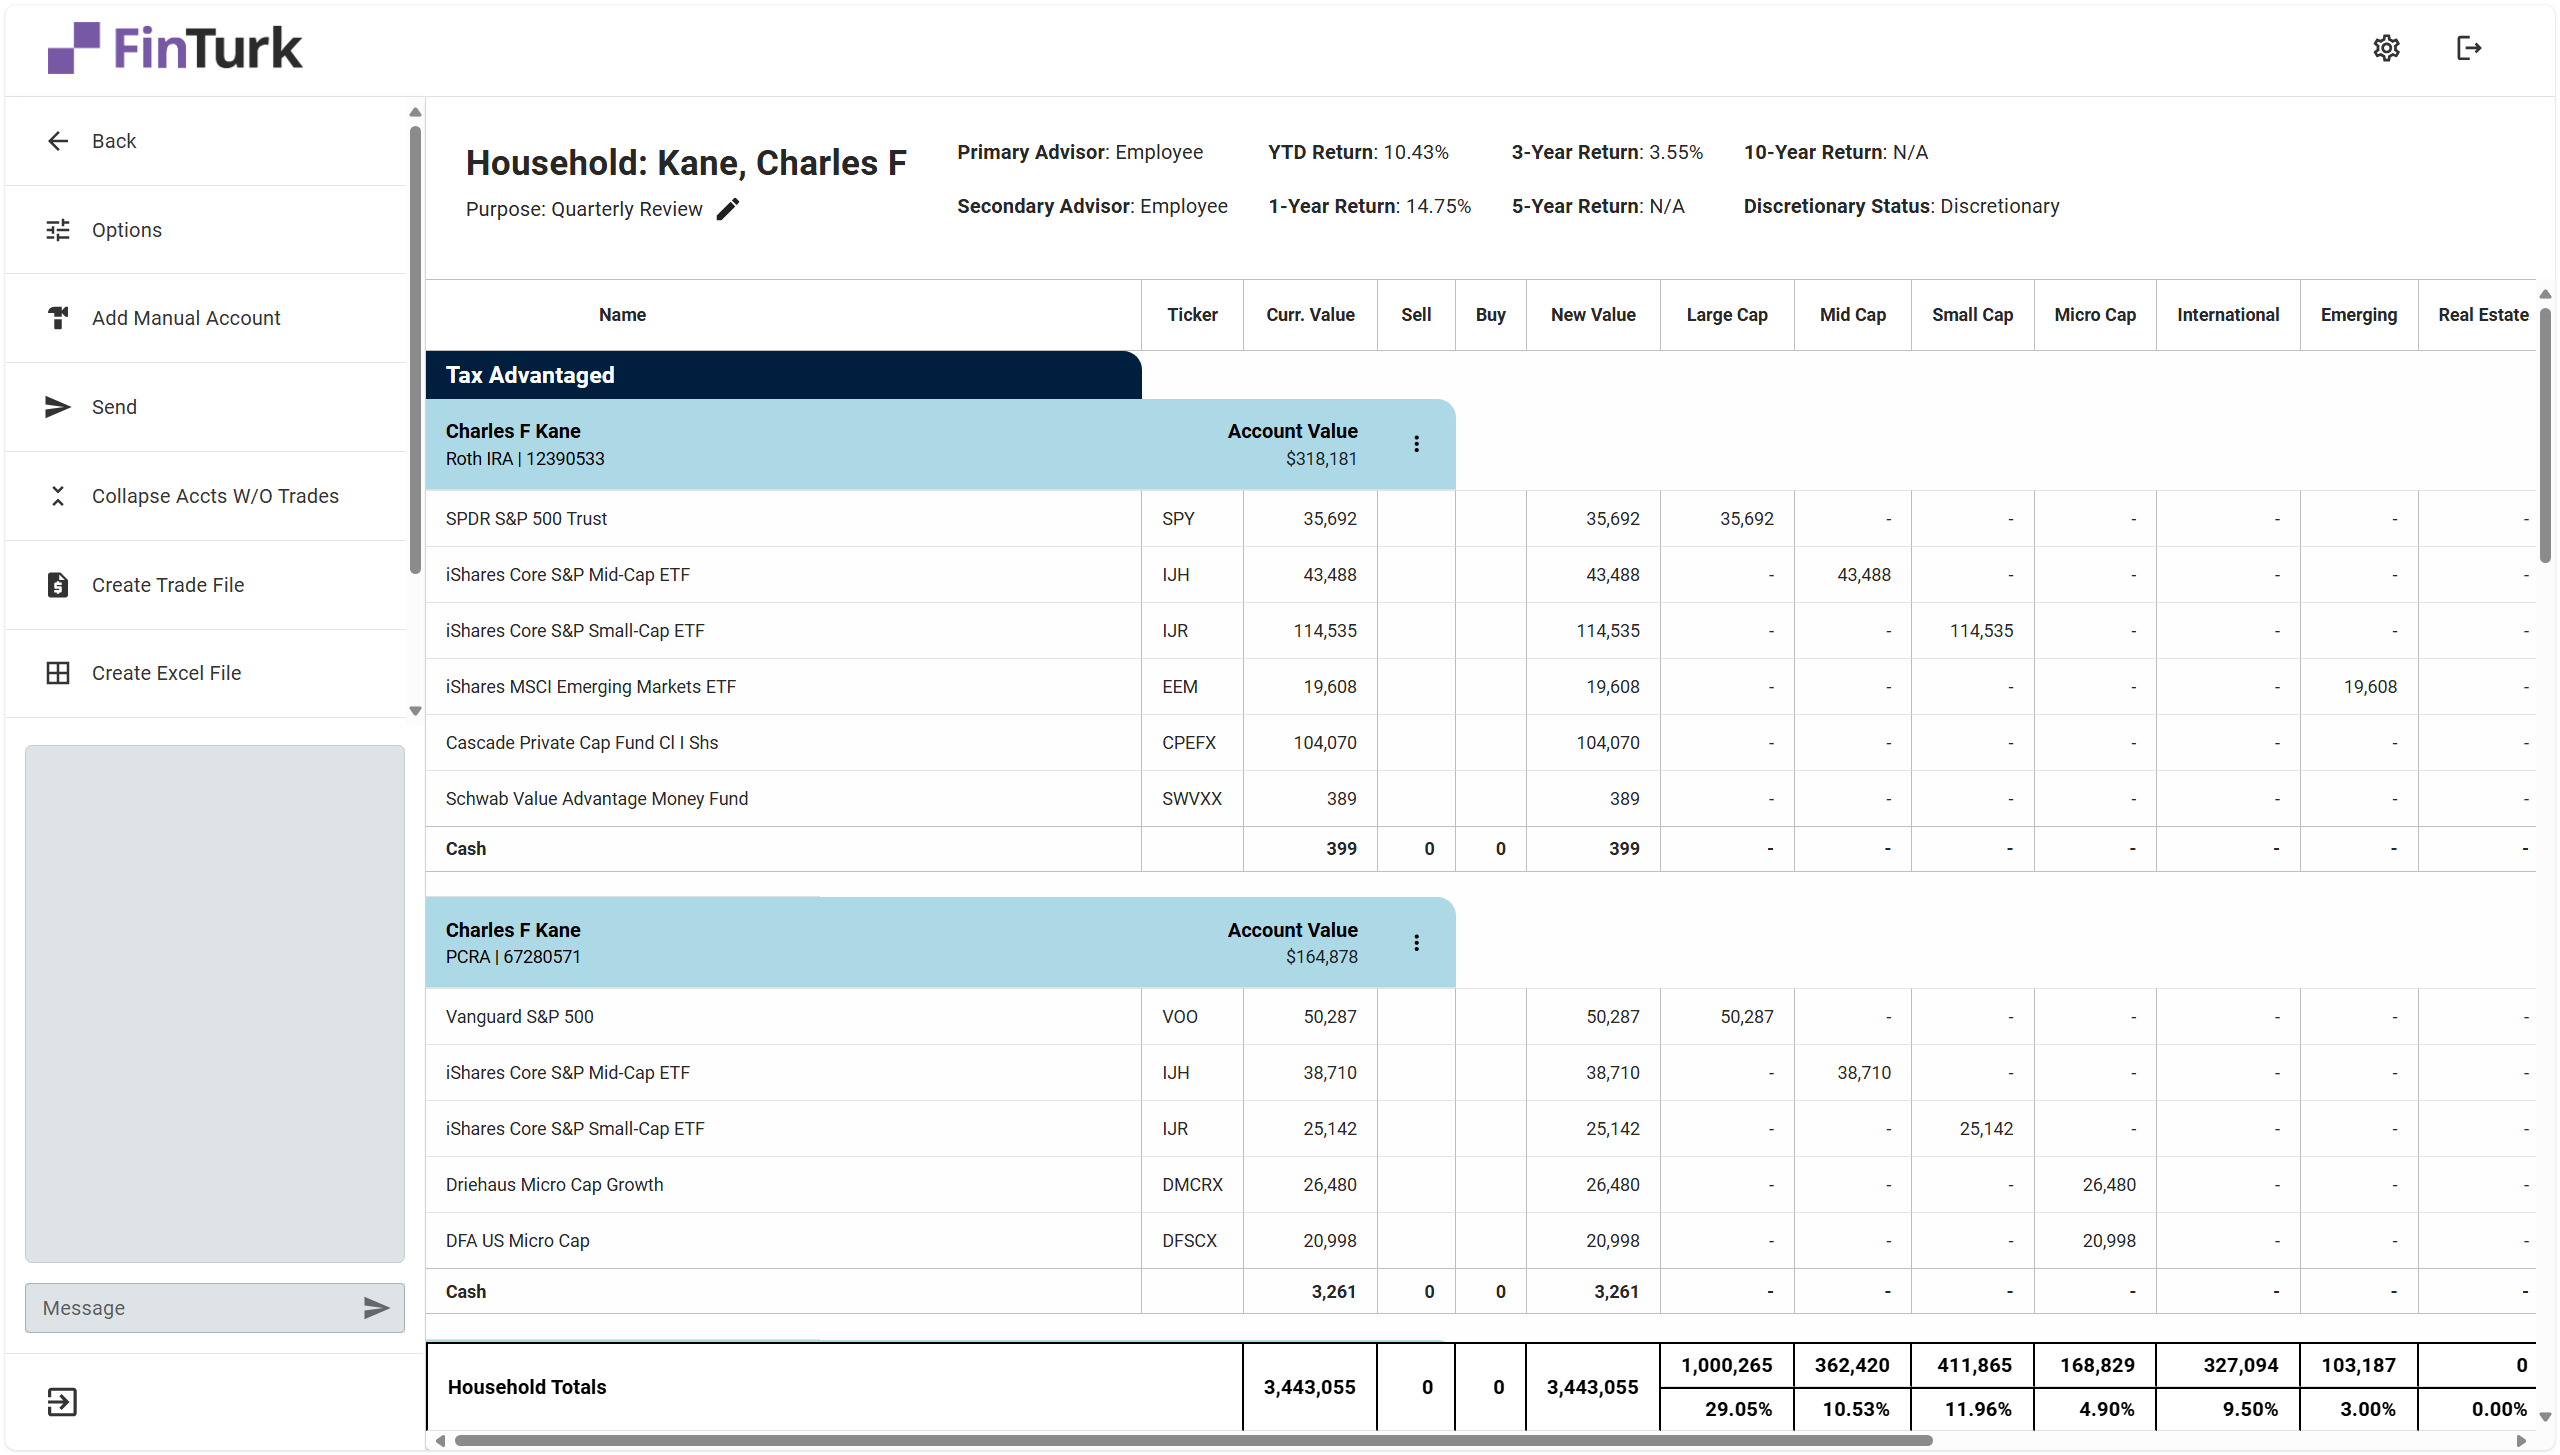
At the top of the Allocation is the Infogrid. The Infogrid is a customizable table displaying information relating to a client’s portfolio or household information. This Infogrid is built to give a quick overview of this client’s portfolio performance.
In the middle of the page is the client’s portfolio Allocation. An Allocation is a visual display of a client’s assets in their portfolio. The Allocation is organized by account families, accounts, and assets.
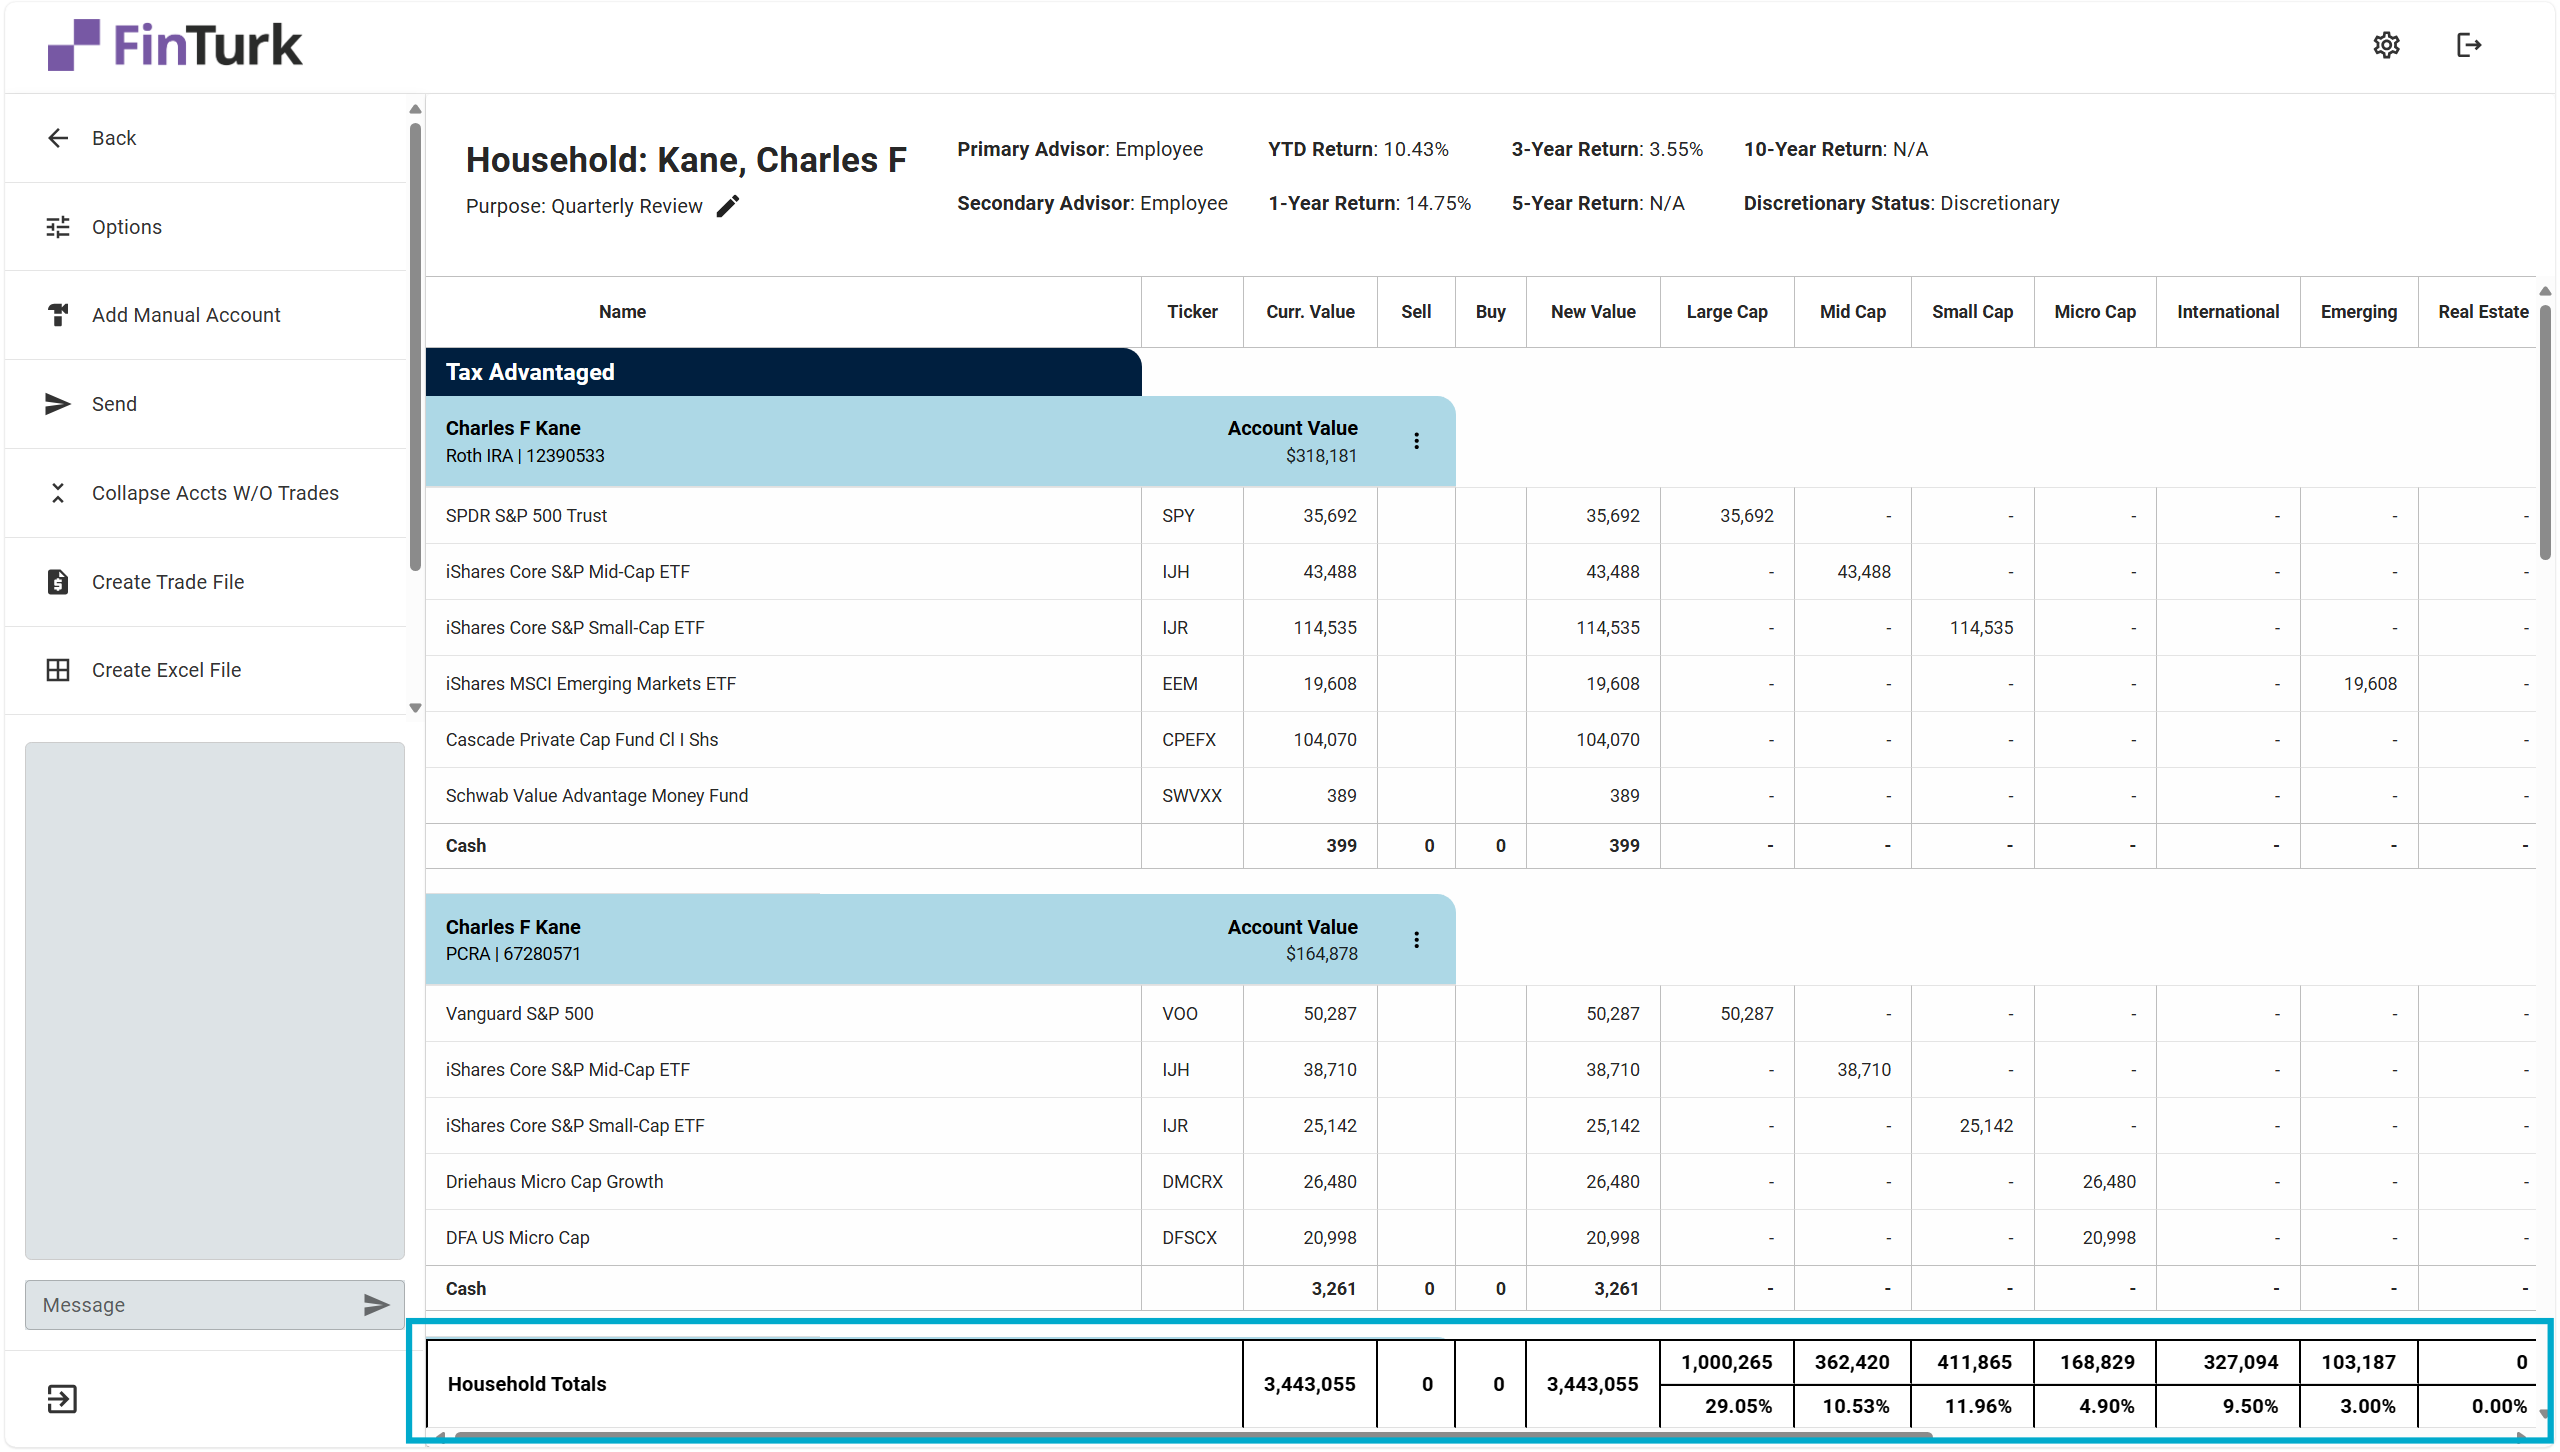
At the bottom of the Allocation is the Household Totals row displaying the current value of a client’s holdings across all their accounts organized by asset class. This is also the area where portfolio Targets appear.
On the left side of the Allocation are two additional tools: the Global Actions Bar and the Messages window.
There’s a lot you can do on an Allocation, so let’s dive in starting with the Infogrid.
The Infogrid
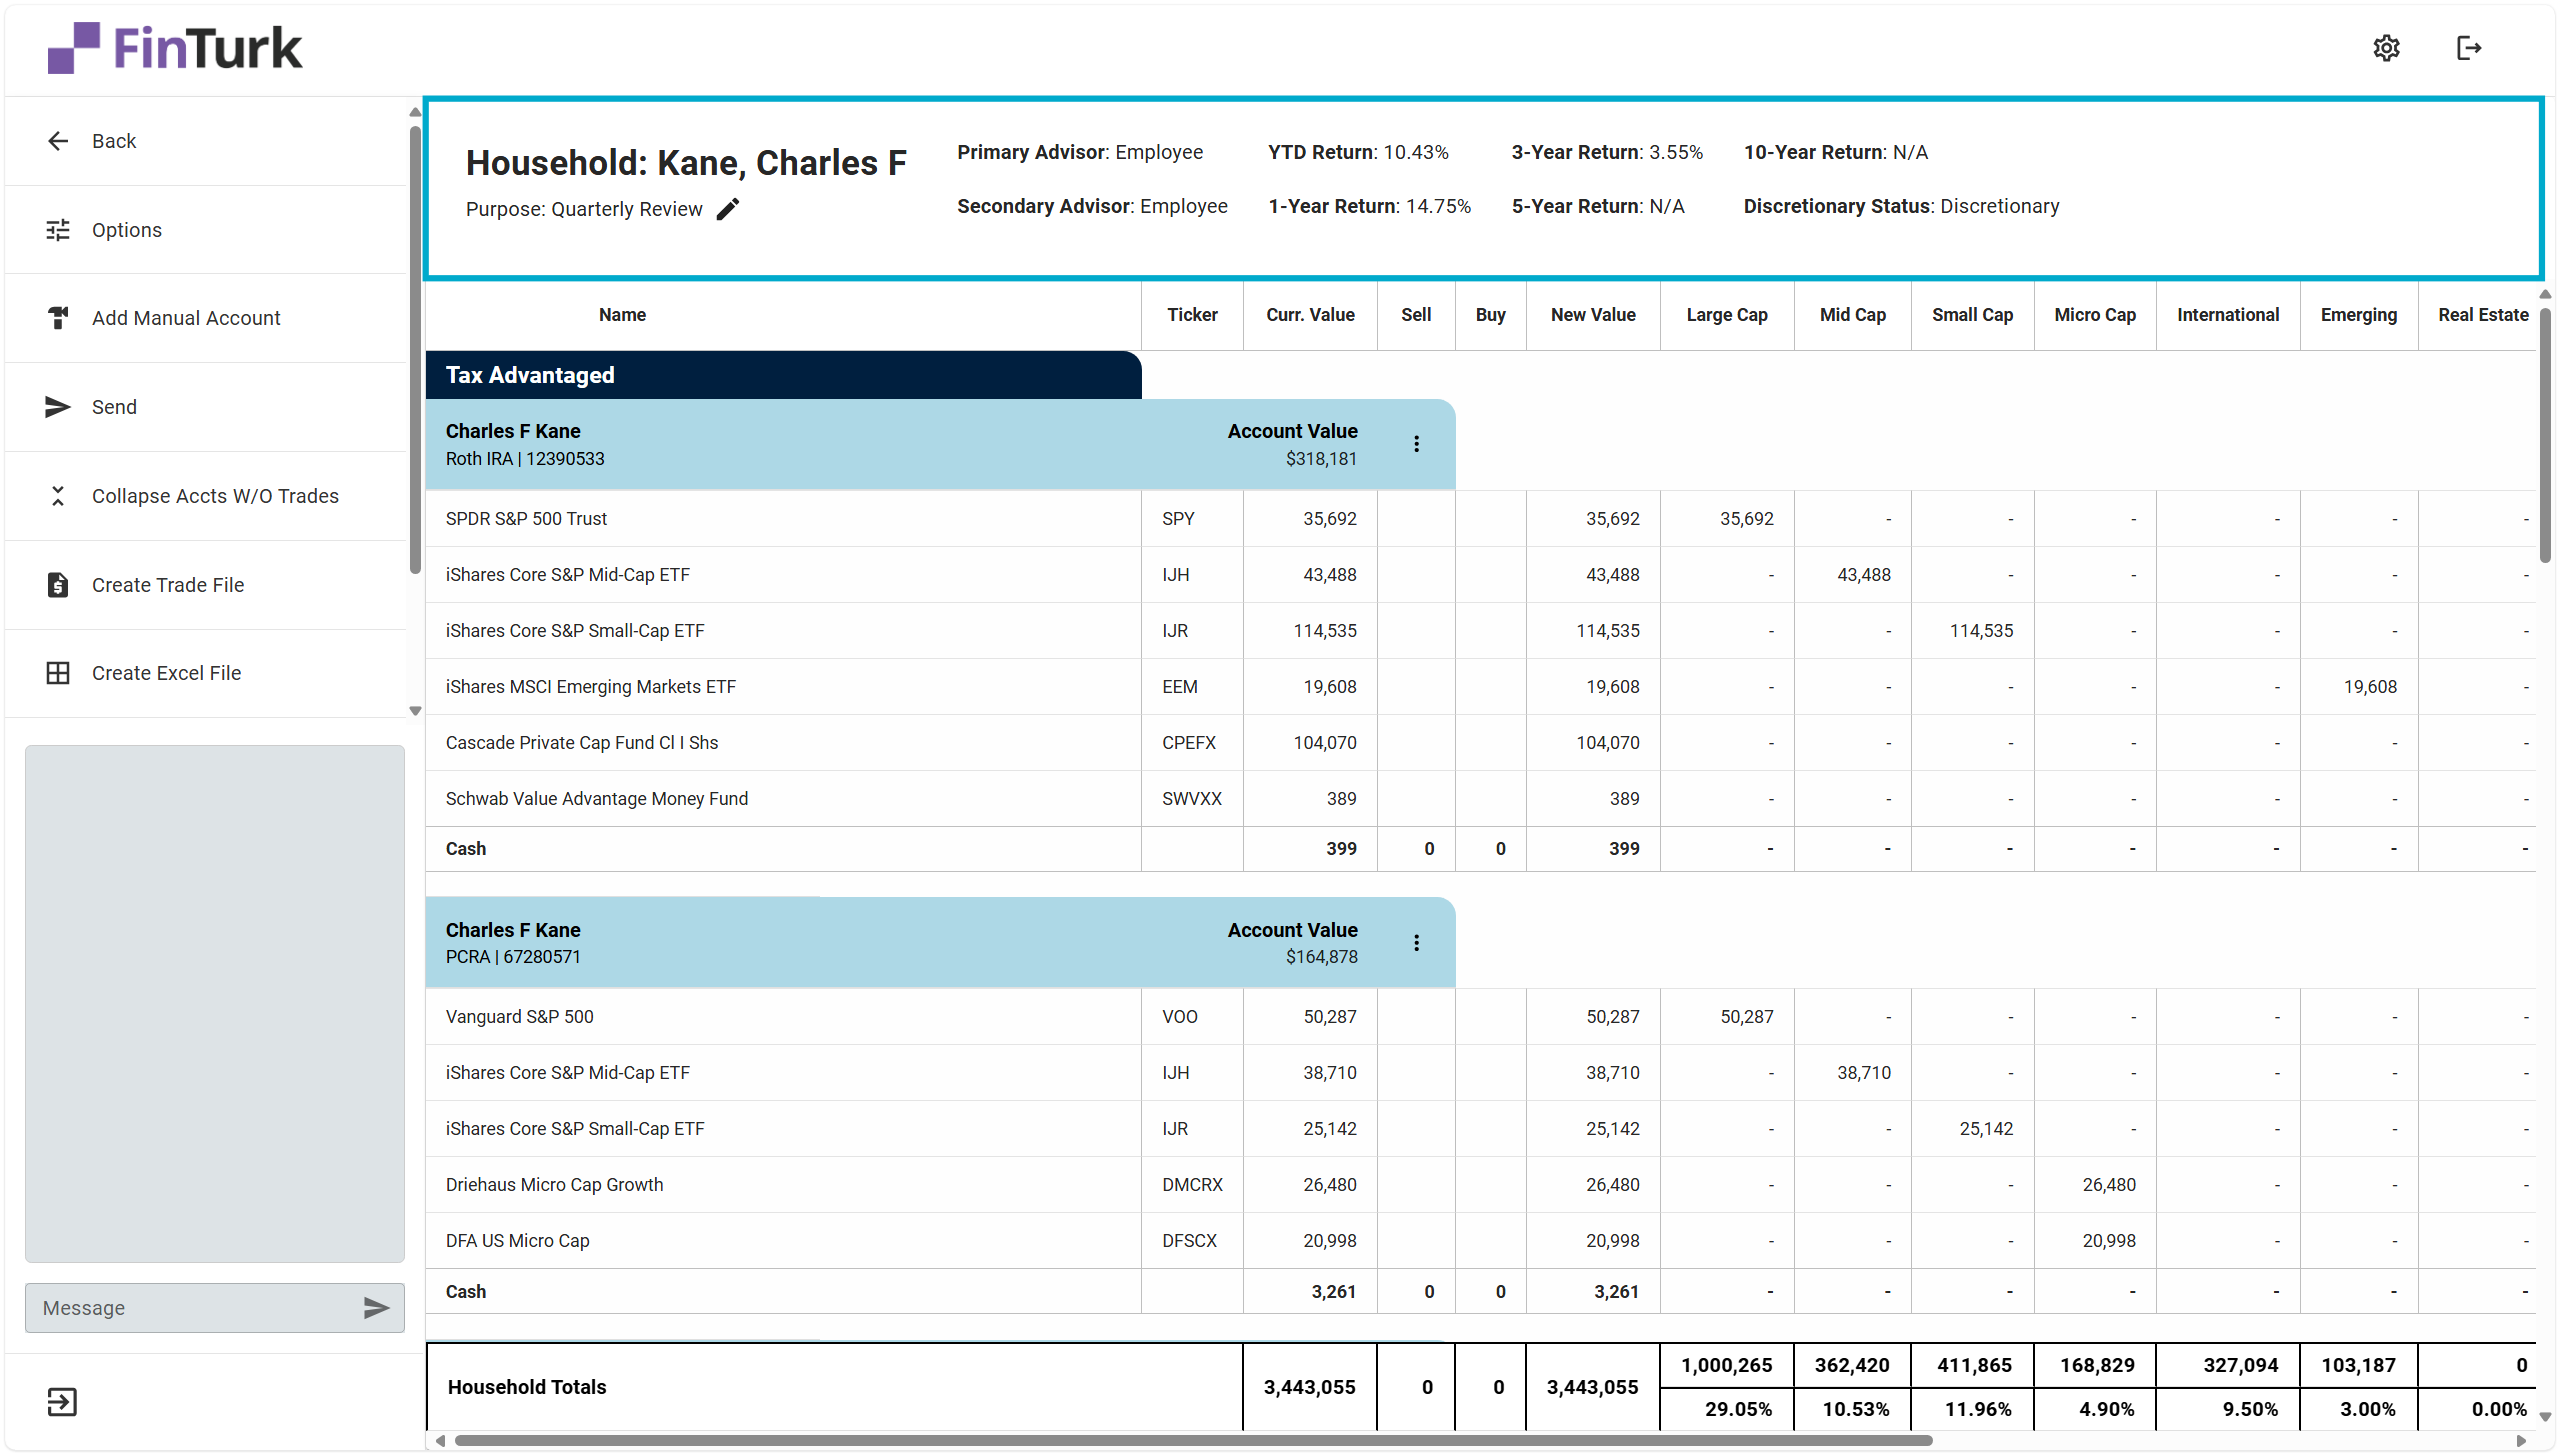
The Infogrid is customizable, meaning you can set up the Infogrid to display information in the format you’d like. To customize the Infogrid, you can look at our documentation about Customizing the Infogrid.
Here, we have the client’s portfolio performance across multiple time periods, their advisory team, and whether or not this account is discretionary.
Also on the Infogrid is the Purpose you set when you first created the Allocation. You can edit the purpose anytime by clicking on the pencil icon.
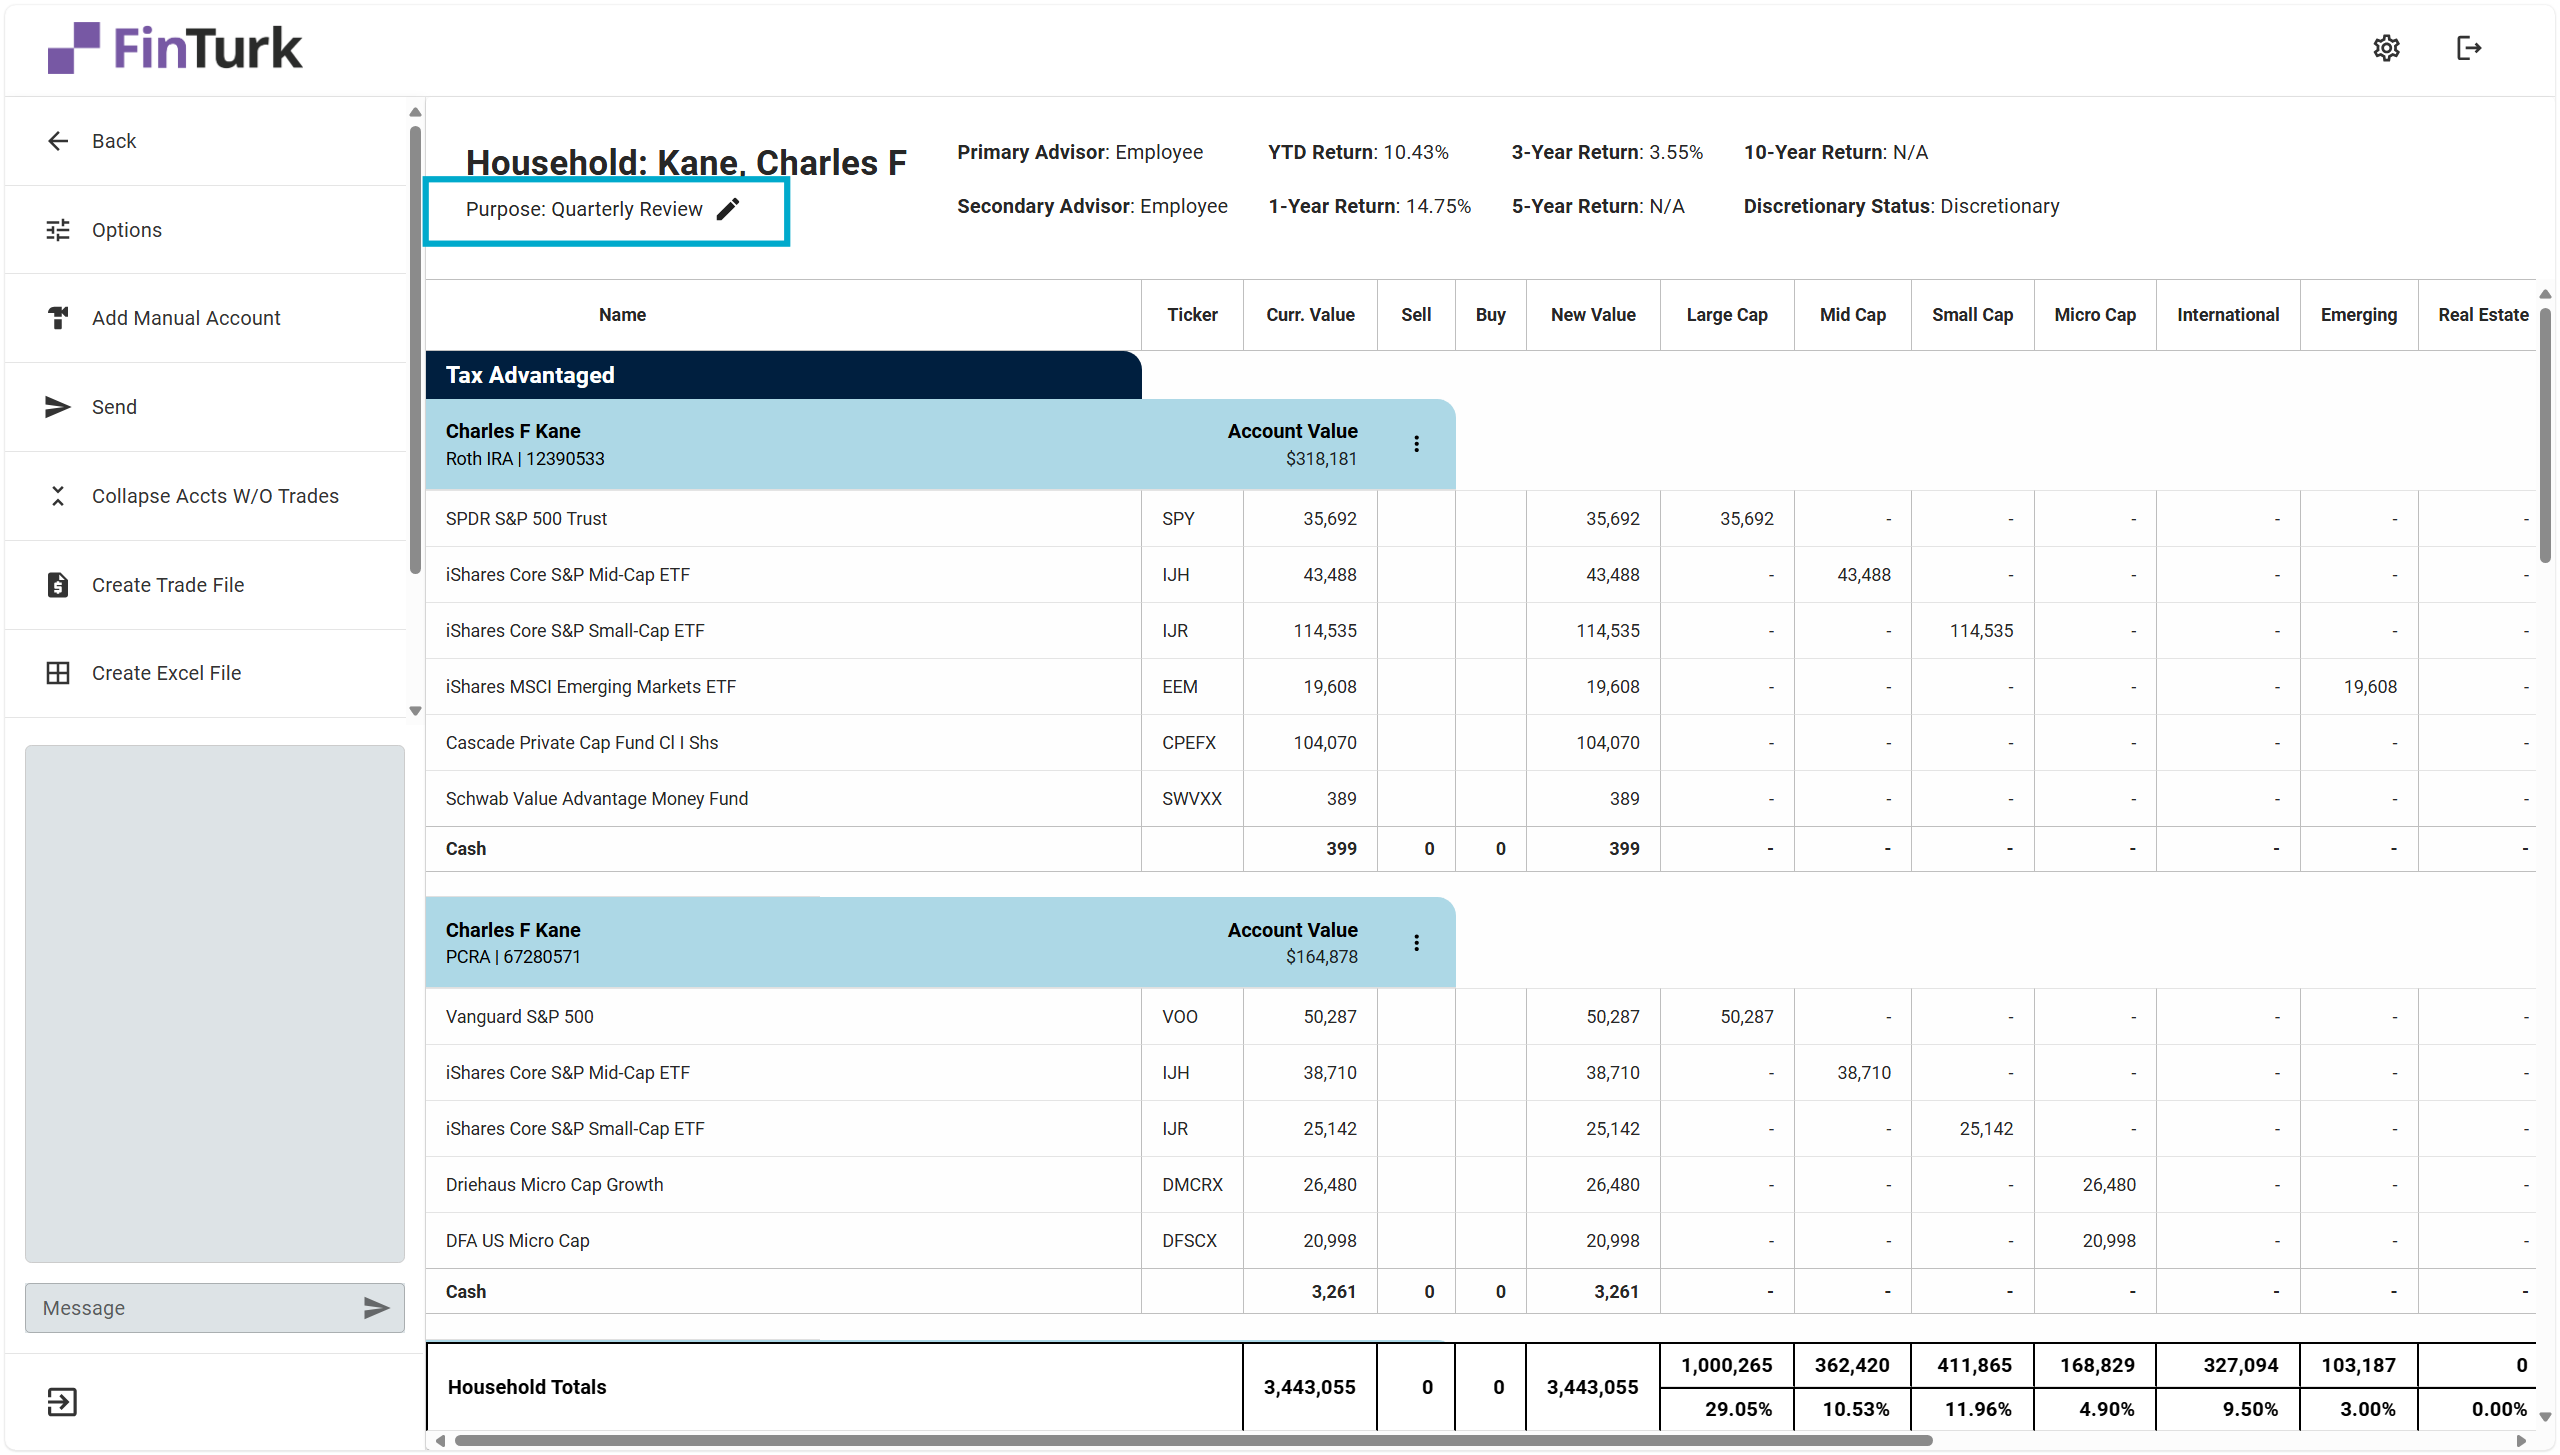
Finally, the client’s name appears in the top left corner of the Infogrid. To navigate to their Client Profile, you can simply click on the client’s name. And if you’ve created any trades on the Allocation, these trades will be saved if you navigate away from the page, so no worries about having to save your work.
Now that we’re comfortable with the Infogrid, we can dive into the main portion of the Allocation tool - the Allocation itself.
The Allocation
Account Families
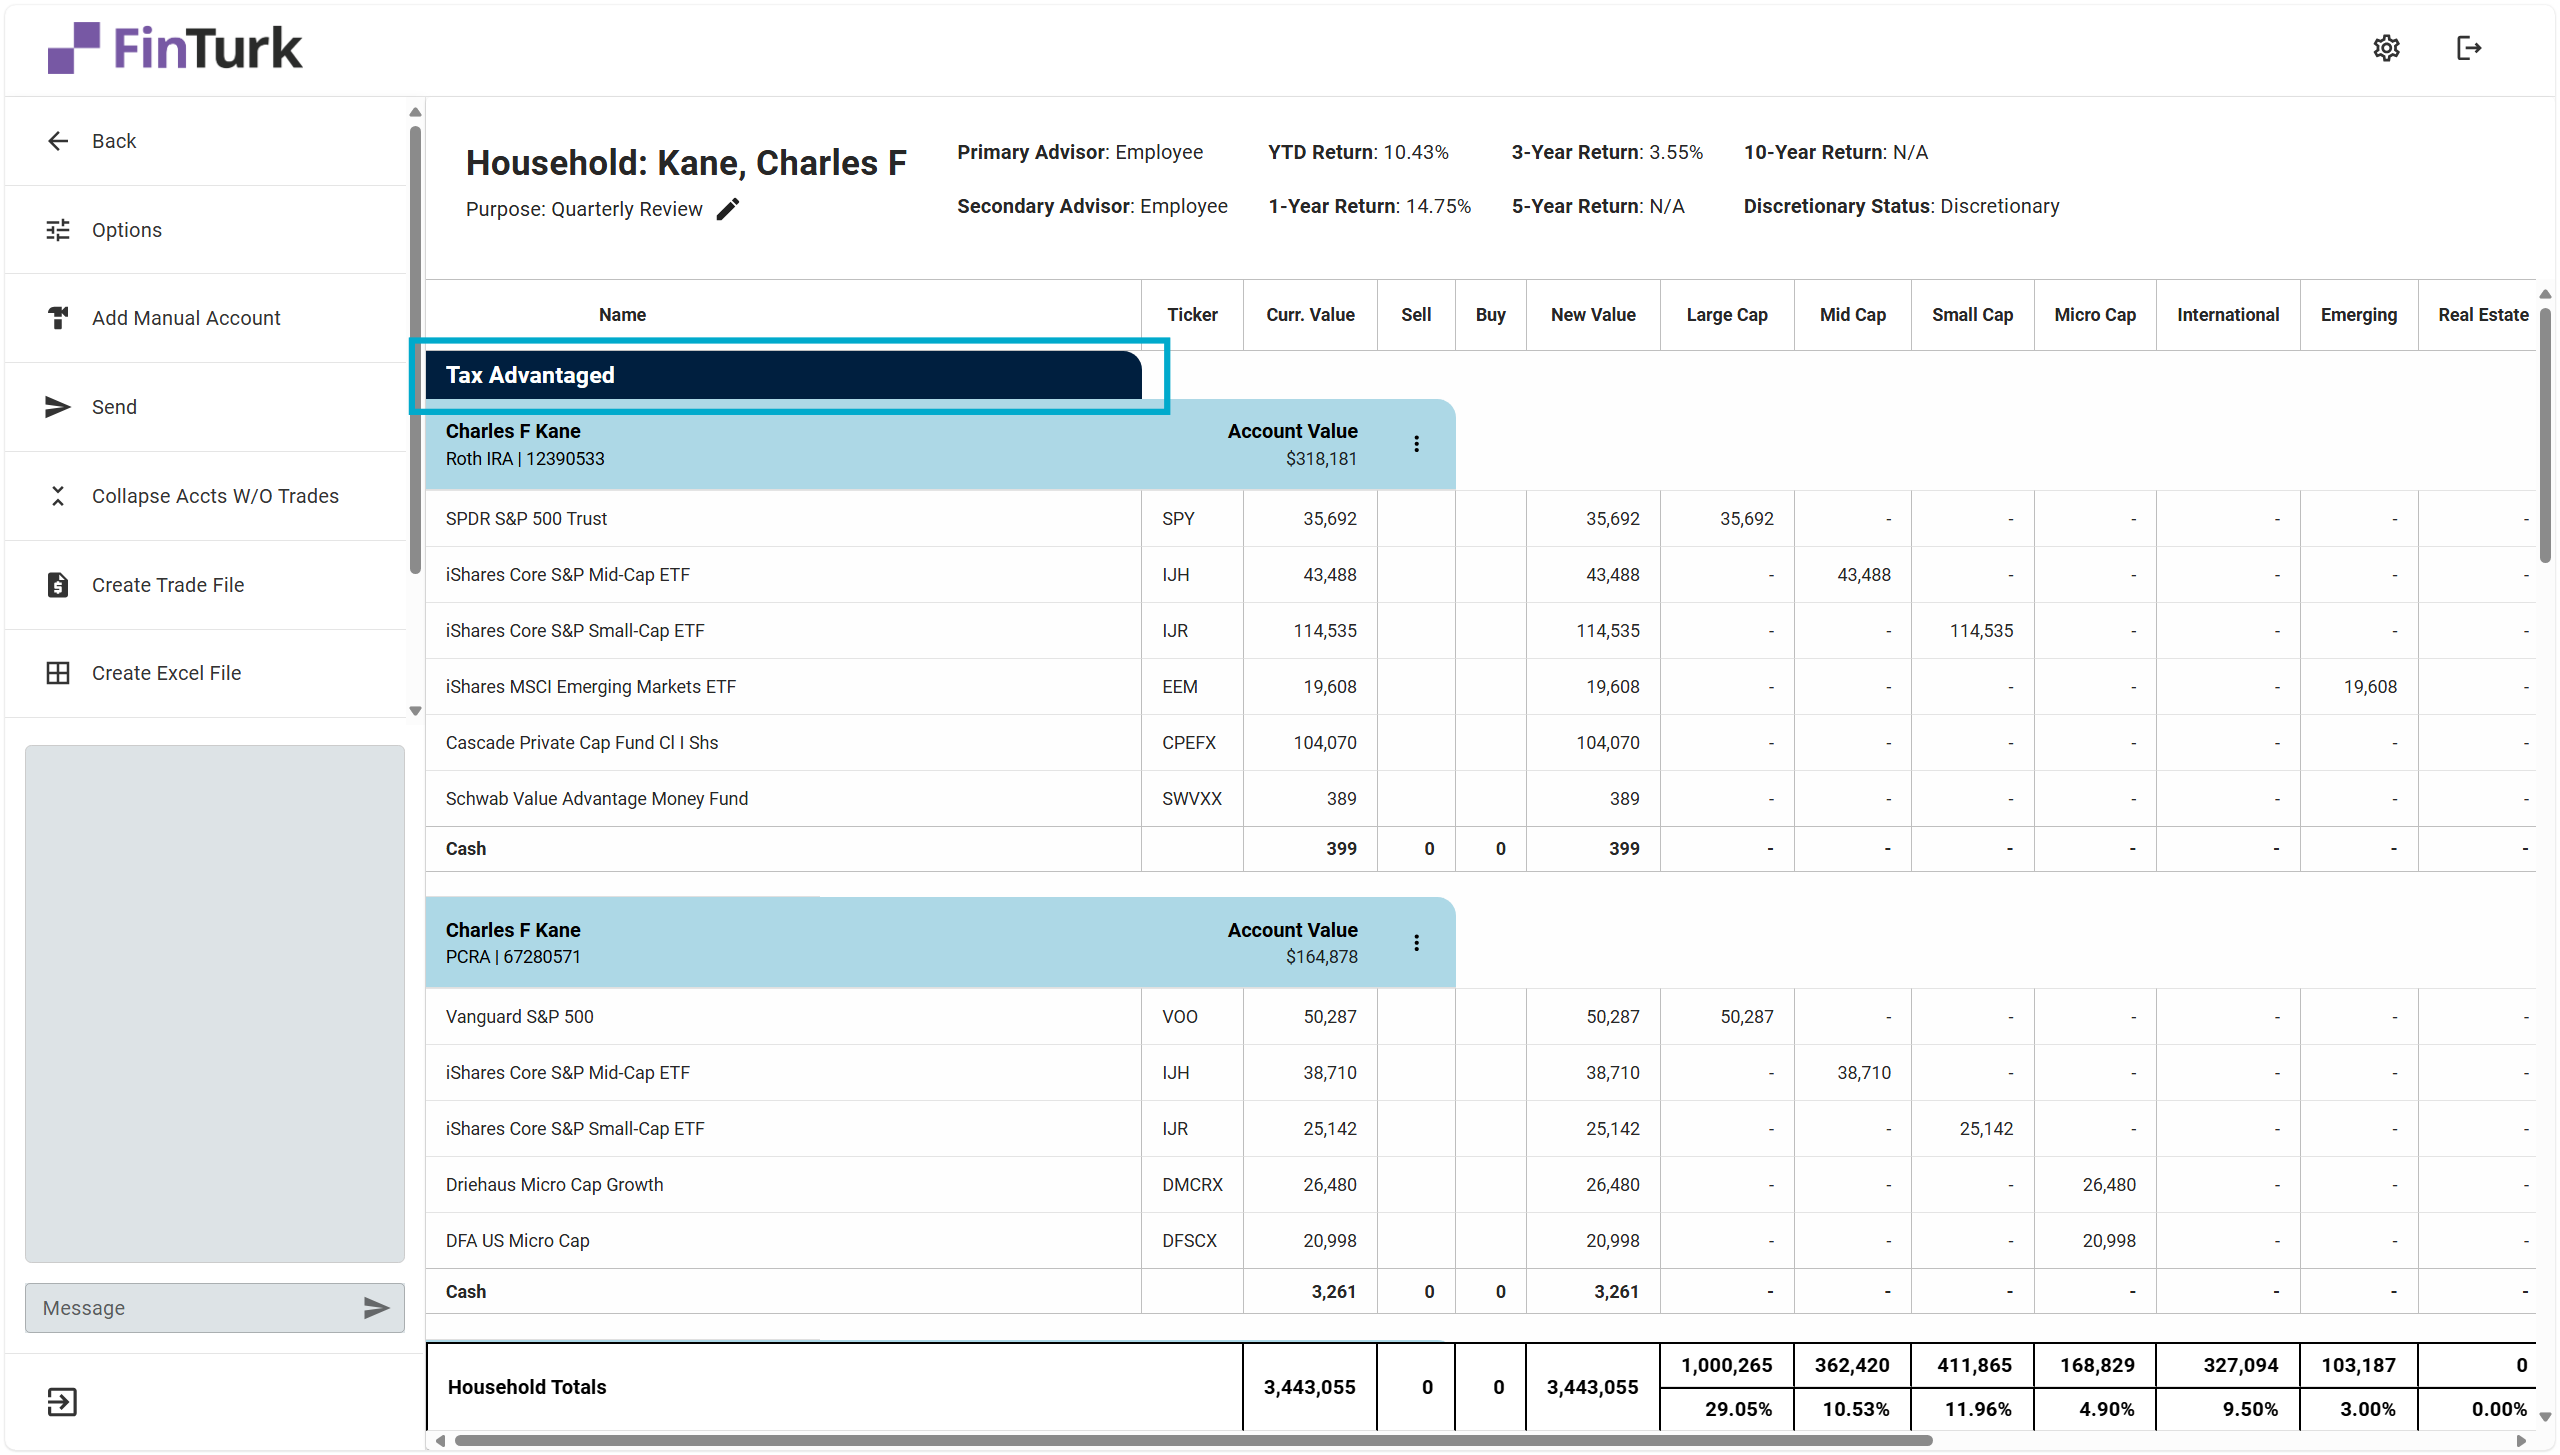
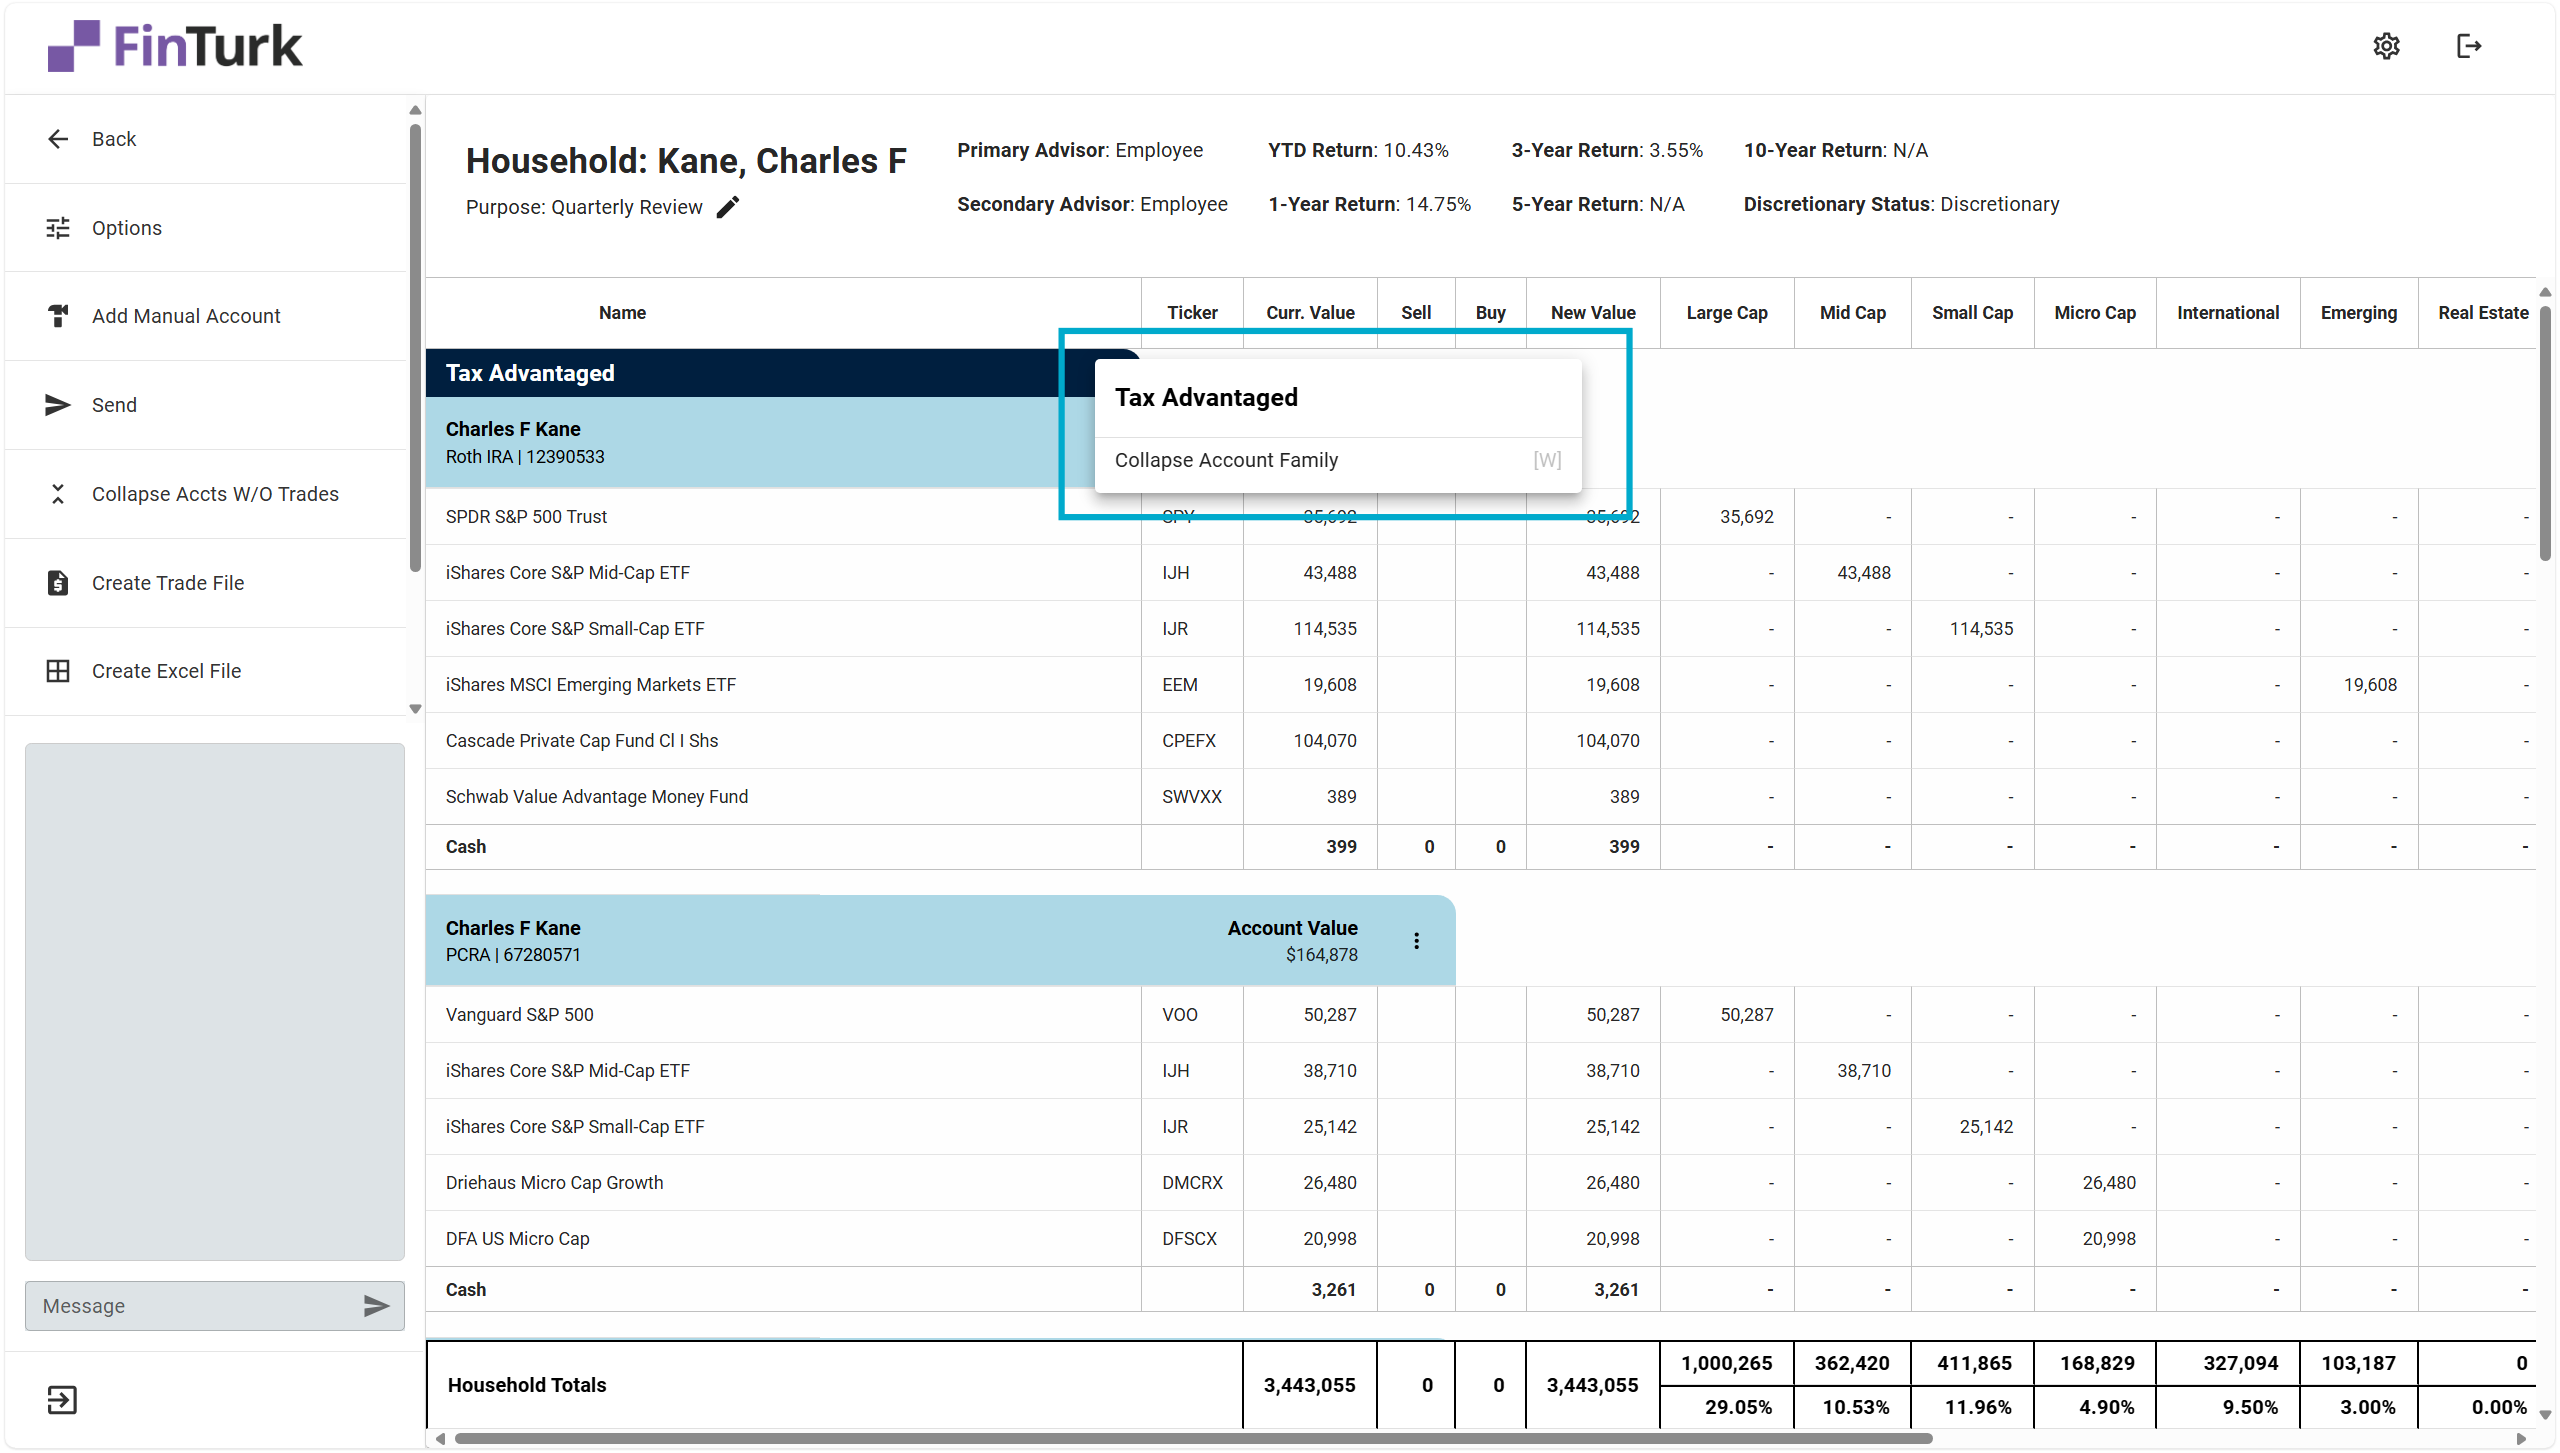
Here, we have the Account Family “Tax Advantaged,” which contains the client’s Roth IRA and 401(k). If they opened any additional accounts - like a traditional IRA - this would also appear under the “Tax Advantaged” Account Family.
If a client has an account that does not fall under an Account Family, it will default to the “Uncategorized” Account Family. You can customize which accounts fall under which Account Family in the Settings tab.
You can collapse an Account Family by right-clicking on the Account Family and selecting “Collapse Account Family.” To uncollapse the Account Family, you can right-click on the collapsed account family and select “Uncollapse Account Family.”
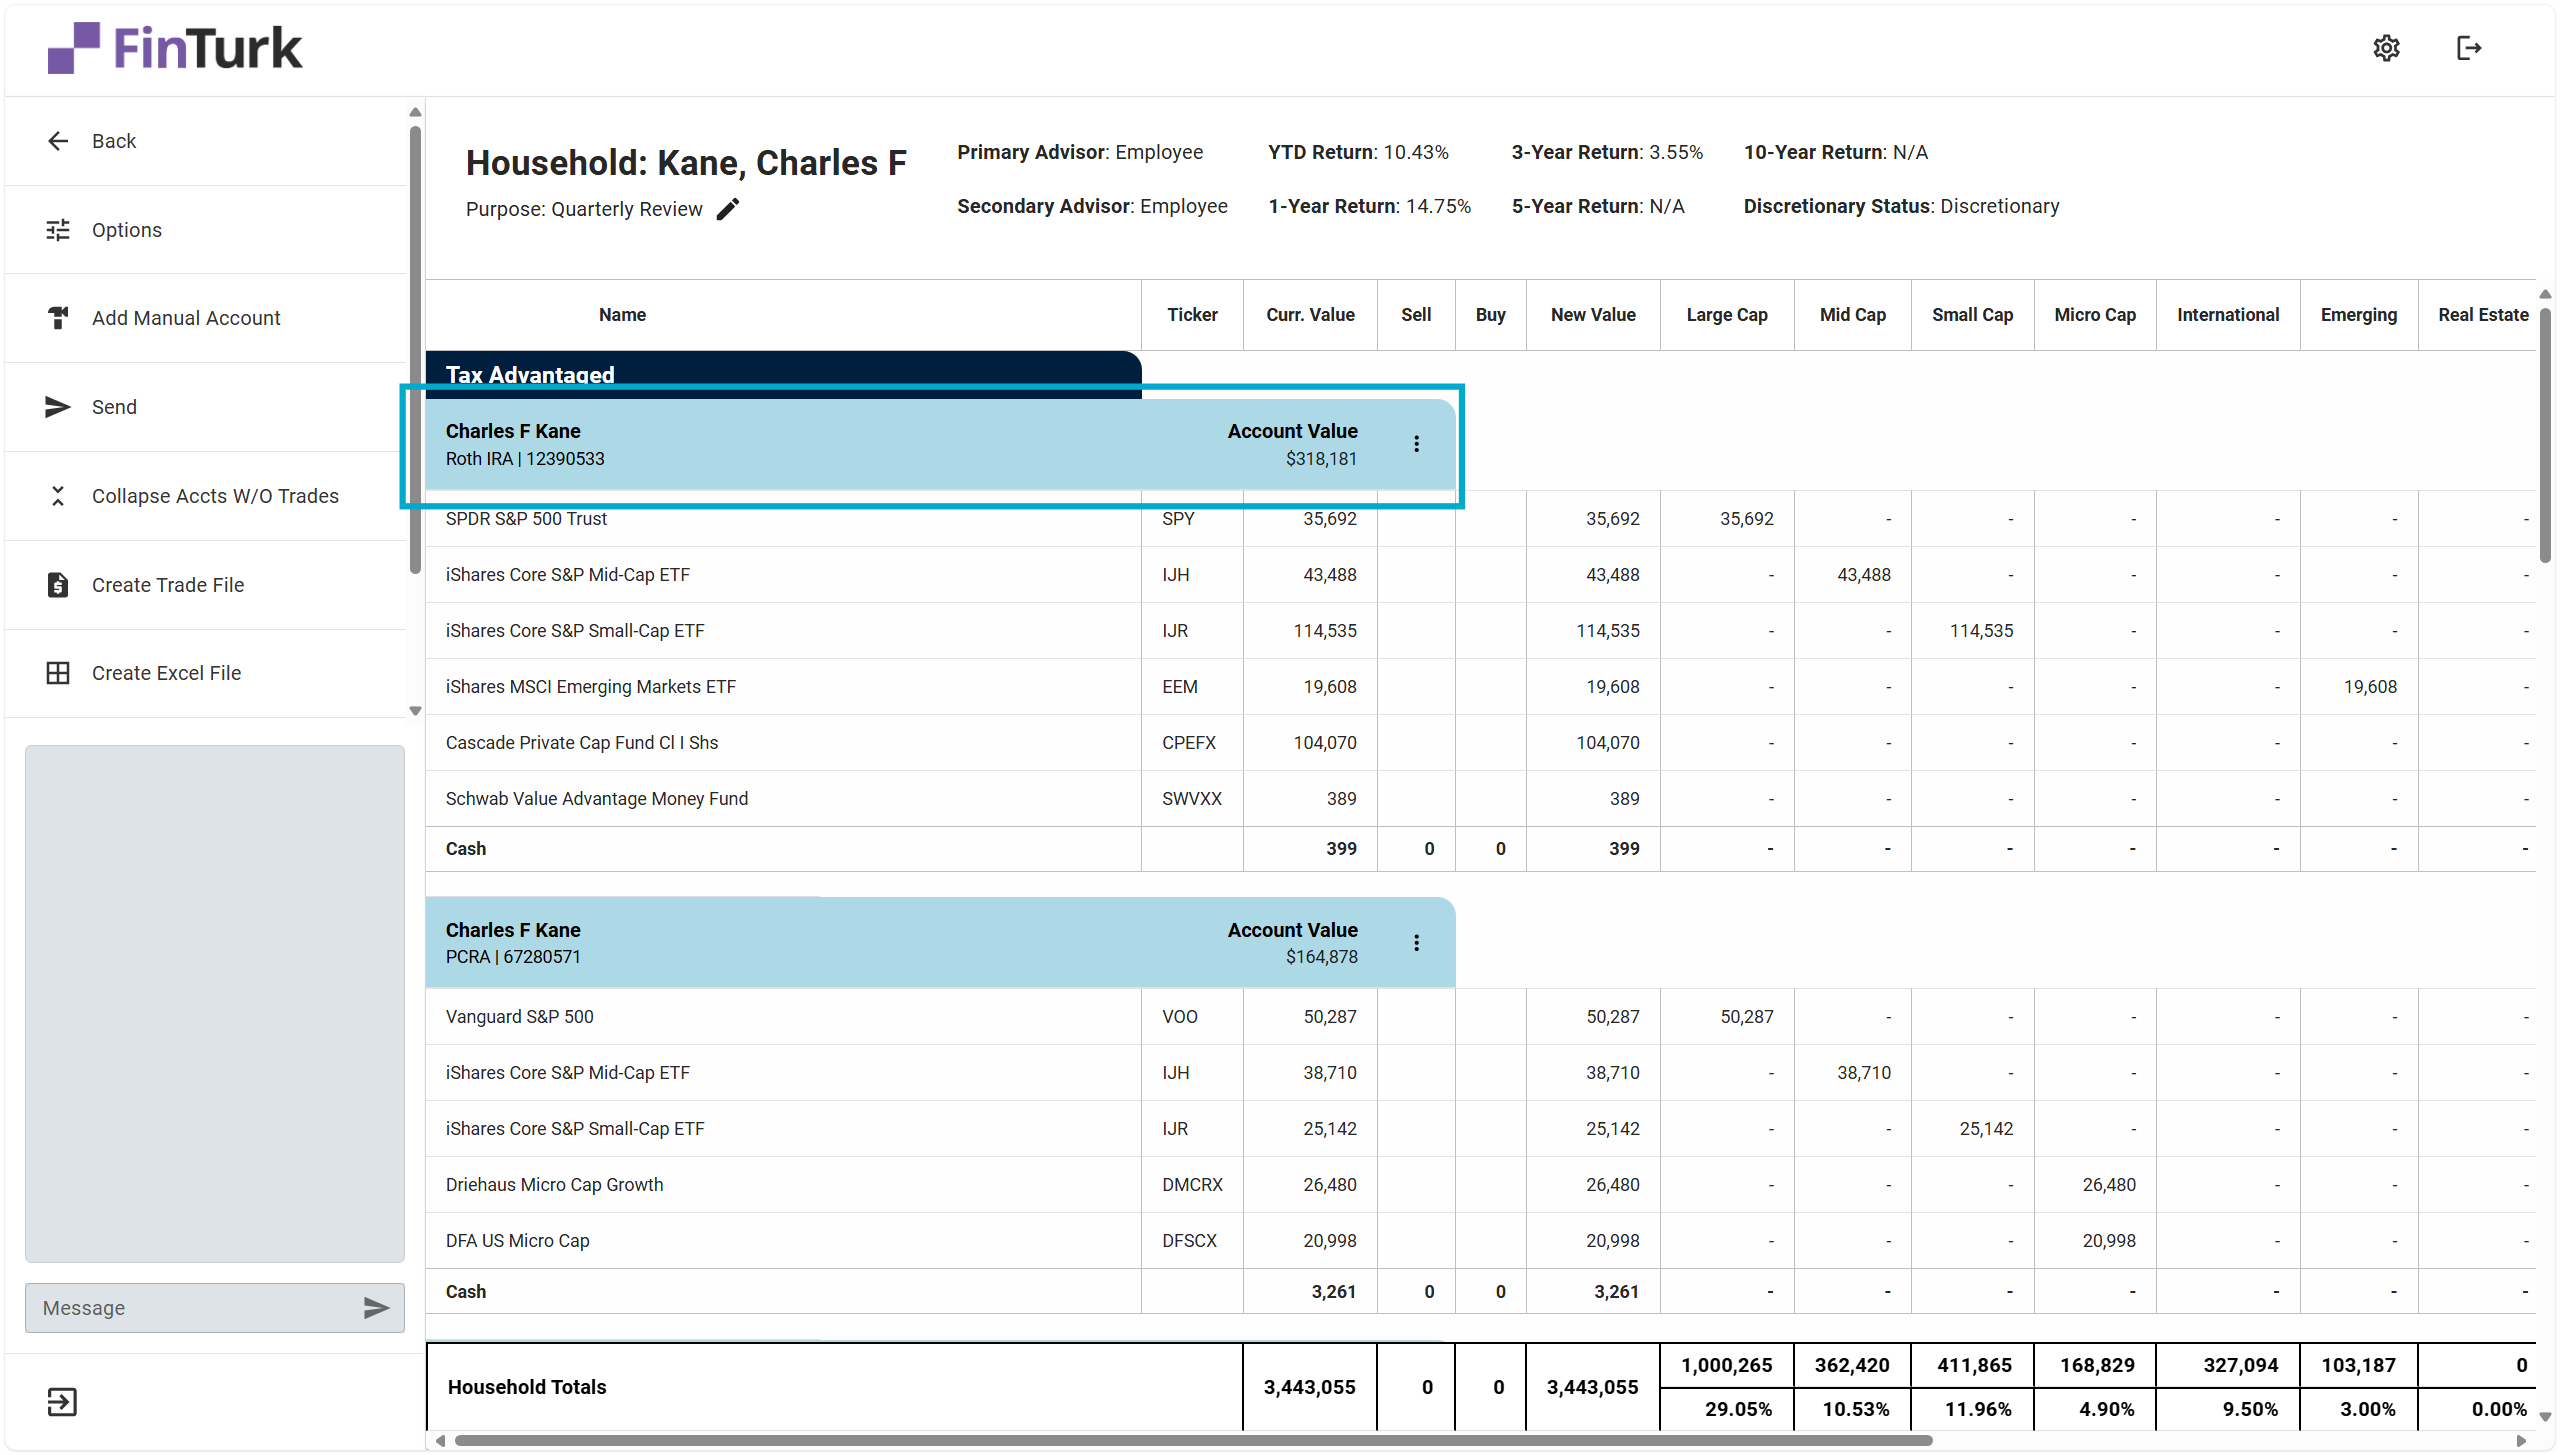
Accounts are displayed within each Account Family, and if a client does not have an account in a specific Account Family, the Account Family will not show up.
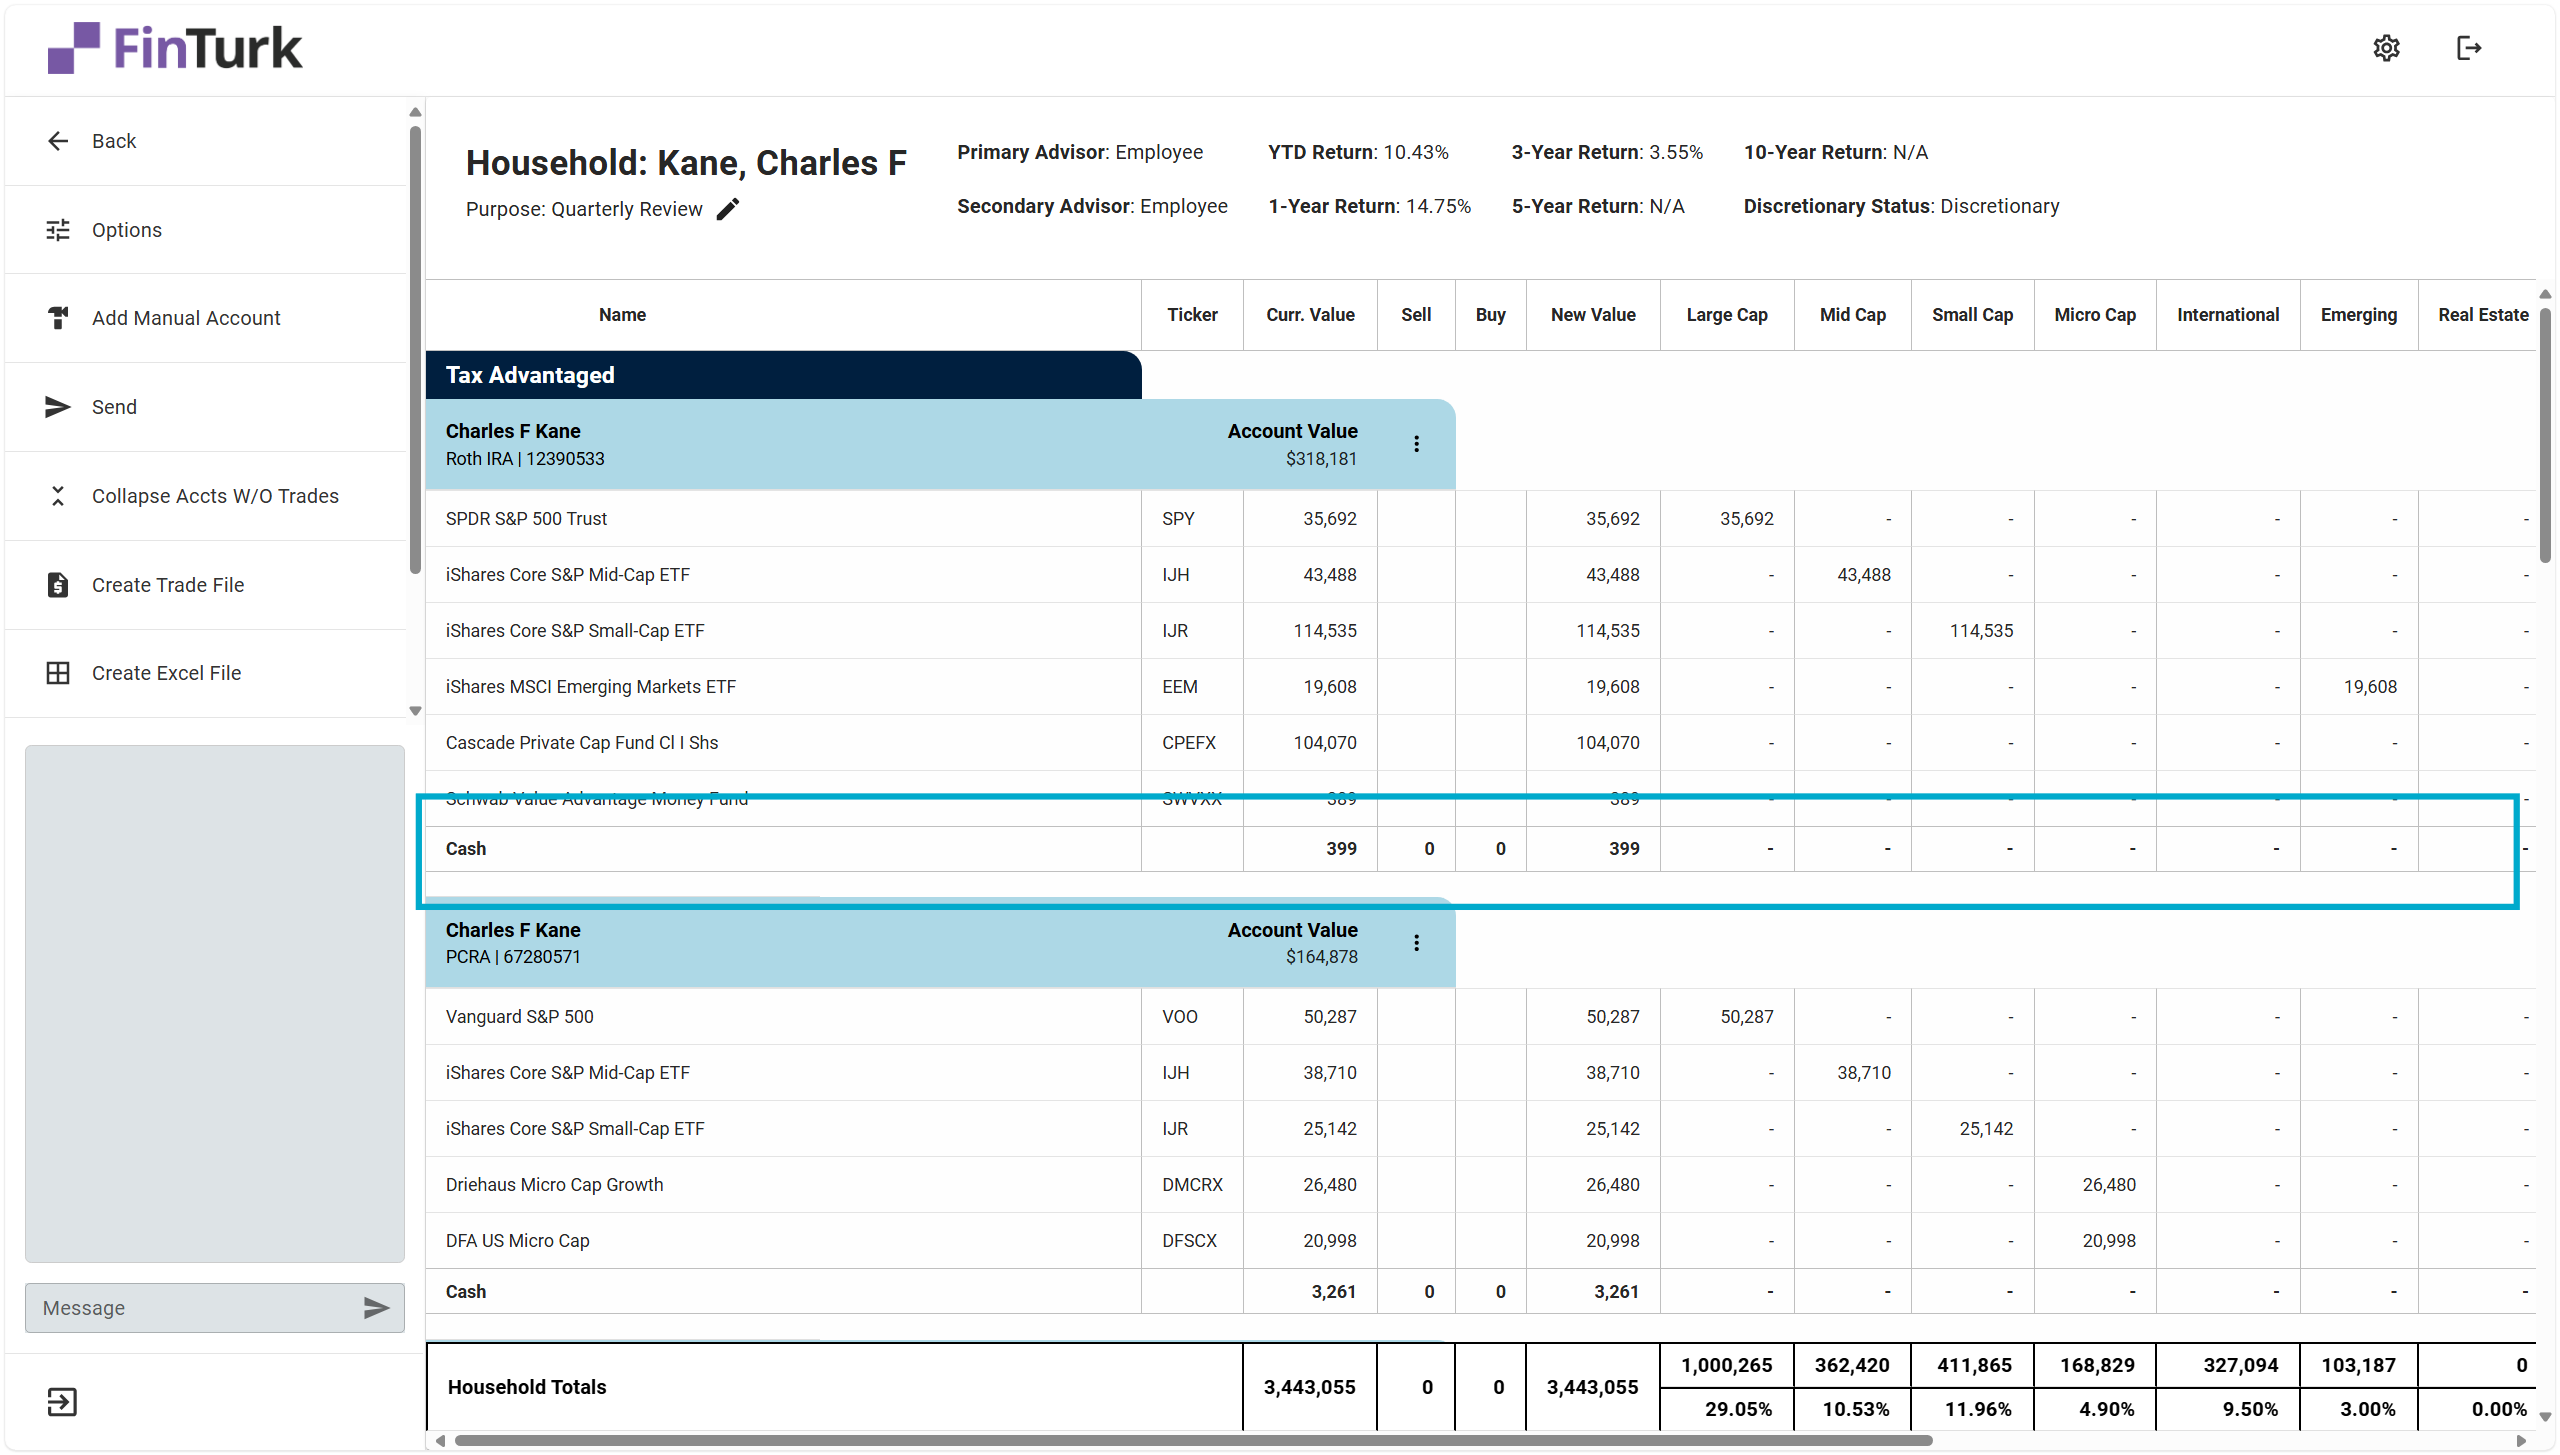
At the bottom of each Account Family is a row displaying the totals in each account. Totals show the total value of the account and the total value of assets by asset class in both percentages and in dollars.

Accounts
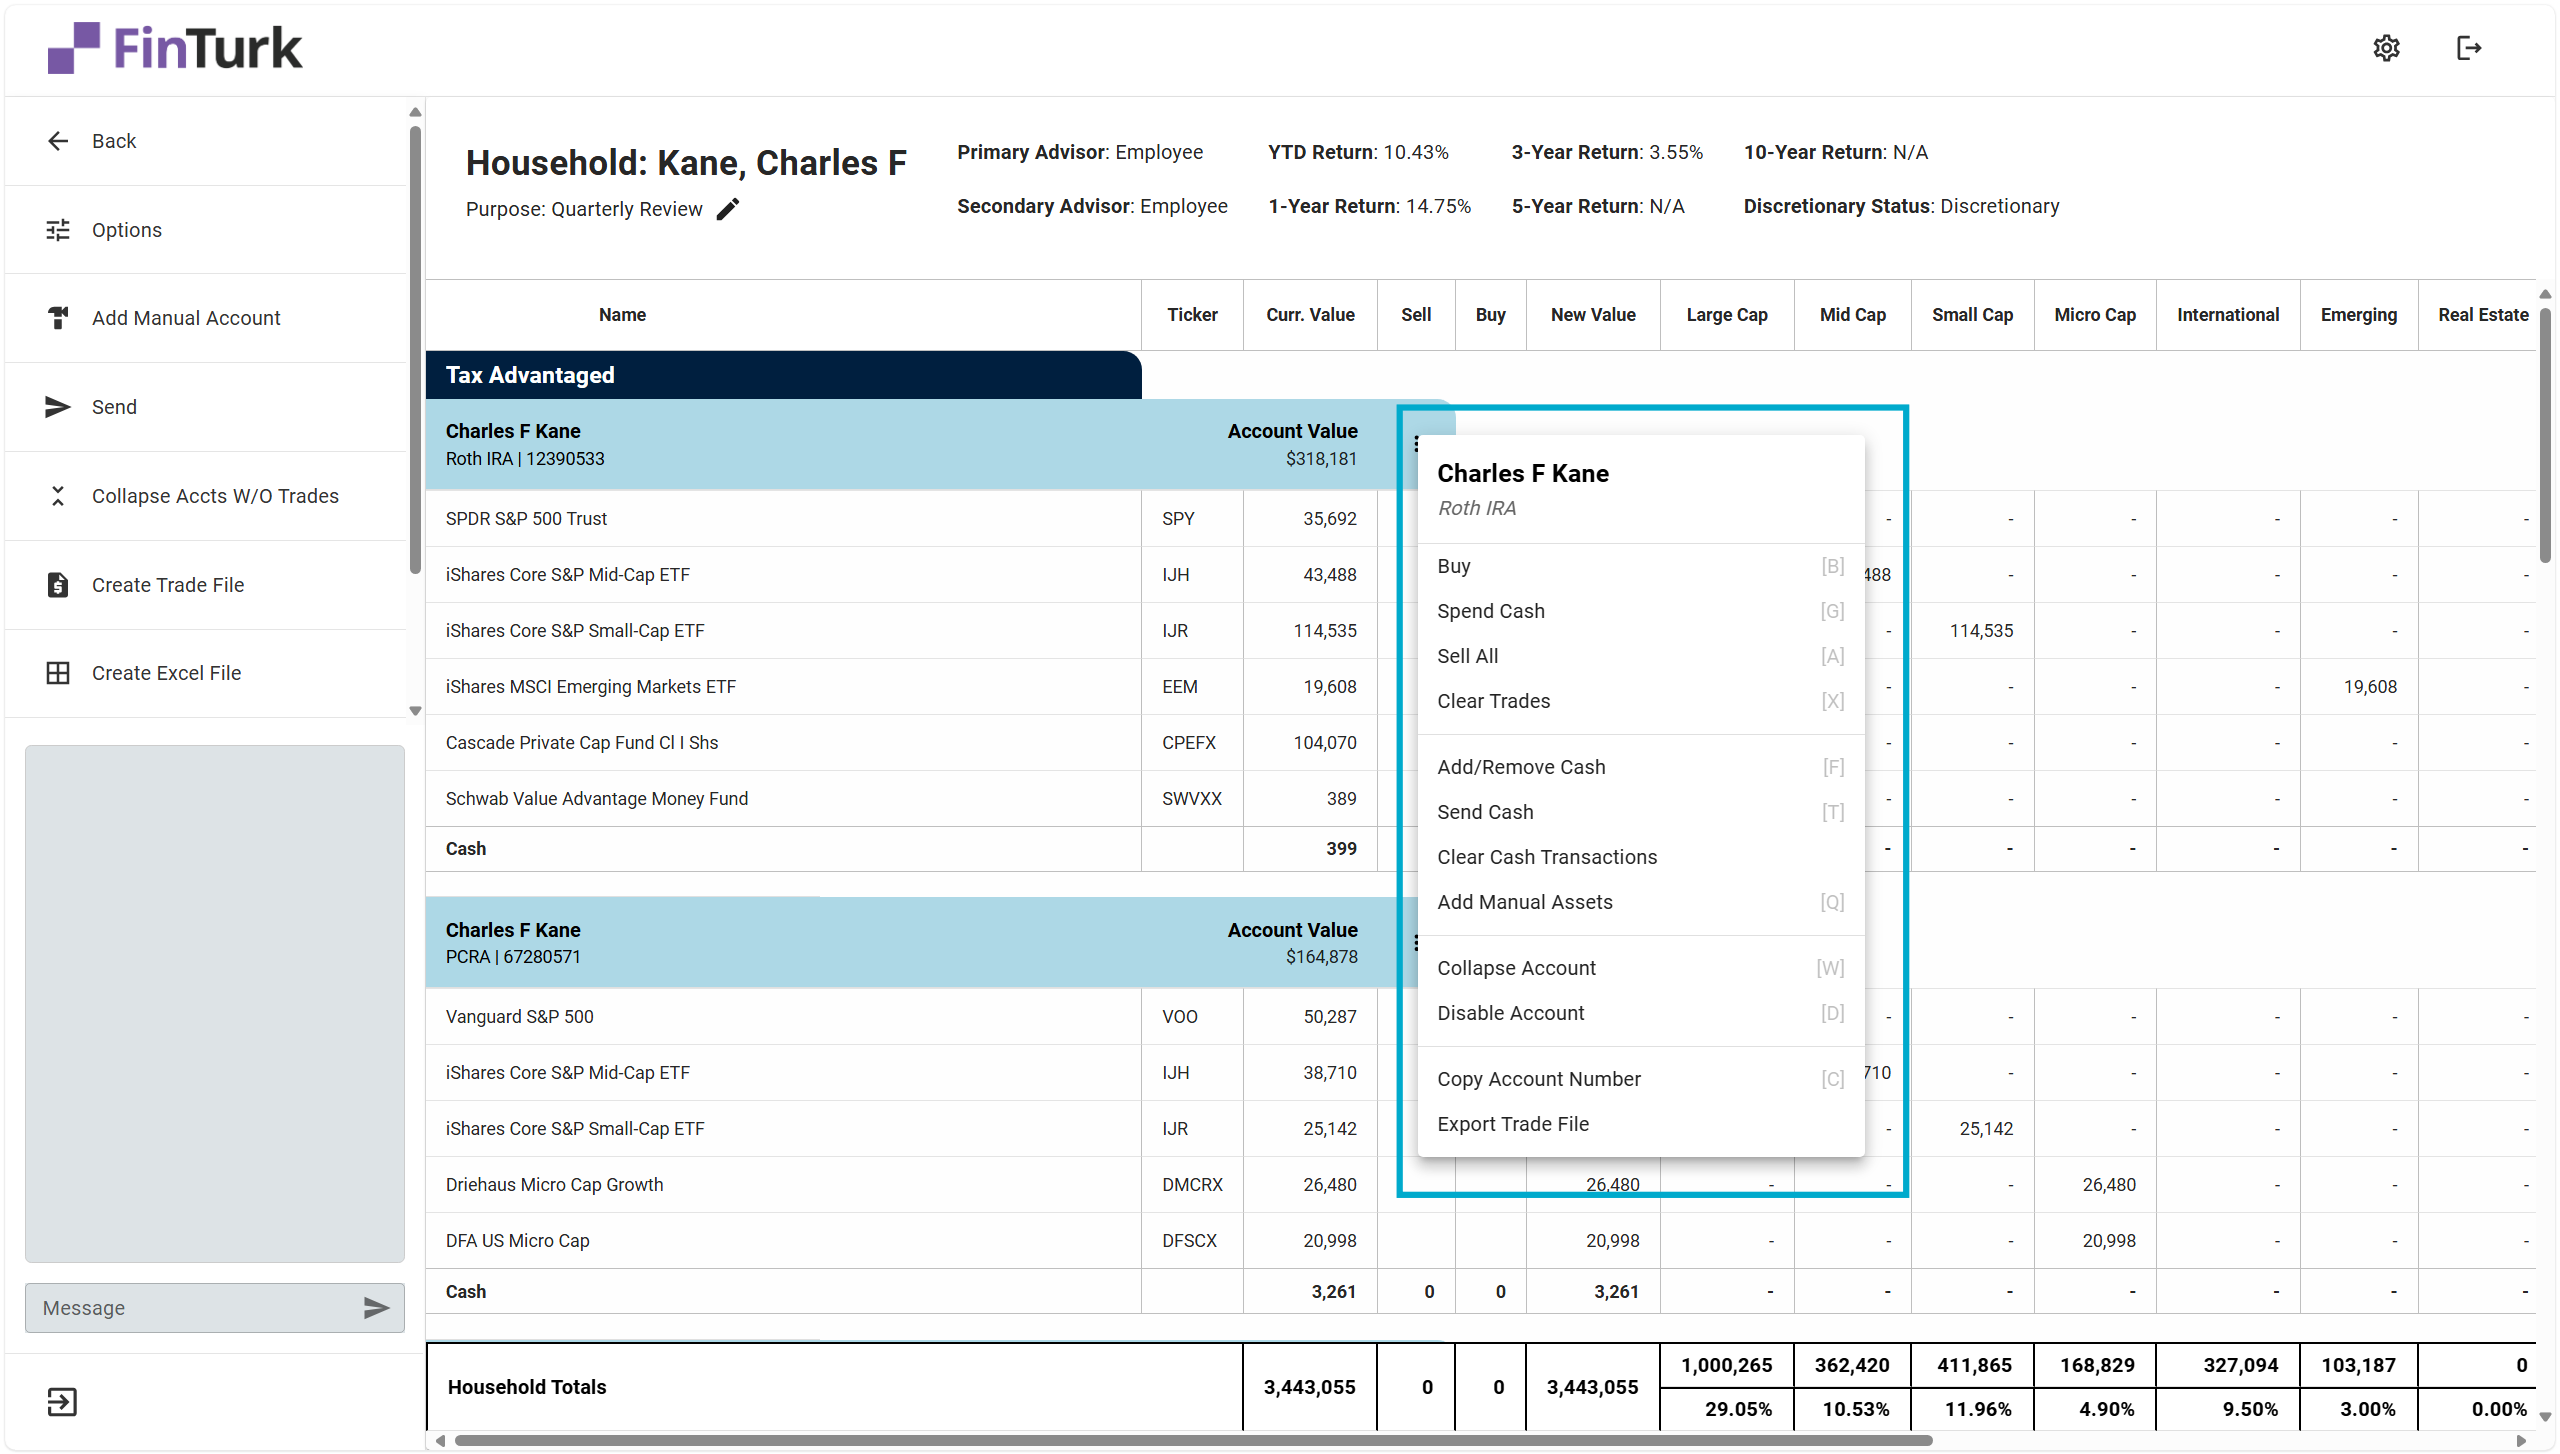
These are the actions you can take on an account level:
- Buy: Creates a buy order for an asset within the account. Opens up a “Buy” dialogue.
- Spend Cash: Spend all the available cash in the account on a single security. Opens up a “Buy” dialogue prepopulated with 100% of the account’s cash.
- Sell All: Creates sell orders selling 100% of each security in the account. Use this when you’re liquidating an entire account.
- Clear Trades: Clears any trades proposed on the account.
- Add/Remove Cash: Allows you to add or remove hypothetical cash to an account. This is useful when proposing an allocation of client capital before the funds have actually hit the account or when modeling what an account would look like after funds have been removed from the account.
- Send Cash: Allows you to hypothetically transfer cash between accounts. This is useful when you’re recommending money movements between accounts.
- Clear Cash Transactions: If you have used the “Send Cash” feature from this account, it will delete the “Send Cash” transaction from both this account and the account that was receiving the cash.
- Add Manual Assets: Opens a window allowing you to add a manual asset to the account. This is useful if your data source does not have pricing or position information about a security this account holds.
- Collapse Account: Collapses the account. When the account is collapsed, it will show up as “Uncollapse Account” instead.
- Disable Account: Disables the account. An account that is disabled will not permit the user to take any actions other than re-enabling the account. This can be useful if the client has an account they prefer to self-manage.
- Copy Account Number: Copies the account number to your device’s clipboard. You can then paste this number in other places.
- Export Trade File: Creates a single trade file containing the trades only for this account and downloads it to your computer.
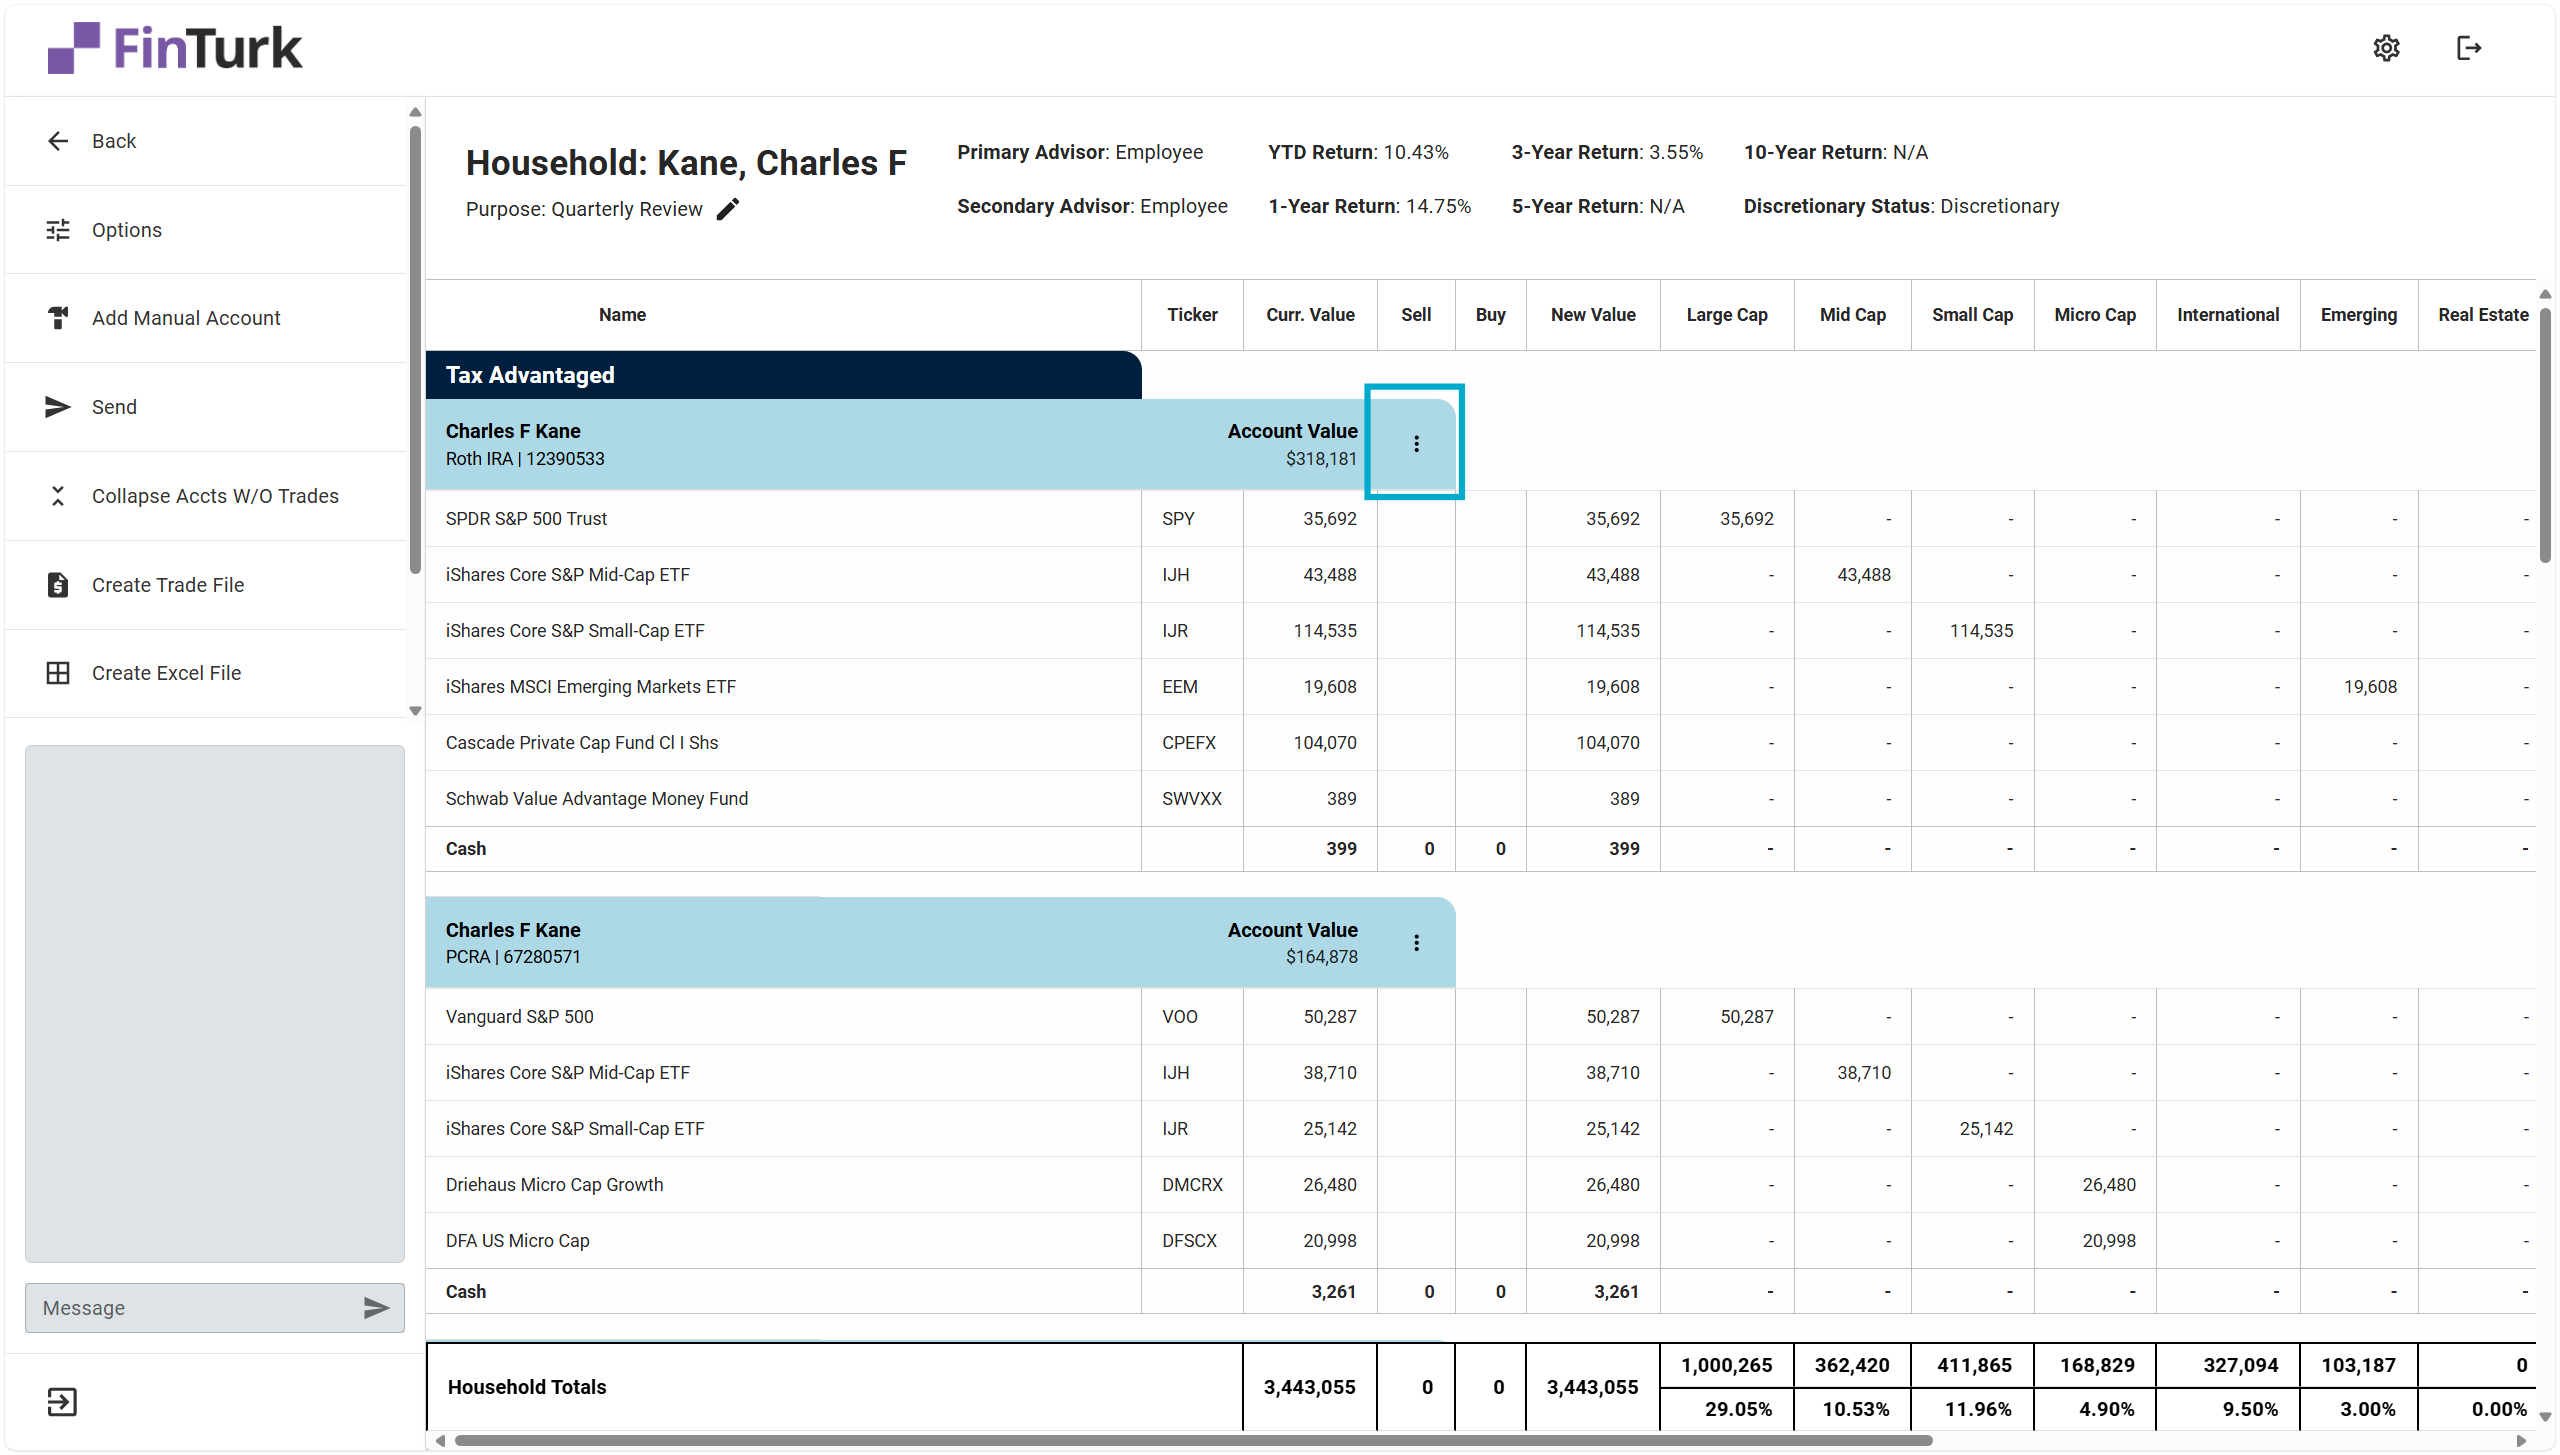
Many of the above actions are also available from the “Account Quick Actions” menu. You can find the “Account Quick Actions” menu by hovering your mouse over the account.
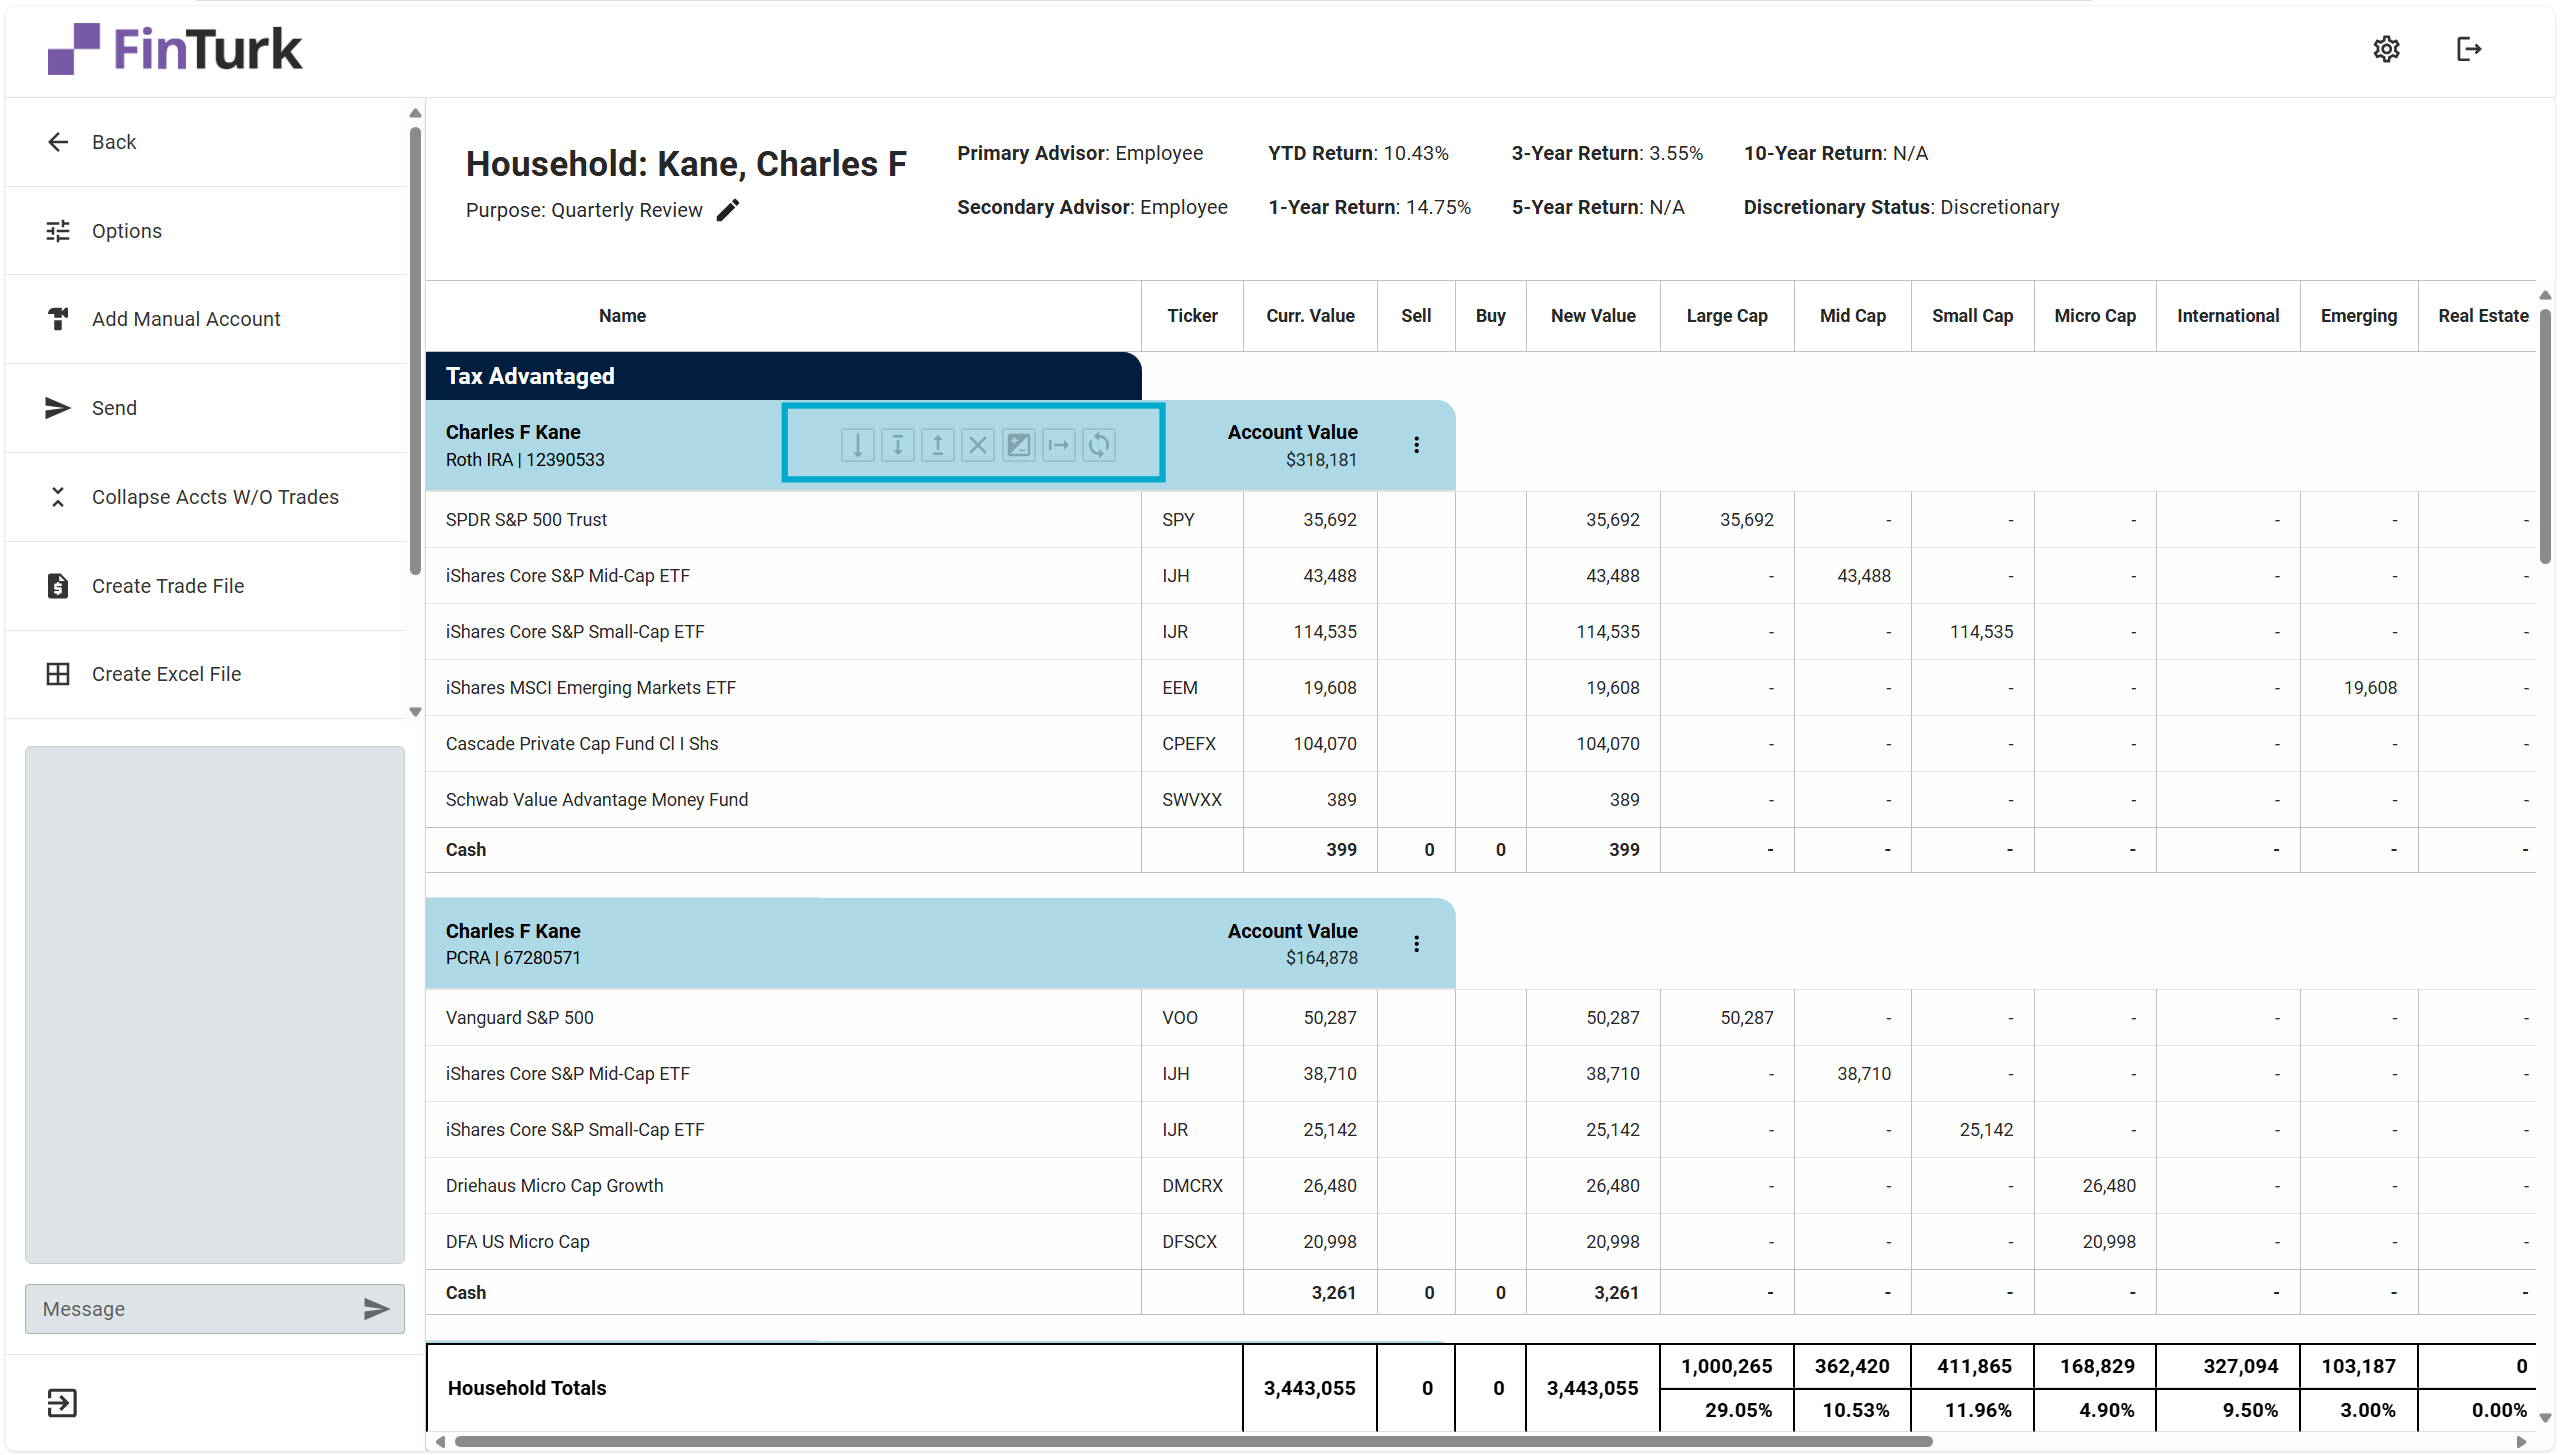
Clicking on an icon will allow you to take an action on the account level without opening up the Account Actions dropdown. It’s for users who are comfortable with the platform and want to move a little more quickly.
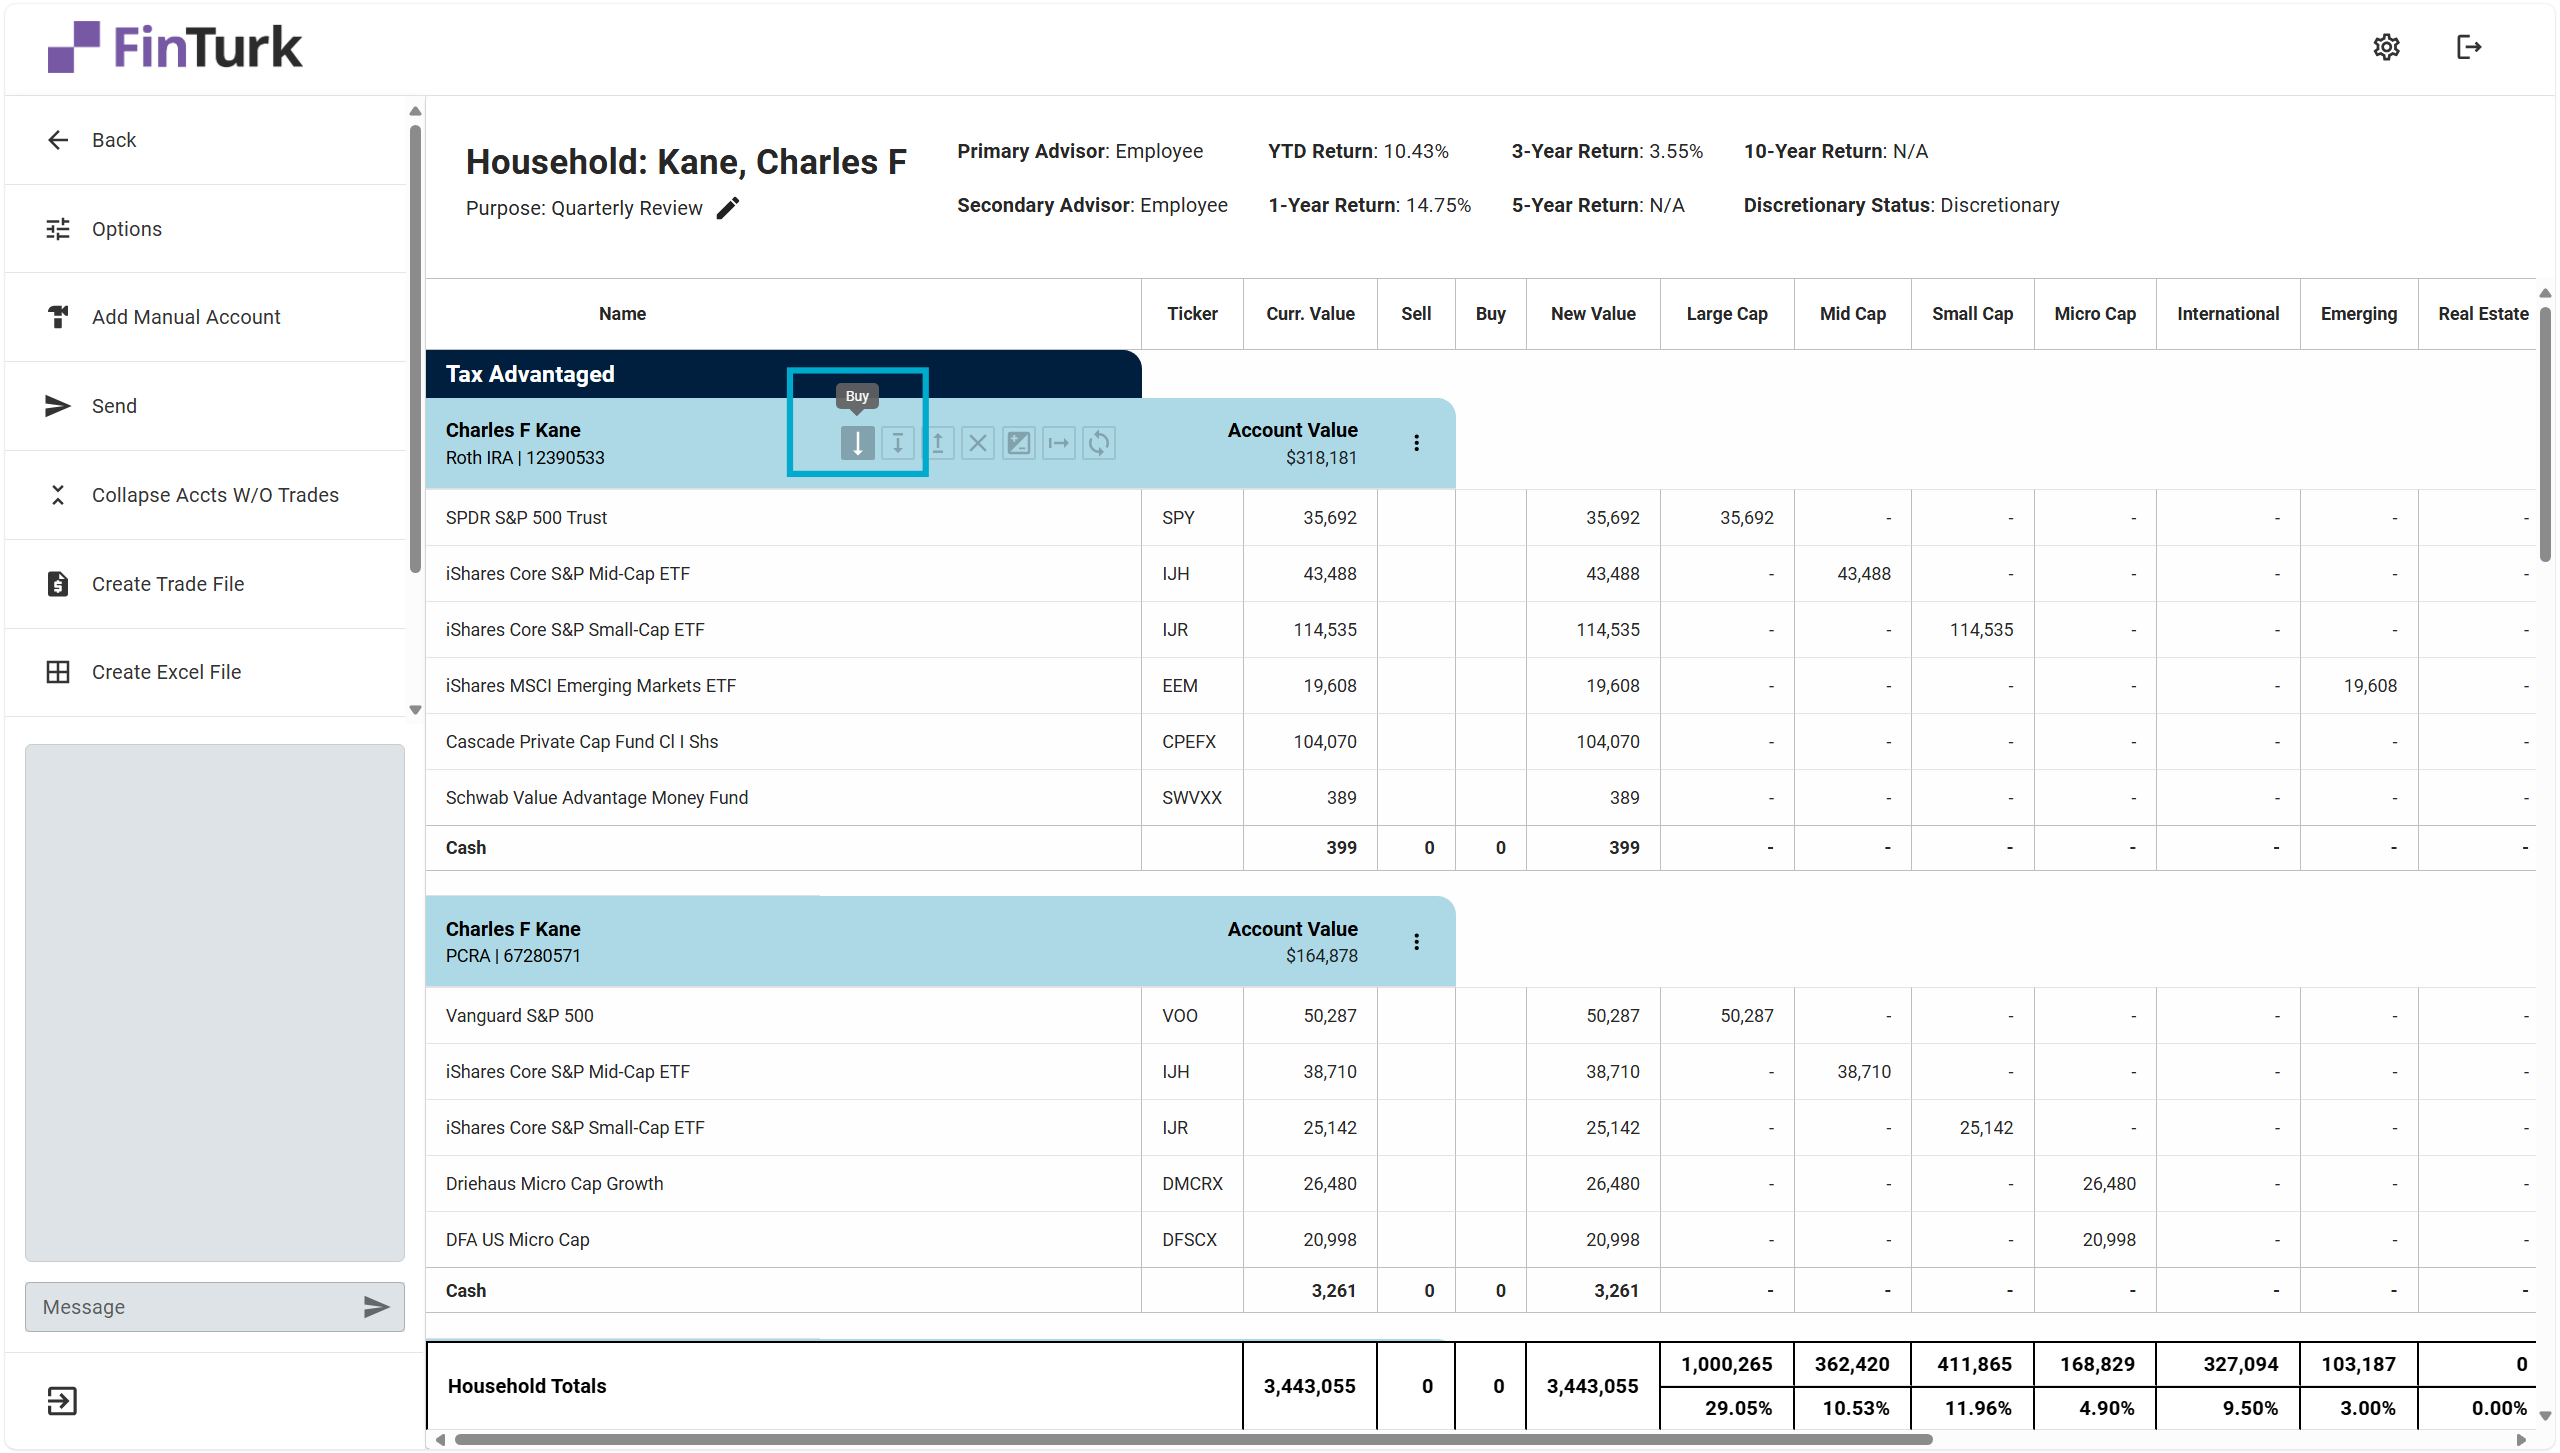
Hovering over an icon on the Account Quick Actions menu will also display a quick tooltip showing you which action the icon controls.
Assets
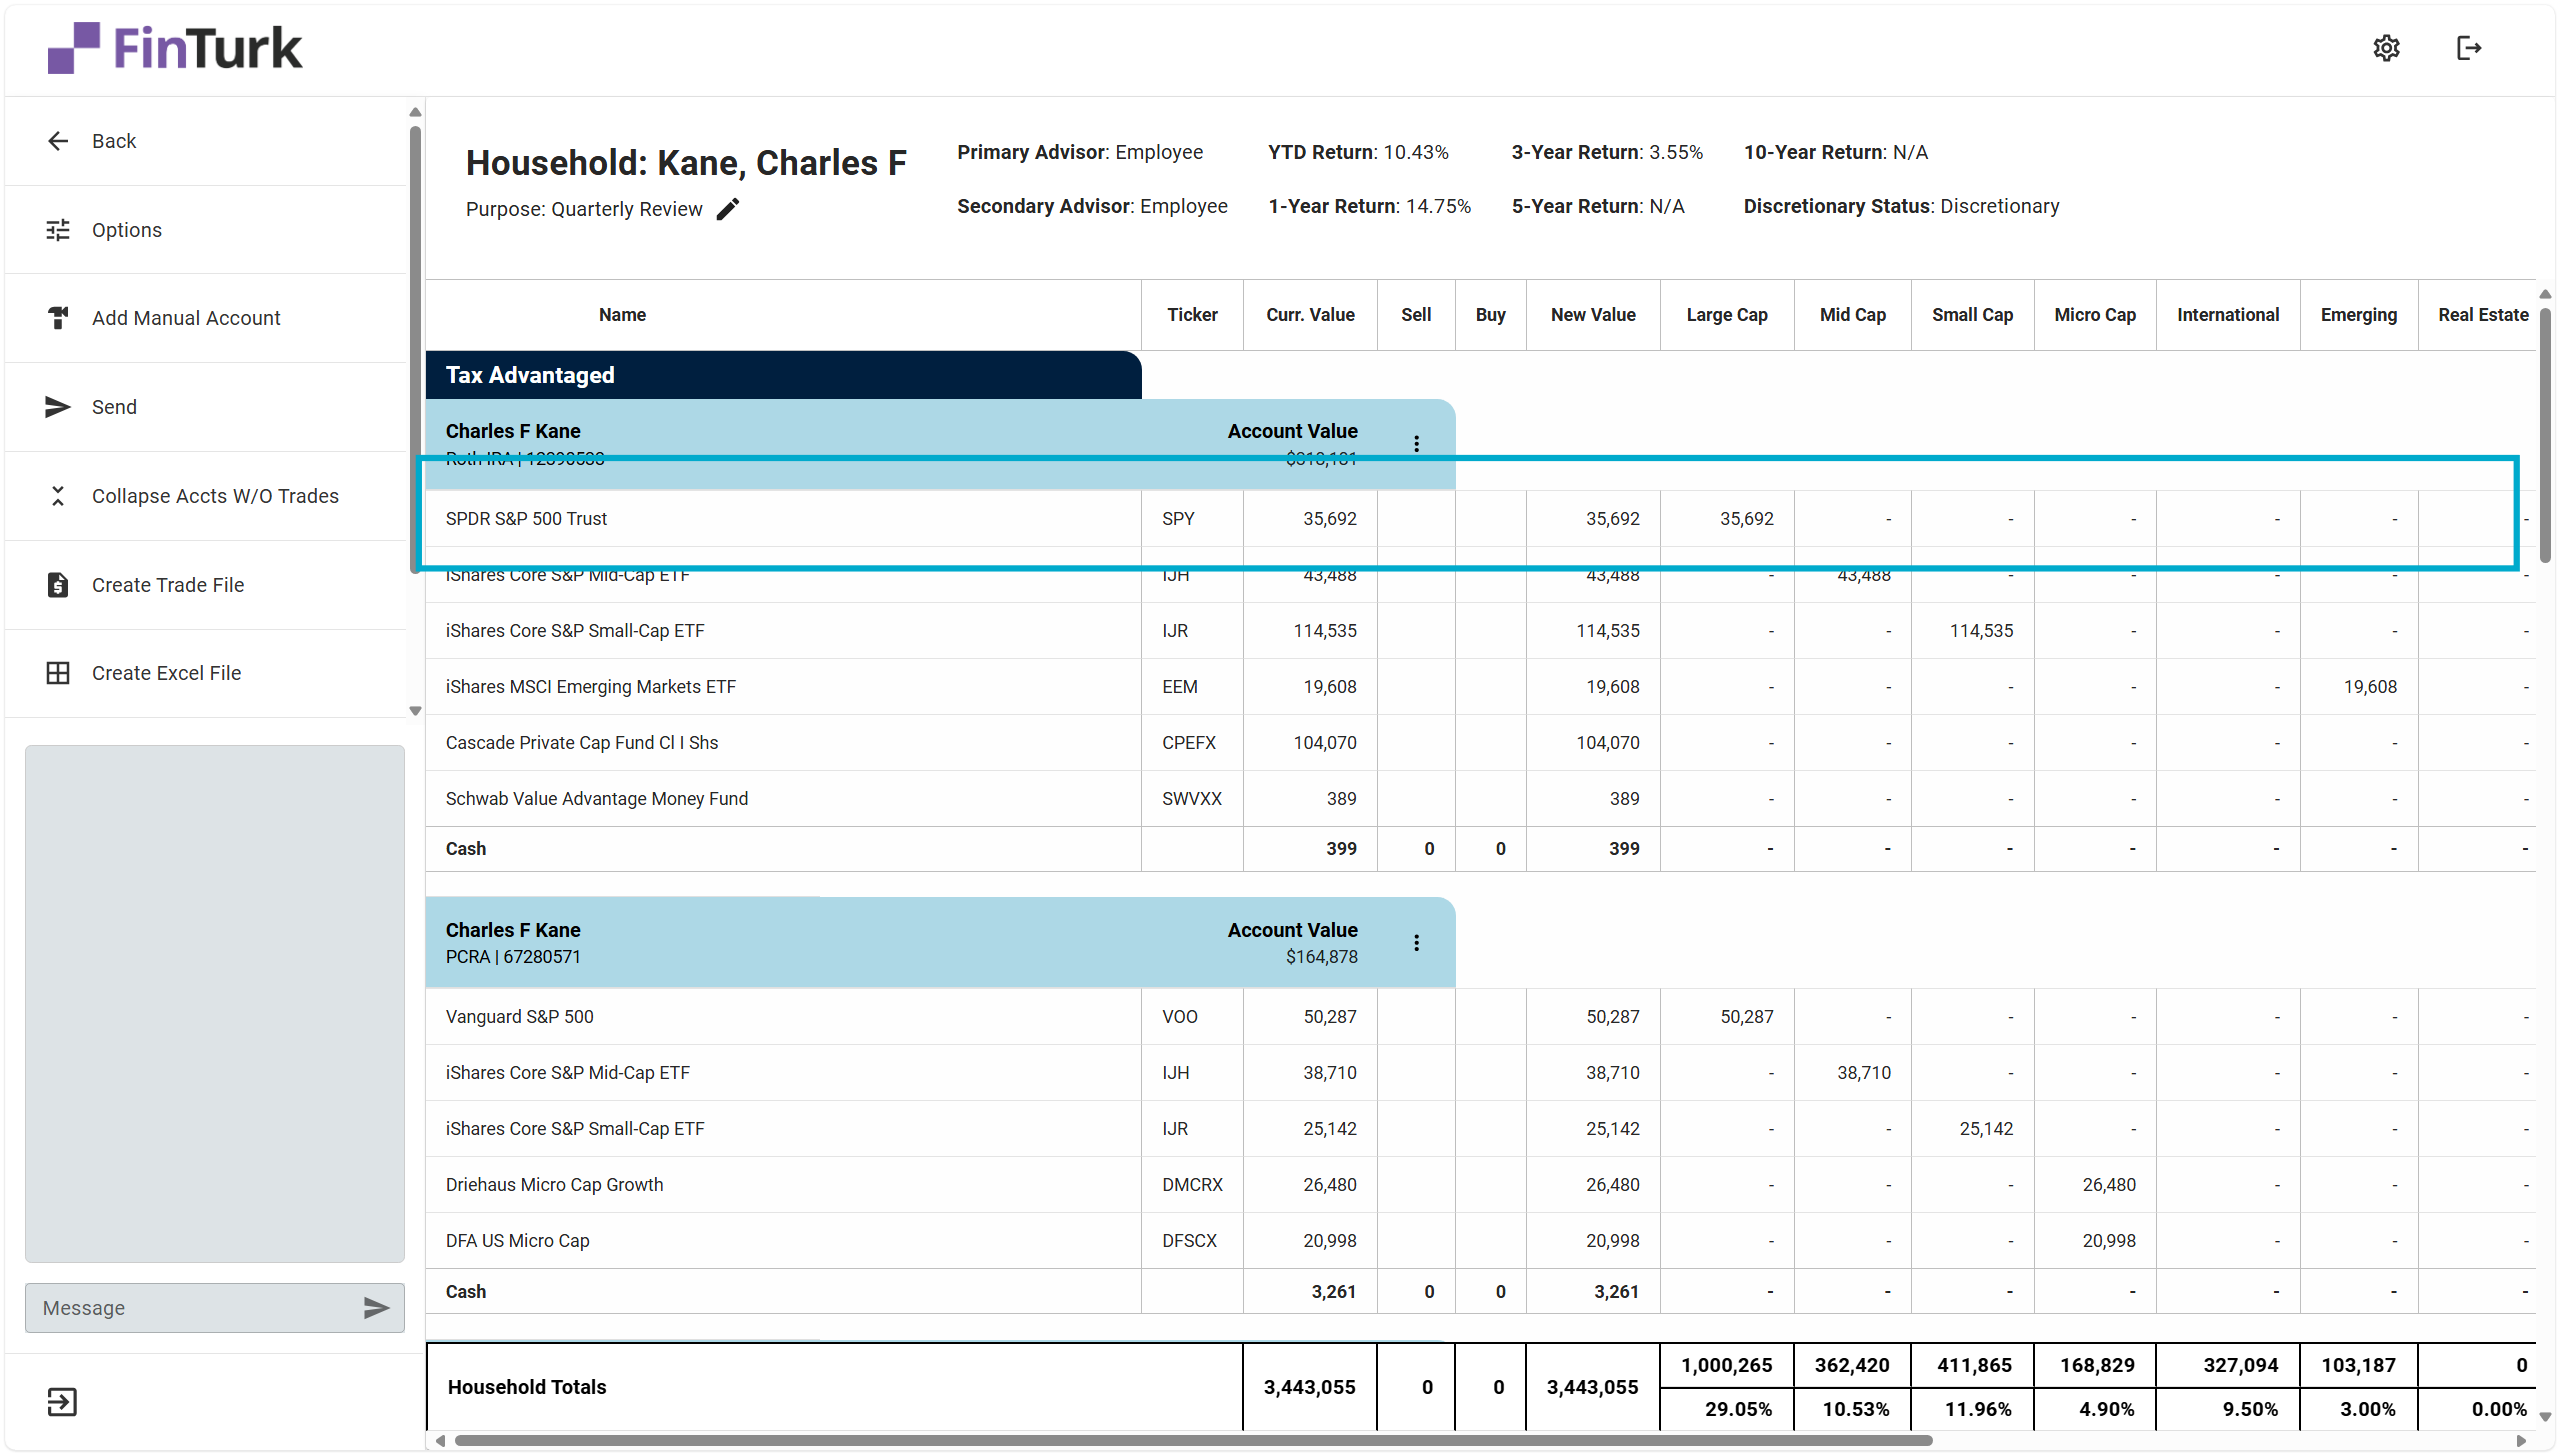

Below is a list of actions you can take:
- Buy: Purchase more of the security. Opens up the “Buy” dialogue with the ticker symbol prepopulated.
- Sell: Sell a specified amount of the security. Opens up the “Sell” dialogue with the ticker symbol prepopulated.
- Sell All: Sells 100% of the security.
- Sell & Replace: Sell a specified amount of the security and uses the proceeds generated from the sale to purchase a specific amount of a replacement security. Can be specified in either percentages or dollars.
- Clear Trade: Clears any trade currently modeled on this asset.
- Position Info: Opens up the “Position Info” window with information (cost basis, yield, etc.) relating to this security.
- More: Opens a dropdown with additional actions you can take on the asset.
The “More” action reveals a couple of less frequently-used actions you can take on an asset.
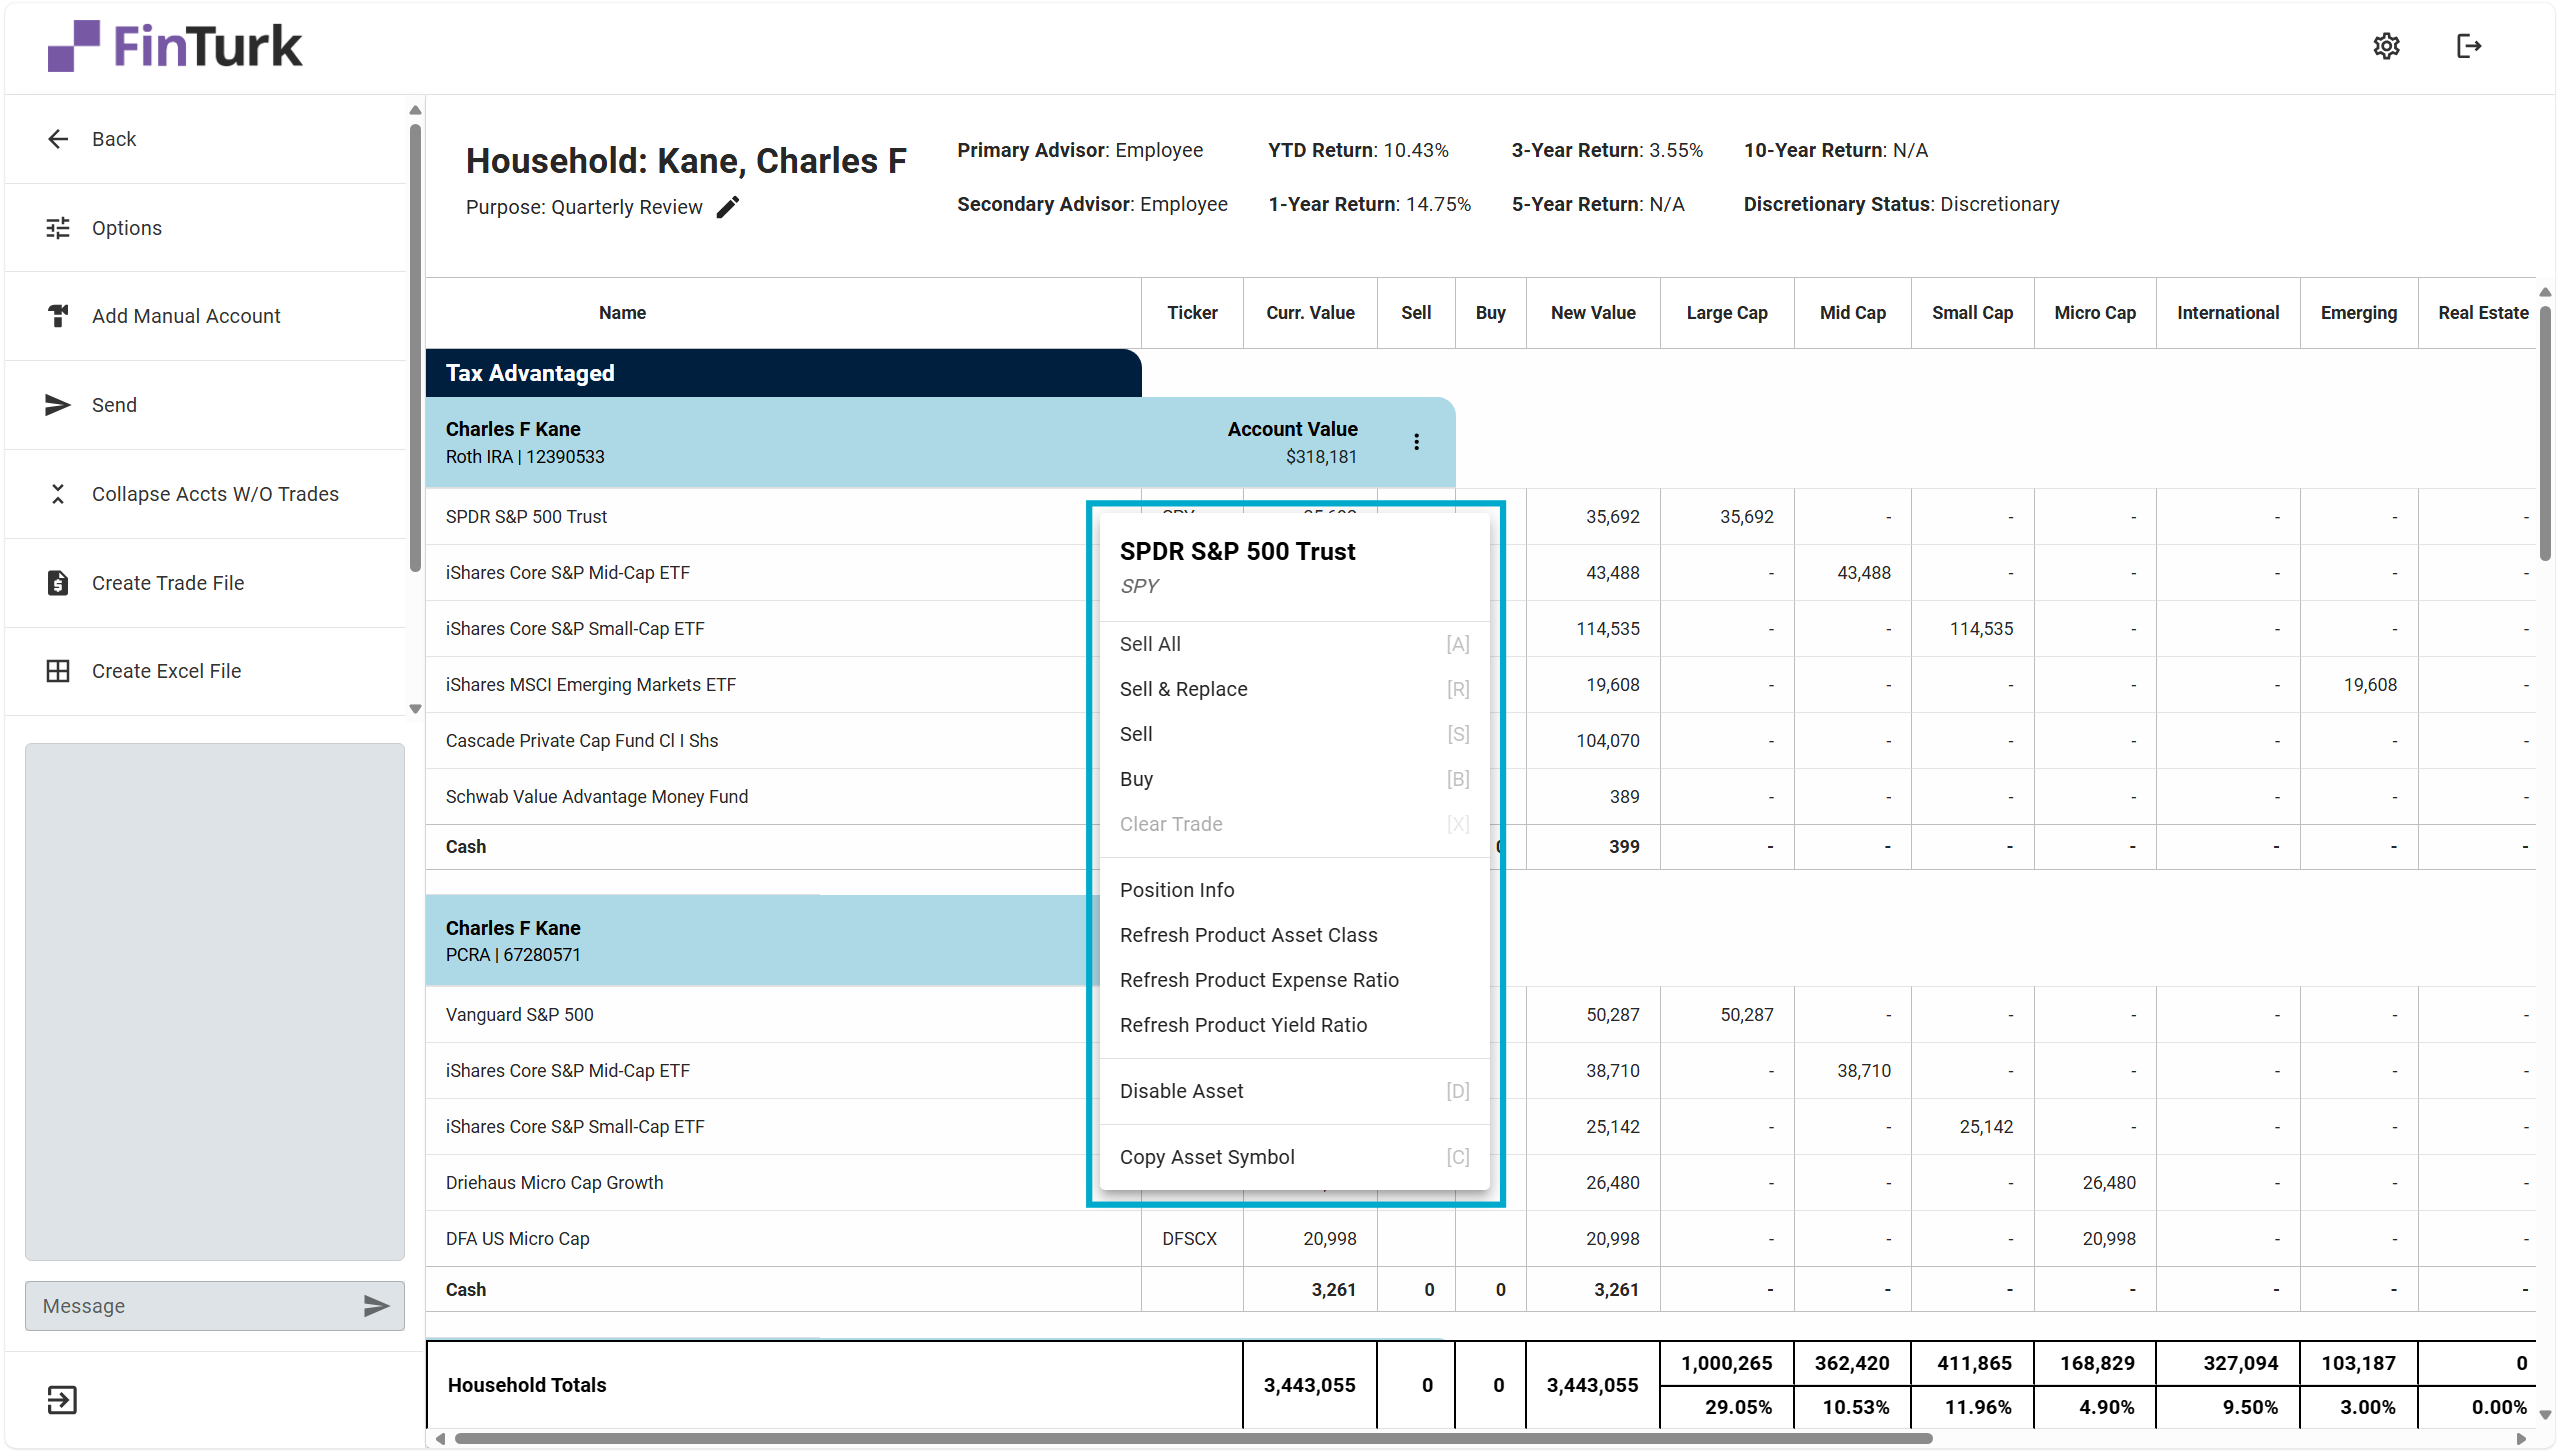
- Refresh Product Asset Class: Pulls in the most recent data about the security’s asset class. Use this if the asset class the security has been assigned to changes.
- Refresh Product Expense Ratio: Pulls in the most recent data about the security’s expense ratio.
- Refresh Product Yield Ratio: Pulls in the most recent data about the security’s yield.
- Disable Asset: Prevents users from taking any actions on this security. This is useful if a client has specifically requested that no action is taken on a security.
- Copy Asset Symbol: Copies the asset’s ticker symbol to your clipboard so you can paste it somewhere else.
You can also open the “More” dropdown on an asset by right-clicking anywhere on the asset.
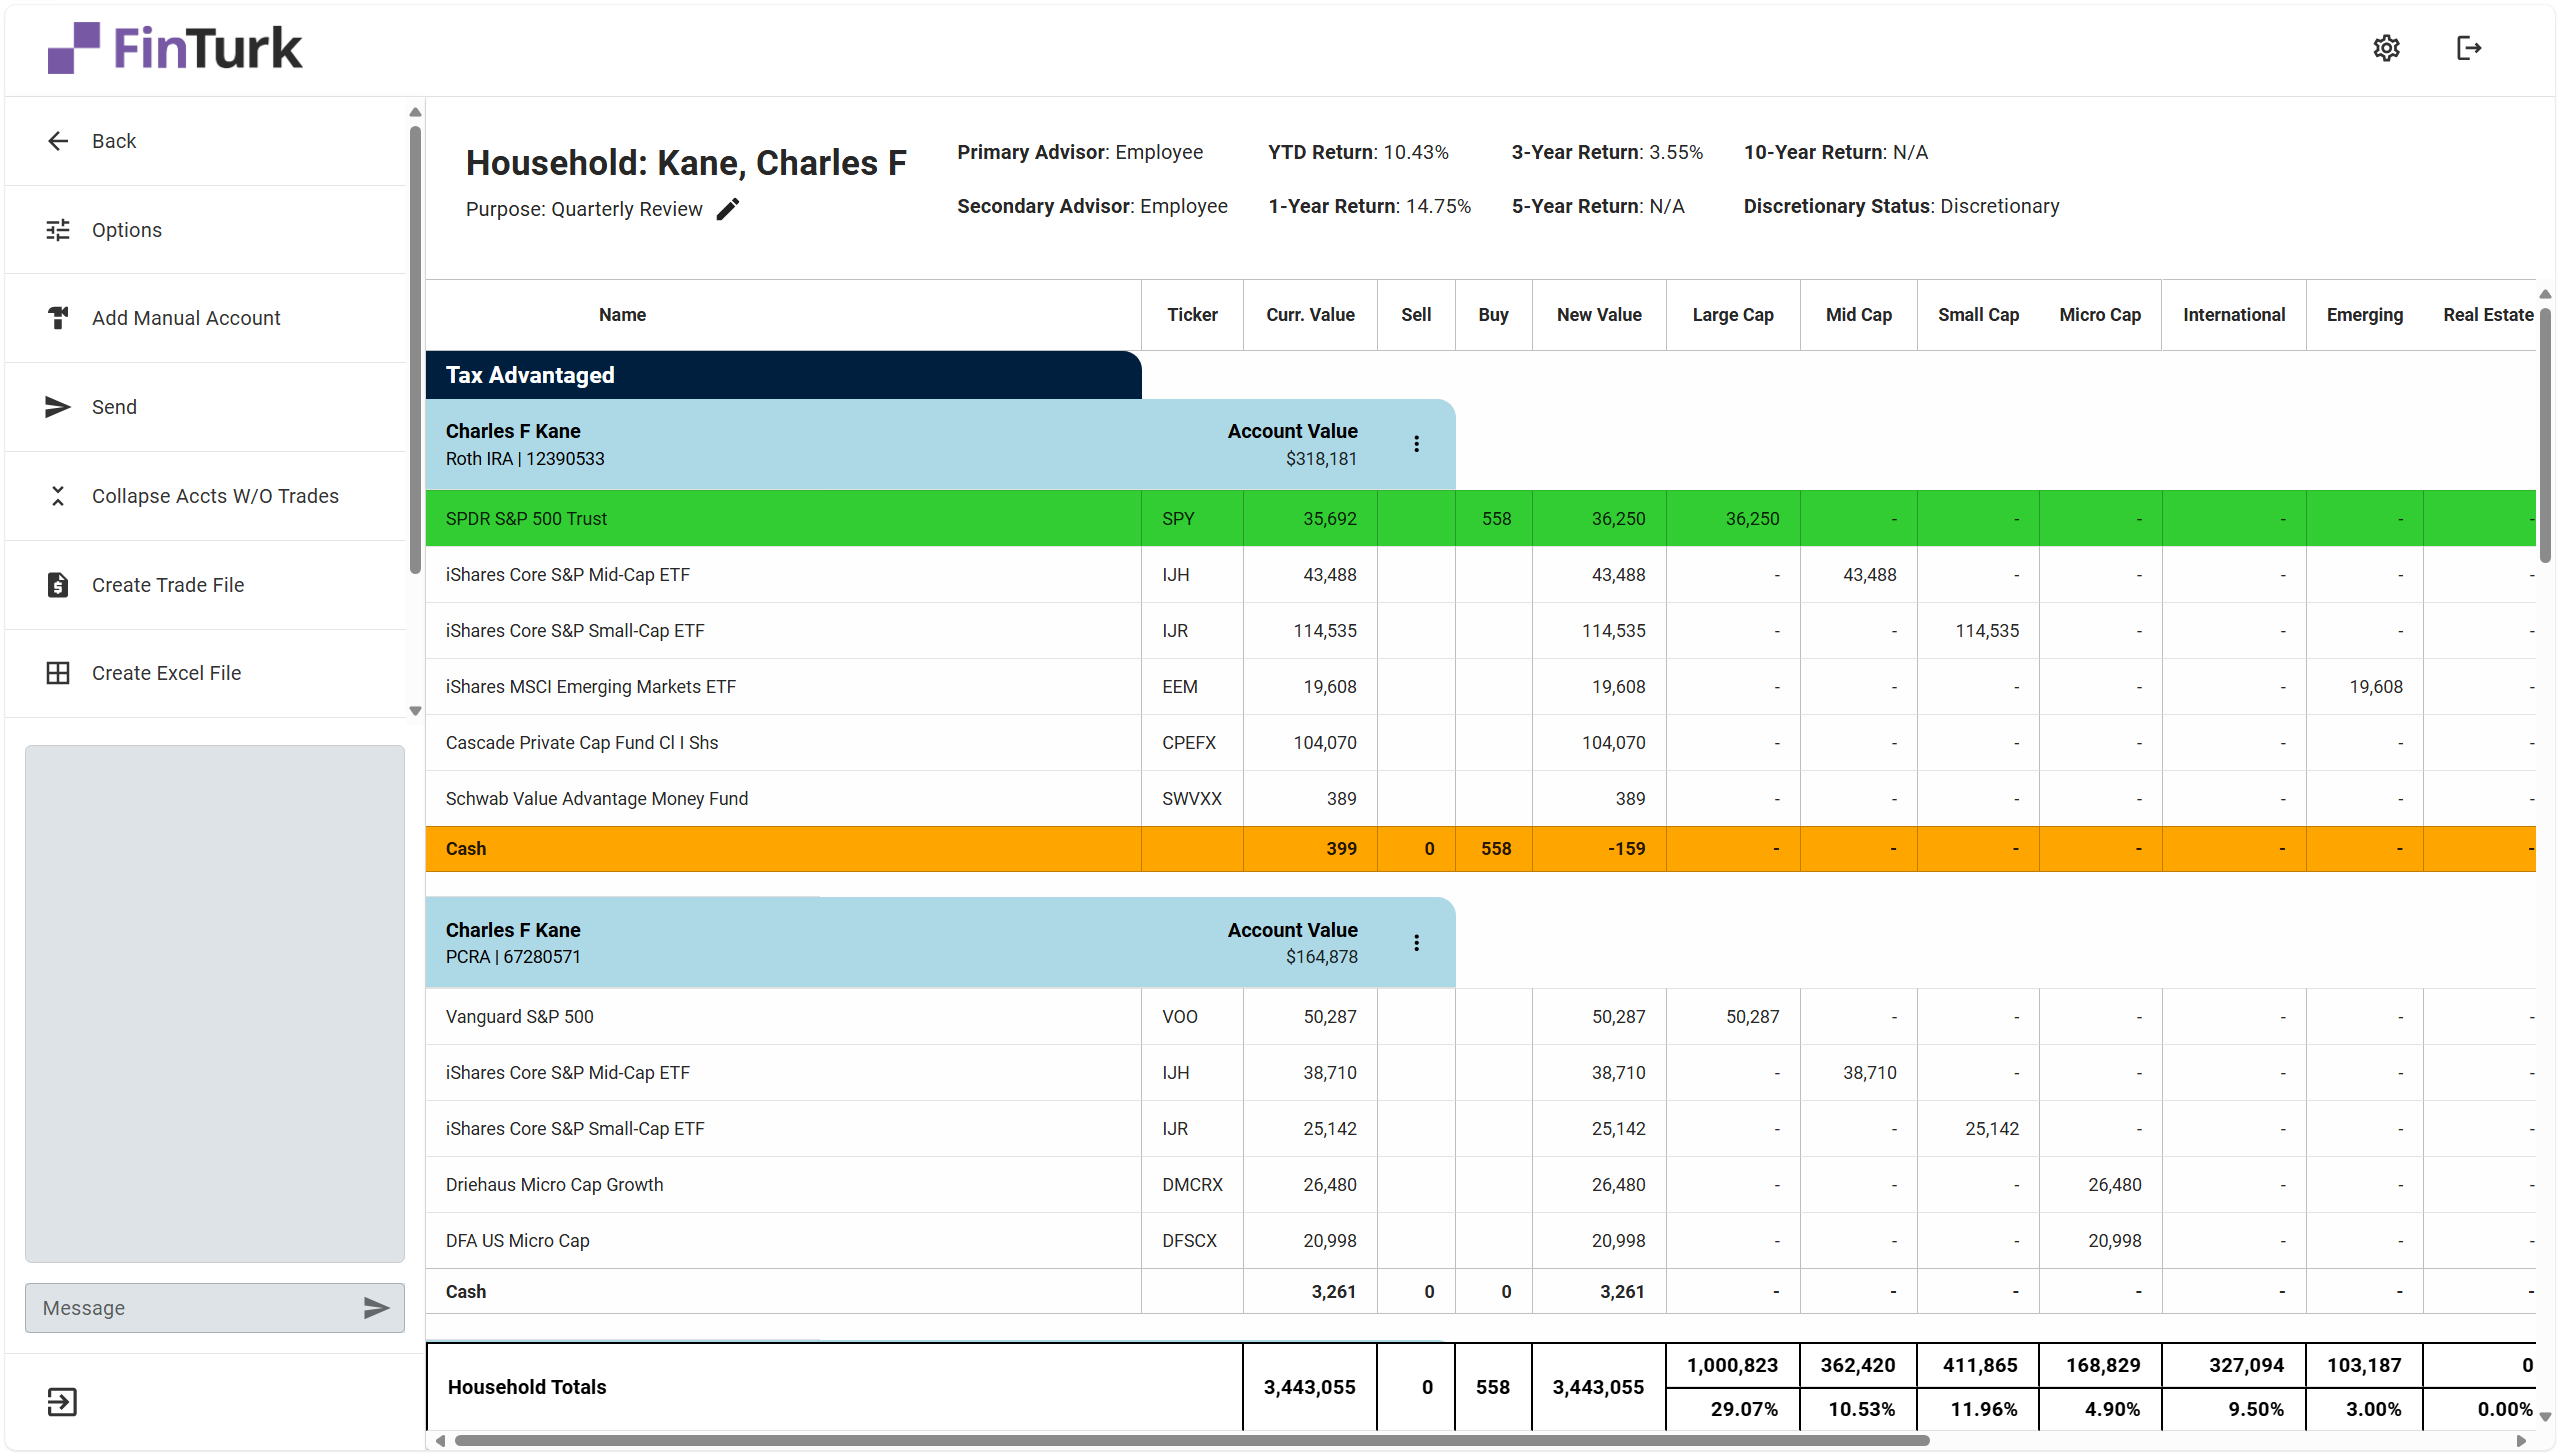
If you model a transaction on an asset, you can see the transaction modeled under either the “Buy” column or the “Sell” column. Asset purchases are show up in green, while asset sell orders show in orange. When a transaction is modeled on an asset, the “New Value” column will also update.
Household Totals & Targets
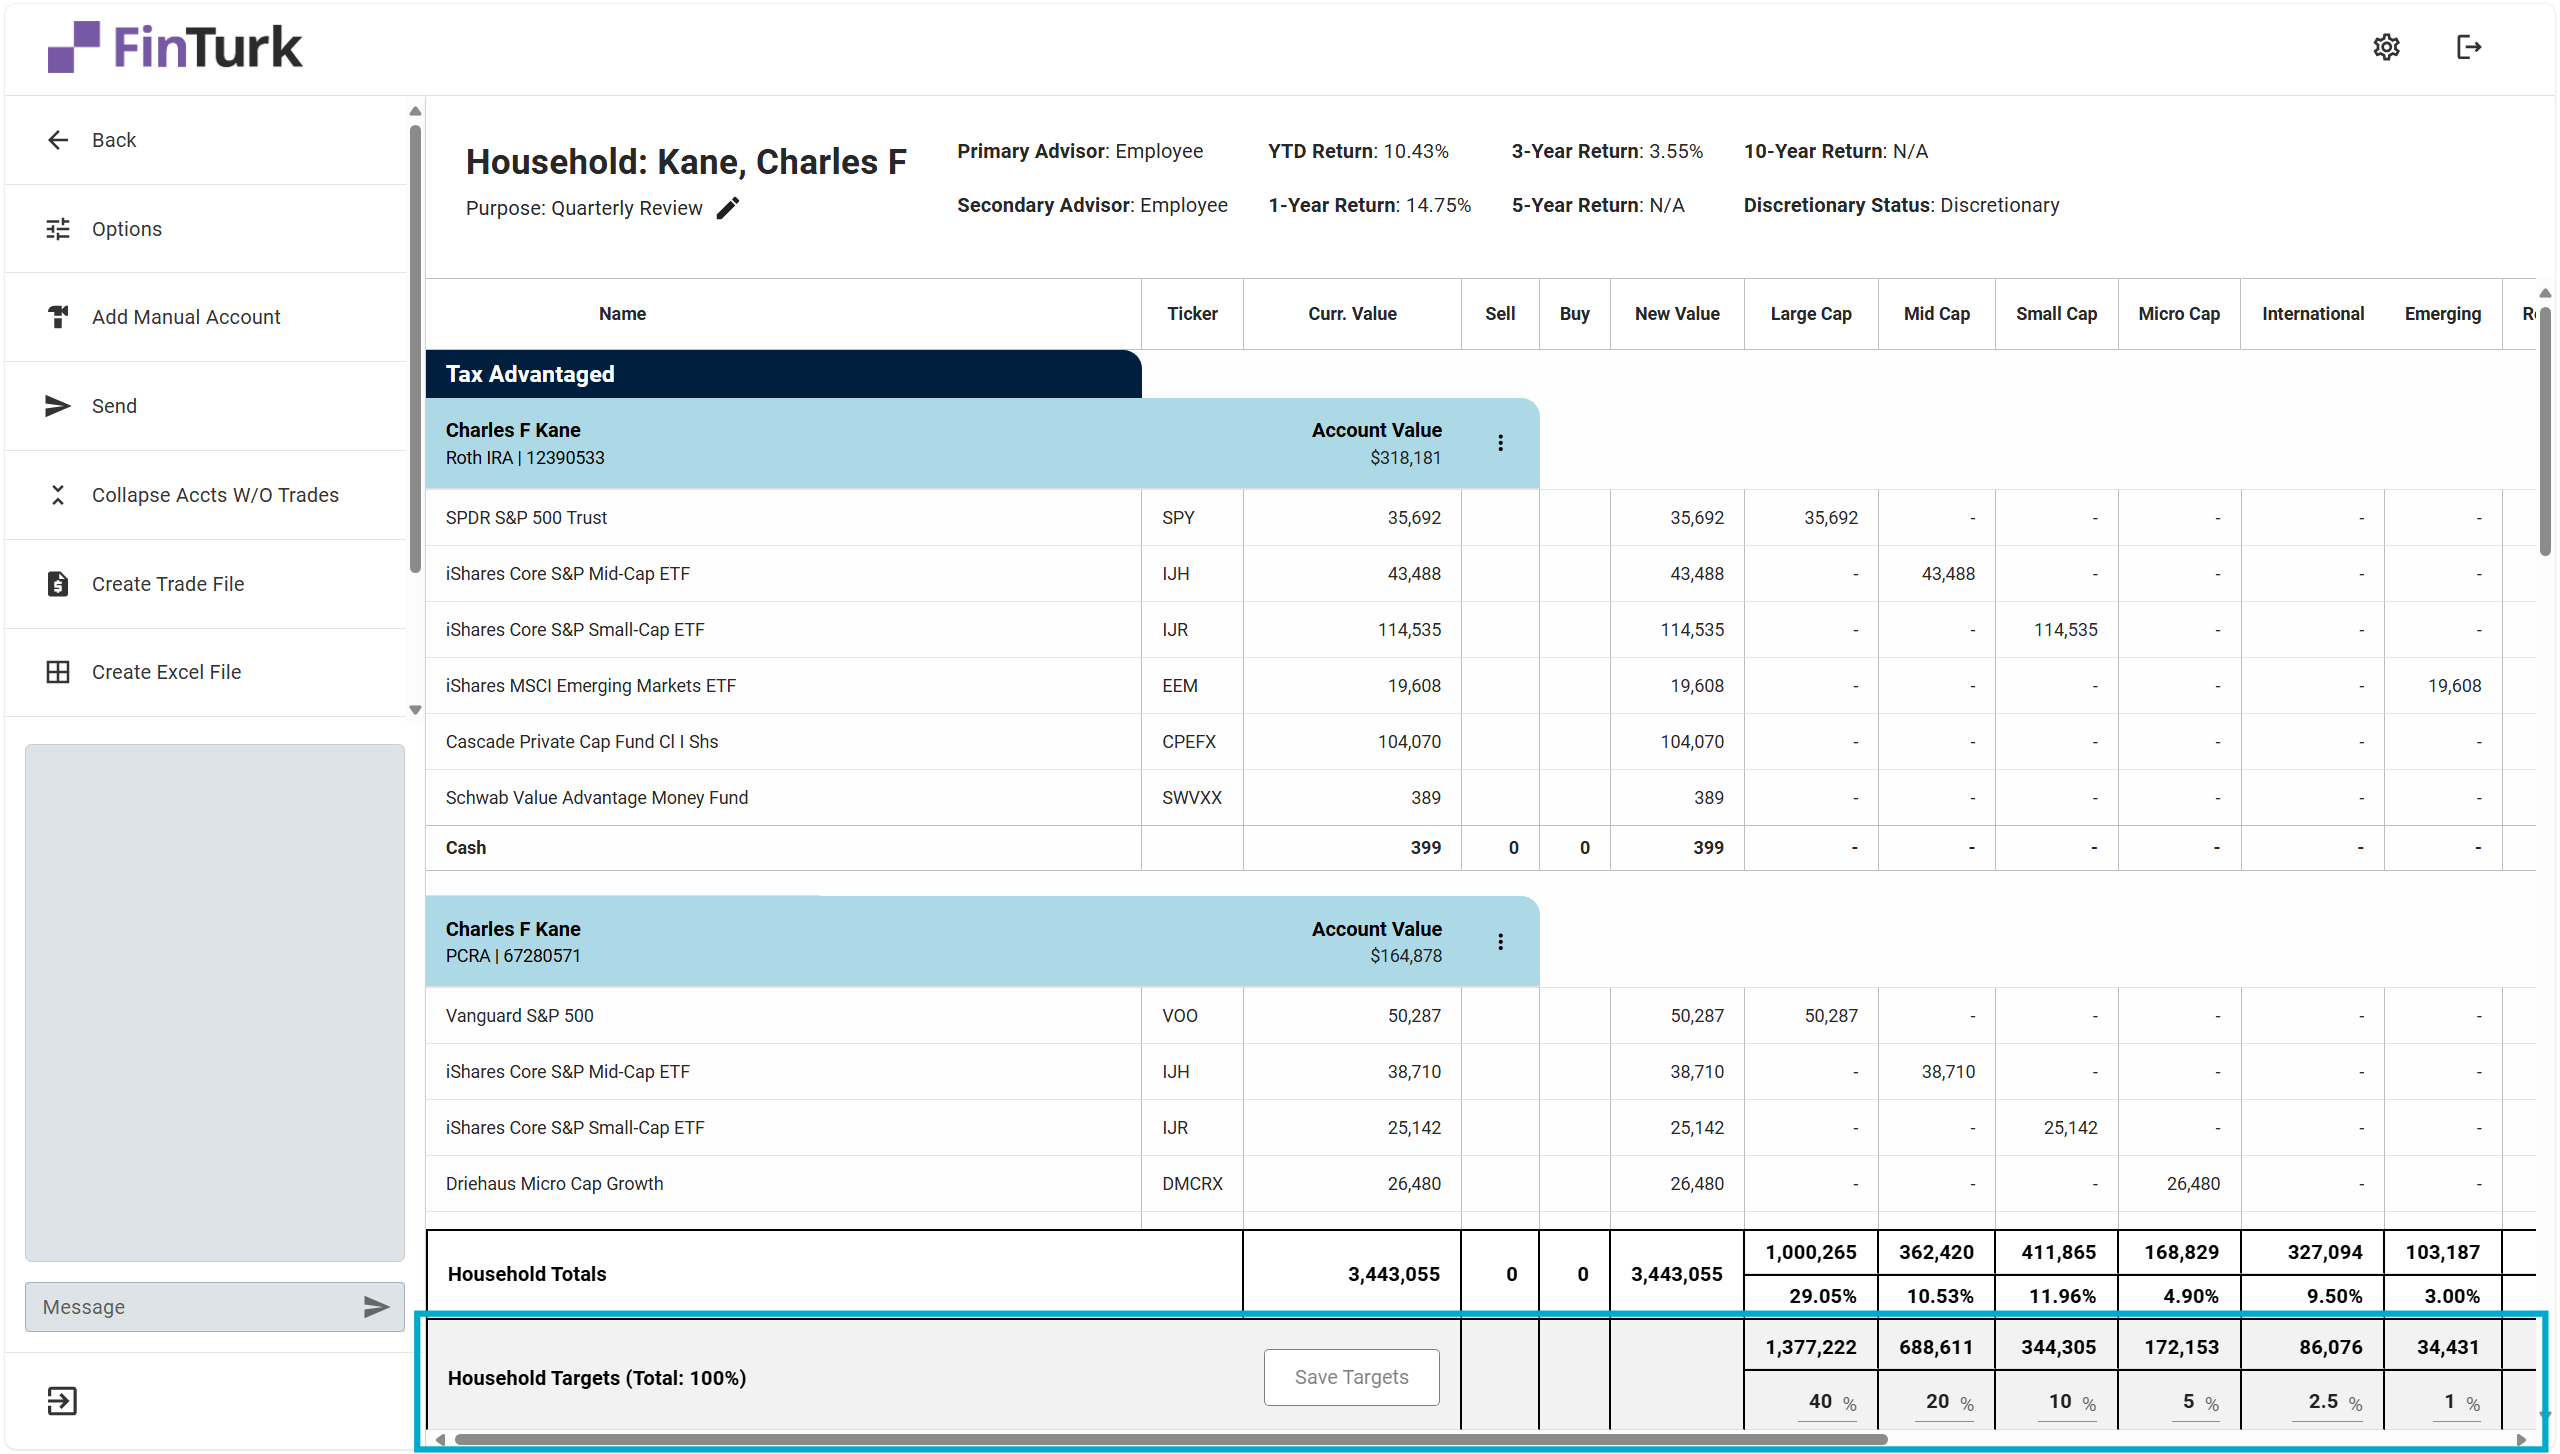
Here, you can see the asset class targets you’ve set for your client’s household. To adjust the targets, simply type in the new target you would like to set and click the “Save Targets” button.
Great! You’re an expert at the Allocation tool now. A few final pieces to round out your knowledge and you’re good to go.
The Global Actions Bar
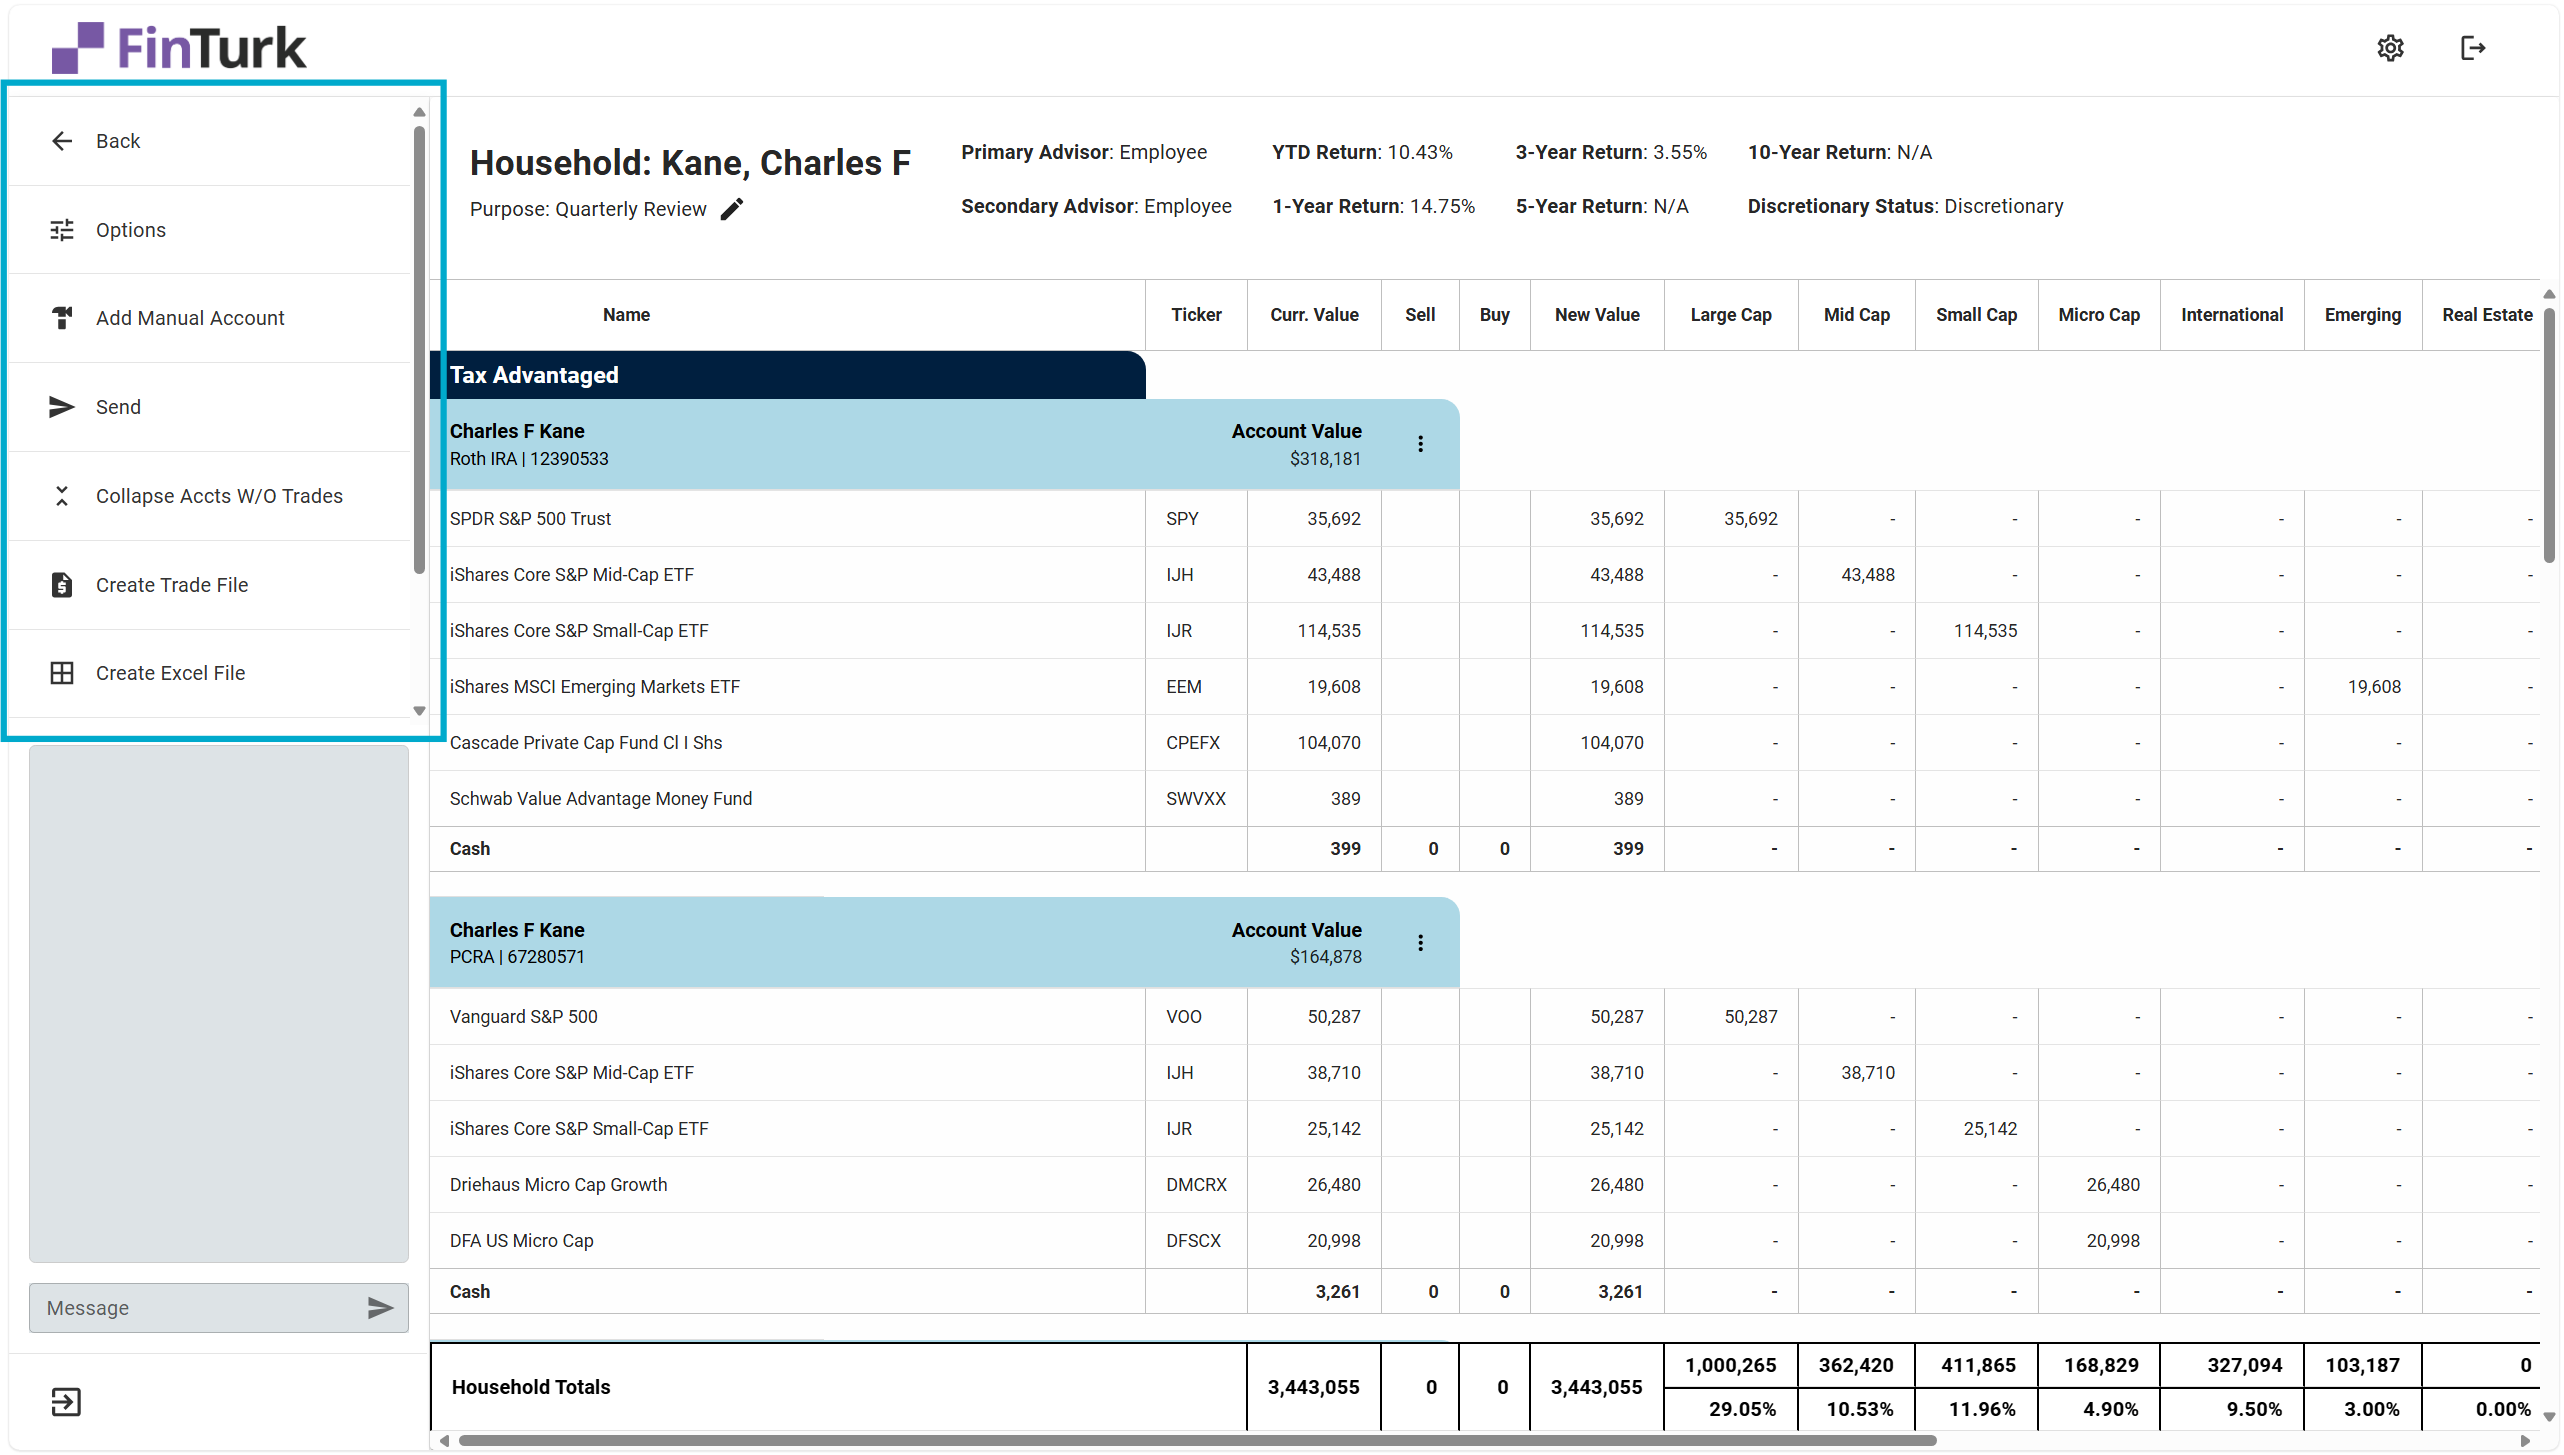
- Back: Takes you back to the Allocations Dashboard.
- Options: Brings up a window allowing you to show additional information about a client’s individual positions, including yield, gain/loss, expense ratios, and more.
- Add Manual Account: Adds a blank account you can use to add securities that are not pulling from your primary data source. For more information about adding manual accounts, you can check out the documentation on Adding Manual Accounts.
- Send: Allows you to send the Allocation to a different status. When you’re sending an Allocation, you can add notes and assign a different member of your team to handle the Allocation, or you can leave it blank to keep it assigned to yourself.
- Collapse Accounts Without Trades: If you are placing trades in a client portfolio with many accounts, you can collapse accounts without trades to keep your focus on only the accounts you are working on.
- Create Trade File: Creates a trade file ready for upload at your client’s custodian. For more information on executing trades in client accounts, check out our Executing Trades documentation.
- Create Excel File: Generates a Microsoft Excel (.xlsx) file and downloads it to your computer. It can be helpful to send an Excel file to a client for approval for trade or to review during a meeting with your client.
- Clear All Trades: Clears all the trades on the Allocation.
- Settings: Navigates you to the Settings page. For more information on the different settings and customization options in FinTurk, check out our Settings documentation.
Messaging on an Allocation
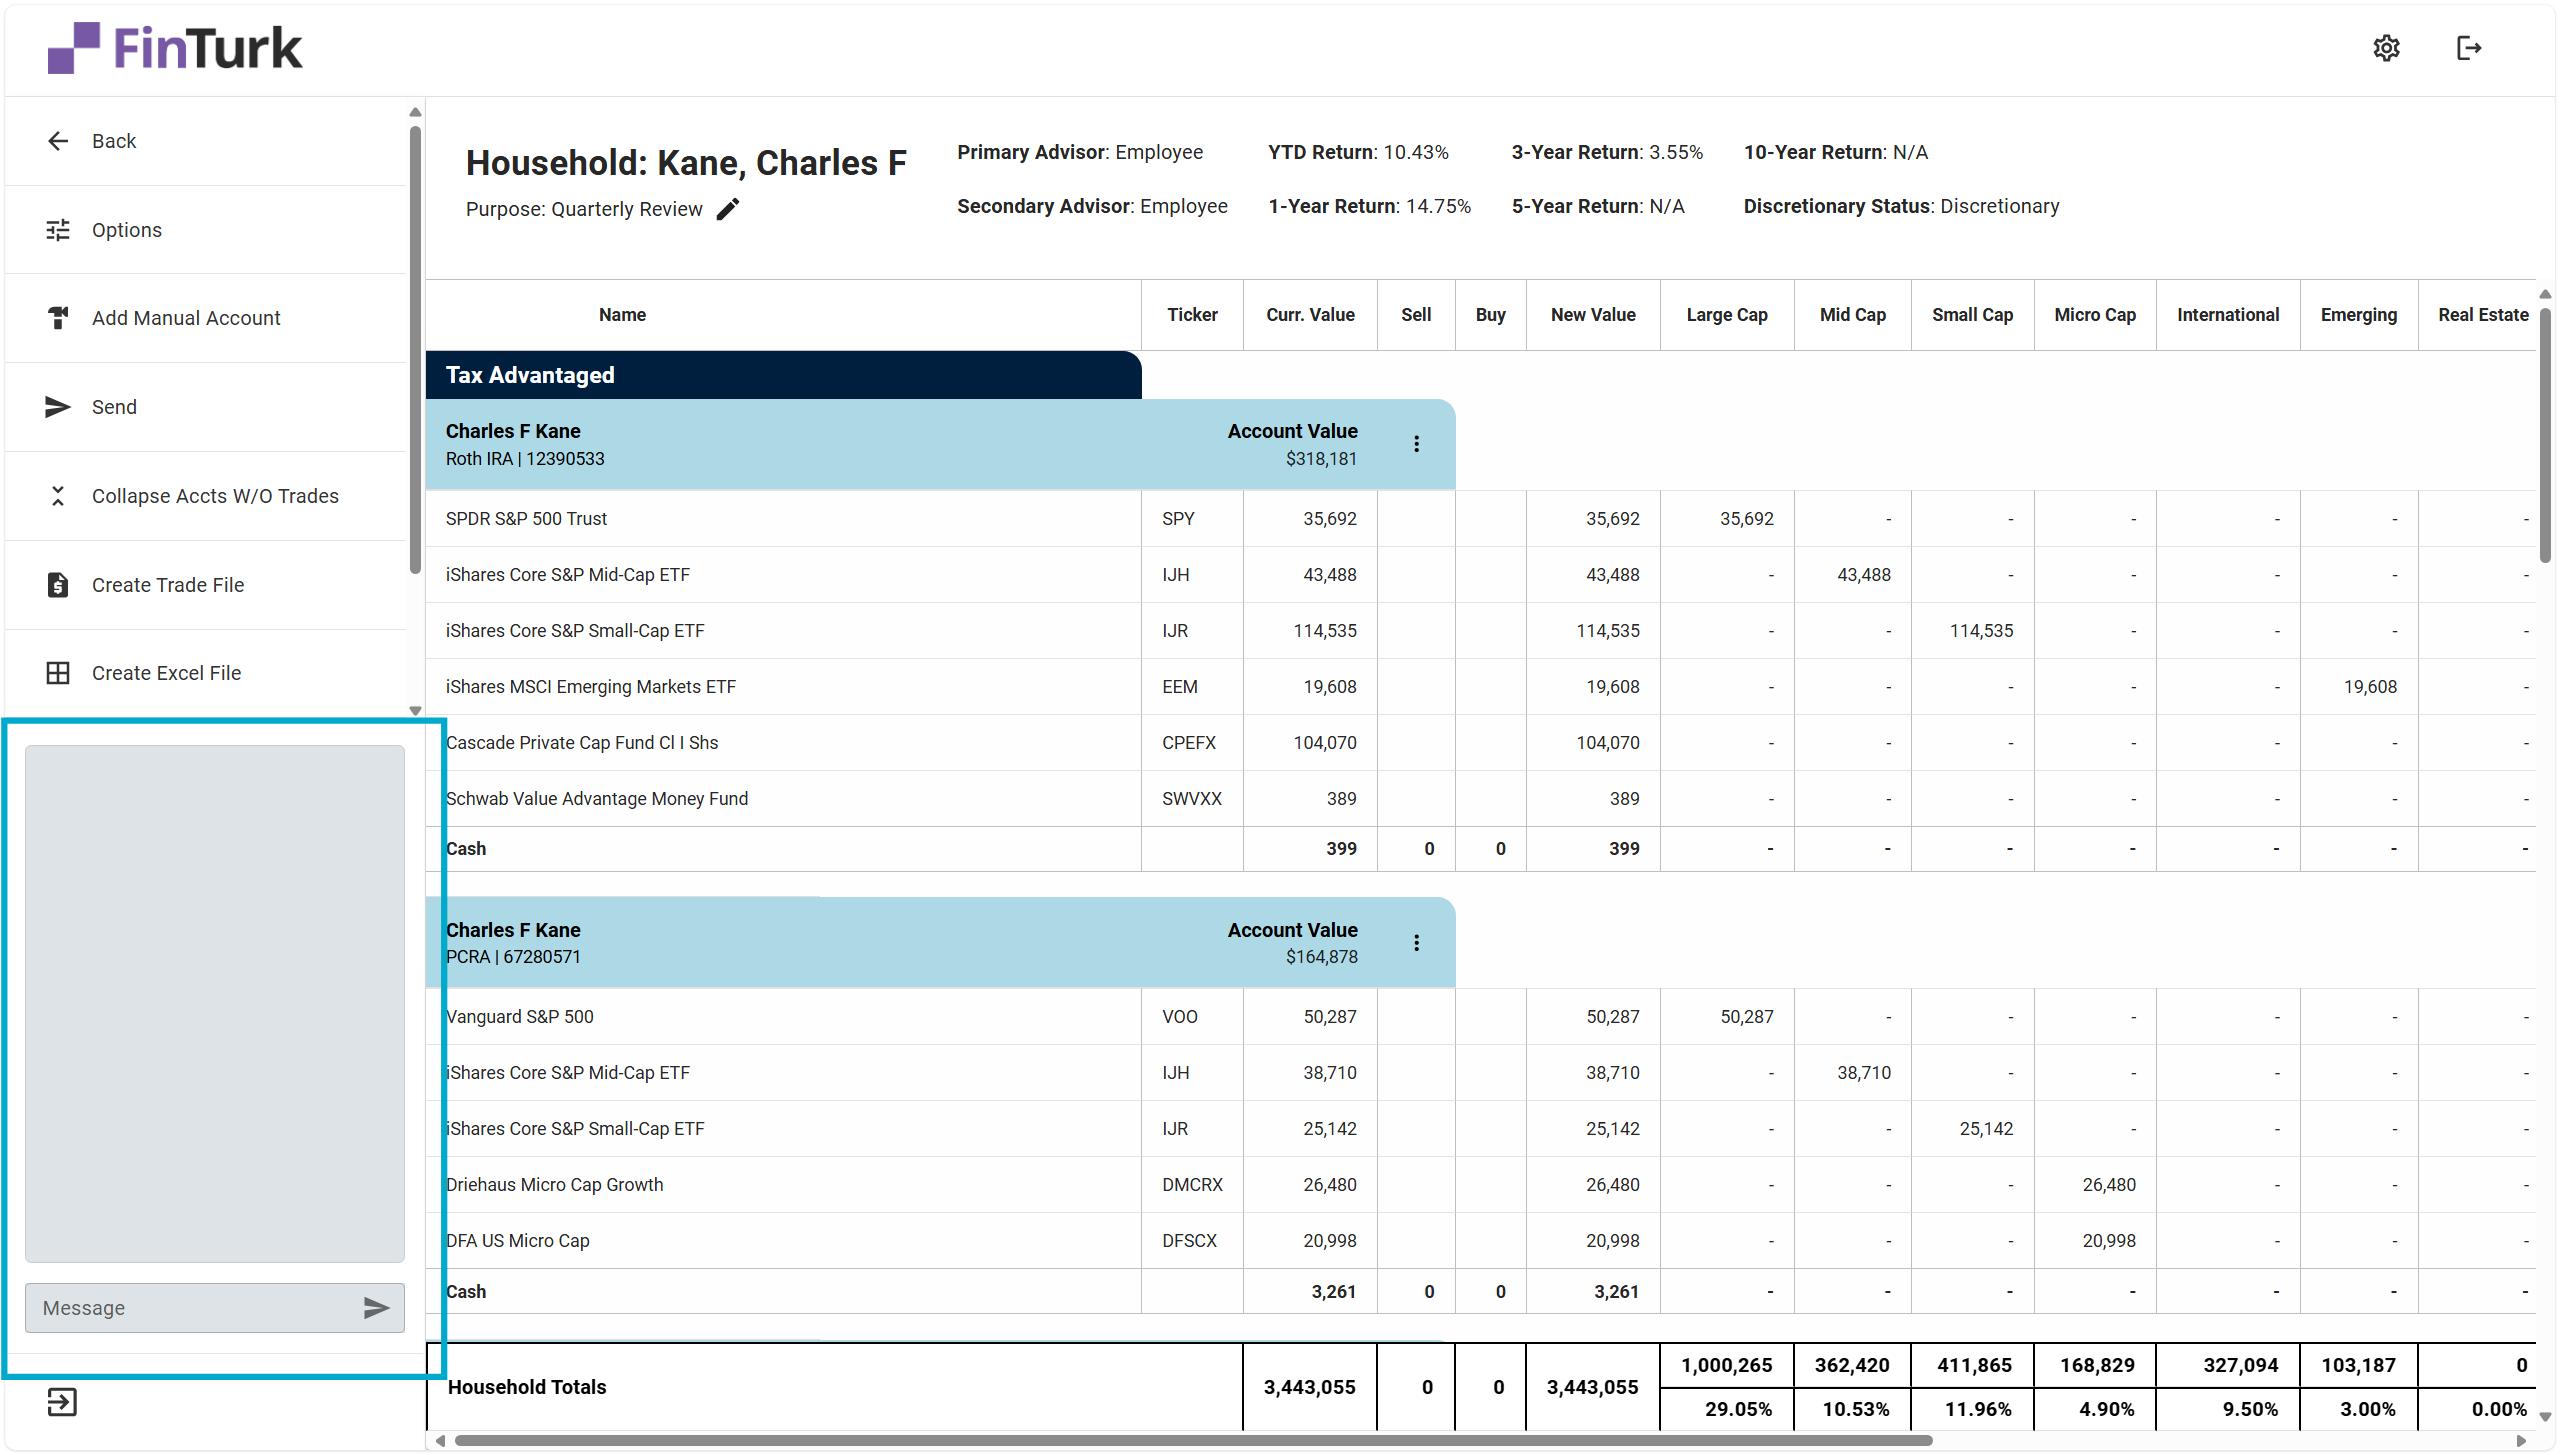
Messages posted on an Allocation are unique to the individual Allocation.
And that’s it! If you’ve made it this far, great work. Next up is mastering the trading functions on FinTurk. Check our Trading Overview documentation.